Exploring The World Of Nintendo 3DS Homebrew

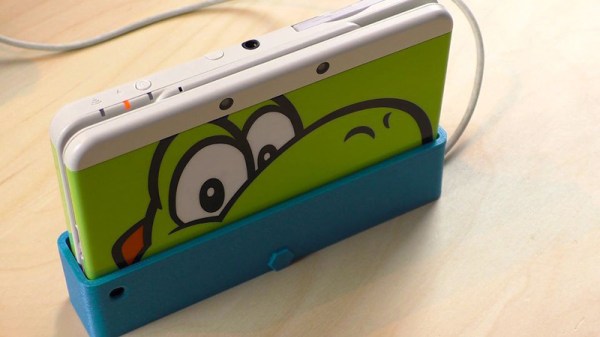
When Nintendo officially ended production of the 3DS in September 2020, it wasn’t exactly a surprise. For one thing, some variation of the handheld system had been on the market since 2011. Which is not to say the product line had become stagnant: the system received a considerable mid-generation refresh, and there was even a more affordable variant introduced that dropped the eponymous stereoscopic 3D effect, but nearly a decade is still a fairly long life in the gaming industry. Of course Nintendo’s focus on the Switch, a hybrid device that blurs the line between console and handheld games, undoubtedly played a part in the decision to retire what could effectively be seen as a competing product.

While putting the 3DS out to pasture might have been the logical business move, a quick check on eBay seems to tell a different story. Whether it’s COVID keeping people indoors and increasing the demand for at-home entertainment, or the incredible library of classic and modern games the system has access to, the fact is that a used 3DS in good condition is worth more today than it was when it was brand new on the shelf this time last year.

I’ve certainly made more expensive mistakes.

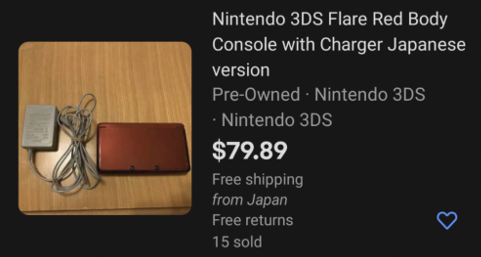
In short, this was the worst possible time for me to decide that I finally wanted to buy a 3DS. Then one day I noticed the average price for a Japanese model was far lower than that of its American counterpart. I knew the hardware was identical, but could the firmware be changed?

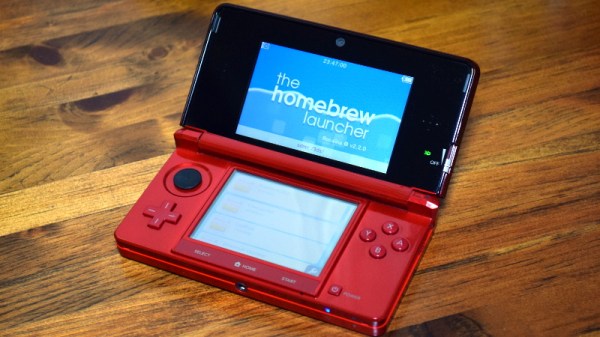
An evening’s worth of research told me the swap was indeed possible, but inadvisable due to the difficulty and potential for unexpected behavior. Of course, that’s never stopped me before.

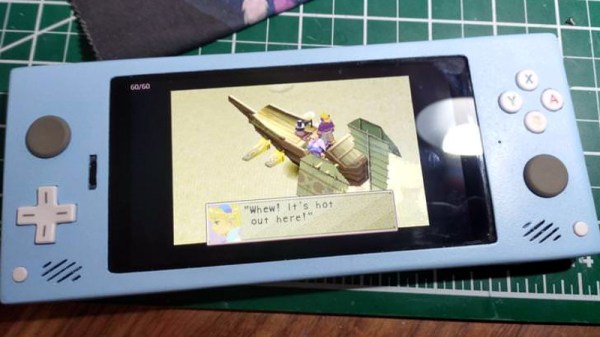
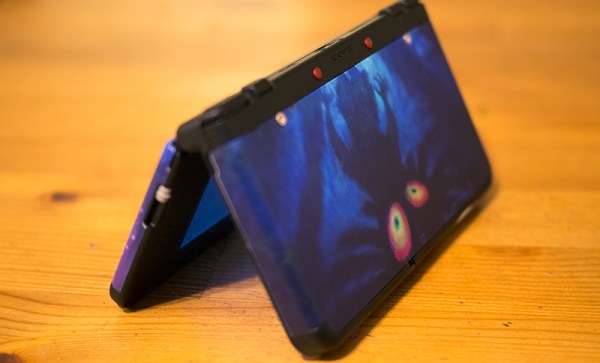
So after waiting the better part of a month for my mint condition 3DS to arrive from the land of the rising sun, I set out to explore the wide and wonderful world of Nintendo 3DS hacking.

Continue reading “Exploring The World Of Nintendo 3DS Homebrew”

3D Print That Charging Dock For Your 3DS

The Switch is the new hotness and everyone wants Nintendo’s new portable gaming rig nestled in a dock next to their TV, but what about Nintendo’s other portable gaming system? Yes, the New Nintendo 3DS can get a charging dock, and you can 3D print it with swappable plates that make it look like something straight out of the Nintendo store.

[Hobby Hoarder] created this charging dock for the New Nintendo 3DS as a 3D printing project, with the goal of having everything printable without supports, and able to be constructed without any special tools. Printing a box is easy enough, but the real trick is how to charge the 3DS without any special tools. For this, [Hobby Hoarder] turned to the small charging contacts on the side of the console. All you do is apply power and ground to these contacts, and the 3DS charges.

Normally, adding contacts requires pogo pins or hilariously expensive connectors, but [Hobby Hoarder] has an interesting solution: just add some metal contacts constructed from LED leads or paper clips, and mount it on a spring-loaded slider. A regular ‘ol USB cable is scavenged, the wires stripped, and the red and black lines are attached to the spring-loaded slider.

There is a slight issue with the charging voltage in this setup; the 3DS charges at 4.6 Volts, and USB provides 5 Volts. If you want to keep everything within exacting specs, you could add an LDO linear regulator, but there might be issues with heat dissipation. You could use a buck converter, but at 0.4 Volts, you’re probably better off going with the ‘aaay yolo’ theory of engineering.

[Hobby Hoarder] produced a few great videos detailing this build, and one awesome video detailing how to print multicolored faceplates for this charging dock. It’s an excellent project, and a great example of what can be done with 3D printing and simple tools.

Continue reading “3D Print That Charging Dock For Your 3DS”

Gaming System Built With Kite, The DIY Android Kit

As a gamer, [Lexie Dostal] dreamed of a smartphone that was a viable gaming platform: something with enough power to run the games and emulators he was interested in, with the controls to make playing them feel natural. So when he got his hands on an early version of Kite, the modular open hardware platform designed to be hacked and customized, that’s exactly what he decided to build. The Kite kit would provide the touch screen and Android-equipped motherboard, he just needed to design a case and integrate controls to make it a real gaming device.

The case design [Lexie] came up with is inspired by the bottom half of the Nintendo 3DS, and ended up only a few centimeters wider than the stock case from the Kite kit. Unfortunately, his delta 3D printer wasn’t large enough to fit the device’s case, so he ended up having to break it into five separate pieces and glue them together. With the case in one piece he worked his way from 220 to 400 grit sand paper, filling any voids in the print with glue as he went. A few coats of primer, more sanding, and a final matte texture spray give the final case a very professional-looking finish.

Not only was the Nintendo 3DS an inspiration for the device, it was also a donor for some of the parts. The directional pad, analog “nub”, and buttons are replacement 3DS hardware, which is interfaced to the KiteBoard with an Arduino Nano. When he couldn’t find springs small enough to use for the shoulder buttons, he bought some thin music wire and wound them himself. Talk about attention to detail.

There’s quite a bit of gear packed into the case, but [Lexie] thinks there’s probably still room to make some improvements. He could free up some room by dropping the connectors and soldering everything directly, and says he’d like to come up with a custom PCB to better interface with the 3DS’s hardware to cut down on some of the wiring required. With the extra room he thinks the battery, currently a 3200 mAh pack designed for the LG V20 smartphone, could probably be replaced with something even bigger.

Readers may recall that the Kite is currently in the running for the 2018 Hackaday prize. Seeing Kite already delivering on the promise of making it easier to develop powerful Android devices is very exciting, and we can’t wait to see what else hackers will be able to do with it.

Creating New Nintendo 3DS Hardware

For the last five years or so, Nintendo has been selling the 3DS, the latest in a long line of handheld consoles. Around two years ago, Nintendo announced the New Nintendo 3DS, with a faster processor and a few other refinements. The new 3DS comes in two sizes: normal and XL. You can buy the XL version anywhere in the world, but Nintendo fans in North America cannot buy the normal version.

[Stephen] didn’t want the jumbo-sized New 3DS XL, both because it’s too large for his pockets, and because there are no fancy cases for the XL. His solution? Creating a US non-XL 3DS with god-like soldering skills.

In manufacturing the XL and non-XL versions of the 3DS, Nintendo didn’t change much on the PCBs. Sure, the enclosure is different, but electronically there are really only two changes: the eMMC storage and the Nintendo processor. 3DS are region-locked, so simply swapping out the boards from a normal 3DS to an XL 3DS wouldn’t work; [Stephen] would also like to play US games on his modded console. That leaves only one option: desoldering two chips from a US XL and placing them on the board from a Japanese 3DS.

With a board preheater and heat gun, [Stephen] was able to desolder the eMMC chip off both boards. Of course this meant the BGA balls were completely destroyed in the process, which means reballing the package with solder bits only 0.3mm in diameter. With the US eMMC transplanted to the Japanese board, [Stephen] ended up with an error message that suggested the processor was reading the memory. Progress, at least.

[Stephen] then moved on to the processor. This was a nightmare of a 512 pin BGA package, with 512 pins that needed a tiny dot of solder placed on them. Here, sanity gave way and [Stephen] called up a local board and assembly house. They agreed to solder the chip onto the board and do an x-ray inspection. With the professional rework done, [Stephen] assembled his new US non-XL 3DS, and everything worked. It’s the only one in the world, and given the effort required to make these mods, we’re expecting it to remain the only one for a very long time.

3DS Homebrew Channel And Custom Firmware

Nintendo has always been very wary about allowing independent and homebrew developers making games for their consoles, and the 3DS is no exception. It’s locked down, and a few 3DS and console hackers have spent years searching for a method that will easily allow anyone to run unsigned code. That day is finally here. The exploit is called NINJHAX, and it allows anyone to install the Homebrew Channel, the repository for everything awesome in the world of 3DS homebrew development.

The latest exploit relies on a bit of code in a retail game – Cubic Ninja – to run unsigned code. This game includes a level editor that allows players to share different levels by QR codes and 3DS’ camera. By carefully crafting one of these QR codes, the 3DS gains the ability to run the Homebrew Channel

If this exploit sounds familiar, you’re right. The most common way to open up a Wii for homebrew development is Smash Stack, an exploit found in Super Smash Bros. Brawl. This exploit also works by modifying custom stages, and opened the door to a wealth of homebrew development for the Wii.

In the video below, [smea] shows off his exploit by starting Cubic Ninja, going to the QR code level editor, then loading up homebrew games. A copy of the game that enables this exploit, Cubic Ninja, is required for this exploit. Last week, you could buy Cubic Ninja for a few dollars on eBay and Amazon. Today, the price has settled around $50, with a few very dumb or very eager people paying up to $300. If you already have the game, you’ll only need to get the homebrew starter kit, generate a QR code, and start installing unsigned code. All the instructions are available on [smeal]’s site.

Continue reading “3DS Homebrew Channel And Custom Firmware”