An RF Remote Is No Match For A Logic Analyser!

The Neewer NL660-2.4 Video Keylight has a handy remote control, which for [Tom Clement] has a major flaw in that it can’t restore the light to the state it had during its last power-on. He’s thus taken the trouble to reverse engineer it and create his own remote using a suitably-equipped Arduino clone.

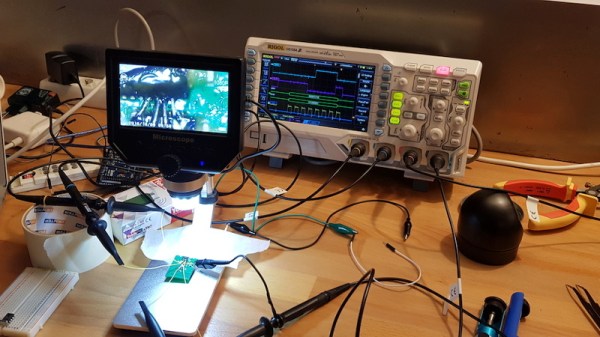
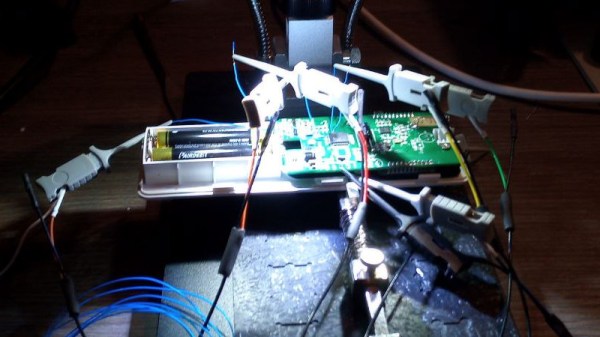
The write-up is a step through primer for the would-be RF remote hacker, identifying the brains as an STM8 and the radio as an NRF24 clone before attempting to dump the firmware of the STM8. As might be expected the STM is protected, which only leaves the option of sniffing the connection between the two chips. The SPI pins are duly probed with a logic analyser, and the codes used by Neweer are extracted. As luck would have it there is a handy board called the RF Nano which is an Arduino Nano and an NRF24 in an Arduino Nano form factor, so a proof of concept remote could be written on an all-in-one module. You can find the result as a GitHub Gist, should you be curious.

We’ve seen Tom a few times before, particularly in his European BadgeLife work, as part of which he’s put a lot of effort into bringing browser-based WebUSB and WebSerial development to his work.

Multi-Channel Battery Monitor Aces First Sea Trial

A little over a a year ago, we covered an impressive battery monitor that [Timo Birnschein] was designing for his boat. With dedicated batteries for starting the engines, cranking over the generator, and providing power to lights and other amenities, the device had to keep tabs on several banks of cells to make sure no onboard systems were dipping into the danger zone. While it was still a work in progress, it seemed things were progressing along quickly.

But we know how it is. Sometimes a project unexpectedly goes from having your full attention to winning an all-expense-paid trip to the back burner. In this case, [Timo] only recently put the necessary finishing touches on his monitor and got it installed on the boat. Recent log entries on the project’s Hackaday.io page detail some of the changes made since the last time we checked in, and describe the successful first test of the system on the water.
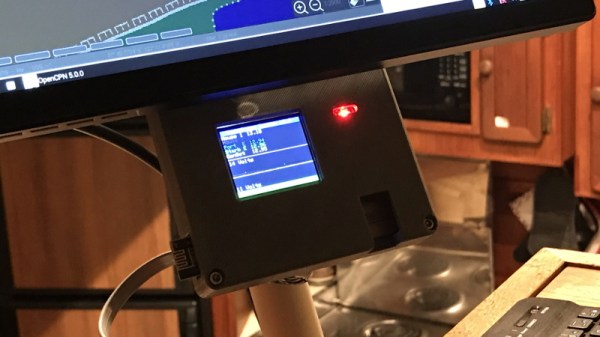
Certainly the biggest issue that was preventing [Timo] from actually using the monitor previously was the lack of an enclosure and mounting system for it. He’s now addressed those points with his 3D printer, and in the write-up provides a few tips on shipboard ergonomics when it comes to mounting a display you’ll need to see from different angles.

The printed enclosure also allowed for the addition of some niceties like an integrated 7805 voltage regulator to provide a solid 5 V to the electronics, as well as a loud piezo beeper that will alert him to problems even when he can’t see the screen.

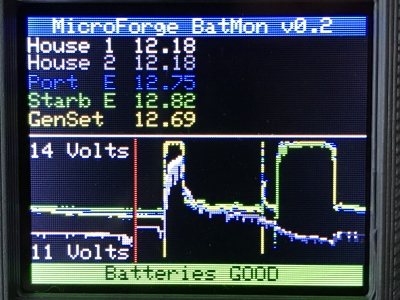
Under the hood he’s also made some notable software improvements. With the help of a newer and faster TFT display library, he’s created a more modern user interface complete with a color coded rolling graph to show voltages changes over time. There’s still a good chunk of screen real estate available, so he’s currently brainstorming other visualizations or functions to implement. The software isn’t using the onboard NRF24 radio yet, though with code space quickly running out on the Arduino Nano, there’s some concern about getting it implemented.

As we said the first time we covered this project, you don’t need to have a boat to learn a little something from the work [Timo] has put into his monitoring system. Whether you’re tracking battery voltages or temperatures reported by your BLE thermometers, a centralized dashboard that can collect and visualize that data is a handy thing to have.

Reverse Engineering Yokis Home Automation Devices

These days, it’s hard to keep track of all the companies that are trying to break into the home automation market. Whether they’re rebrands of somebody else’s product or completely new creations, it seems like every company has at least a few “smart” gadgets for you to choose from. We hadn’t heard of the Yokis devices that [Nicolas Maupu] has been working on before today, but thanks to his efforts to reverse engineer their protocol, we think they might become more popular with the hacking crowd.

Even if you don’t have a Yokis MTV500ER dimmer or MTR2000ER switch of your own, we think the detailed account of how [Nicolas] figured out how to talk to these devices is worth a read. His first step was to connect his oscilloscope directly to the SPI lines on the remote to see what it was sending out. With an idea of what he was looking for, he then used an nRF24L01+ radio connected to an ESP8266 to pull packets out of the air so he could analyze their structure. This might seem like a very specialized process, but in reality most of the techniques demonstrated could be applicable for any unknown communications protocol of which you’ve got a hex dump.

On the other hand, if you do have some of these devices (or plan to get them), then the software [Nicolas] has put together looks very compelling. Essentially it’s an interactive firmware for the ESP8266 that allows it to serve as a bridge between the proprietary Yokis wireless protocol and a standard MQTT home automation system. When the microcontroller is connected to the computer you get a basic terminal interface that allows you to scan and pair for devices as well as toggle them on and off.

This bridge could be used to allow controlling your Yokis hardware with a custom handheld remote, or you could follow the example of our very own [Mike Szczys], and pull everything together with a bit of Node-RED.

Fail Of The Week: The Arduino Walkie That Won’t Talkie

There’s something seriously wrong with the Arduino walkie-talkie that [GreatScott!] built.

The idea is simple: build a wireless intercom so a group of motor scooter riders can talk in real-time. Yes, such products exist commercially, but that’s no fun at all. With a little ingenuity and a well-stocked parts bin, such a device should be easy to build on the cheap, right?

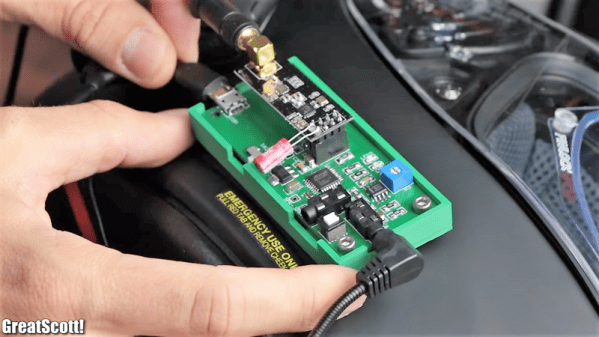
Apparently not. [GreatScott!] went with an Arduino-based design, partly due to familiarity with the microcontroller but also because it made the RF part of the project seemingly easier due to cheap and easily available nRF24 2.4 GHz audio streaming modules. Everything seems straightforward enough on the breadboard – an op-amp to boost the signal from the condenser mic, a somewhat low but presumably usable 16 kHz sampling rate for the ADC. The radio modules linked up, but the audio quality was heavily distorted.

[GreatScott!] assumed that the rat’s nest of jumpers on the breadboard was to blame, so he jumped right to a PCB build. It’s a logical step, but it seems like it might be where he went wrong, because the PCB version was even worse. We’d perhaps have isolated the issue with the breadboard circuit first; did the distortion come from the audio stage? Or perhaps did the digitization inject some distortion? Or could the distortion be coming from the RF stage? We’d want to answer a few questions like that before jumping to a final design.

We love that [GreatScott!] has no issue with posting his failures – we’ve covered his suboptimal CPU handwarmer, and his 3D-printed BLDC motor stator was a flop too. It’s always nice to post mortem these things to avoid a similar fate.

Continue reading “Fail Of The Week: The Arduino Walkie That Won’t Talkie”

DIY Six Channel Arduino RC Transmitter

It’s wasn’t so long ago that RC transmitters, at least ones worth owning, were expensive pieces of gear. Even more recently than that, the idea of an RC transmitter running an open source firmware would have been considered a pipe dream. Yet today buying cheap imported transmitters and flashing a community developed firmware (if it didn’t come with it pre-installed to begin with) is common place. It’s not much of a stretch to say we’re currently in the “Golden Age” of hobby RC transmitters.

But what if even cheap hardware running customizable software isn’t enough? What if you want to take it to the next level? In that case, [Electronoobs] has an Arduino powered RC transmitter with your name on it. But this is no scrap of protoboard with a couple of cheap joysticks on it, though he has made one of those too. The goal of this build was for it to look and perform as professional as possible while remaining within the hobbyist’s capabilities. The final product probably won’t be winning any design awards, but it’s still an impressive demonstration of what the individual hacker and maker can pull off today with the incredible technology we have access to.

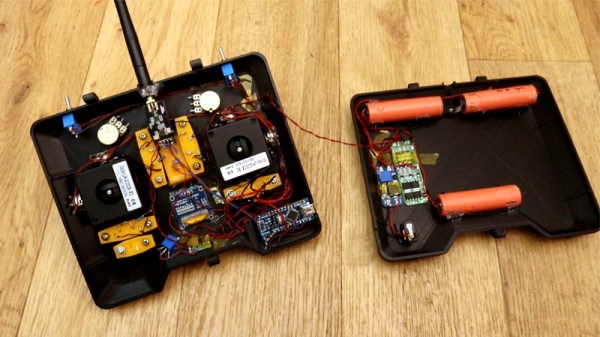
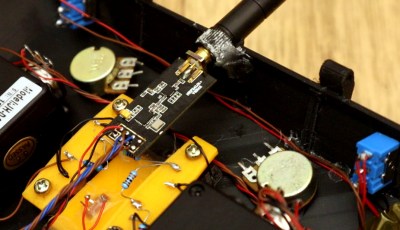
So what goes into this homebrew radio control system? Inside the back panel [Electronoobs] mounted the batteries, charging module, and the voltage regulator which steps the battery voltage down to the 3.3 V required to drive the rest of the transmitter’s electronics. On the flip side there’s an Arduino Nano, an NRF24 module, and an OLED display. Finally we have an assortment of switches, buttons, potentiometers, and two very nice looking JH-D202X-R2 joysticks for user input.

As you might have guessed, building your own transmitter means building your own receiver as well. Unfortunately you won’t be able to bind your existing RC vehicles to this radio, but since the receiver side is no more complicated than another Arduino Nano and NRF24 module, it shouldn’t be hard to adapt them if you were so inclined.

Low-cost consumer RC transmitters can be something of a mixed bag. There are some surprisingly decent options out there, but it’s not a huge surprise that hackers are interested in just spinning up their own versions either.
Continue reading “DIY Six Channel Arduino RC Transmitter”

Retro Wall Phone Becomes A Doorbell, And So Much More

We have to admit that this retasked retro phone wins on style points alone. The fact that it’s filled with so much functionality is icing on the cake.

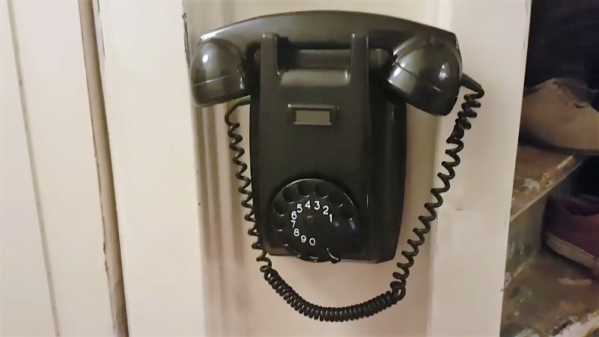
The way [SuperKris] describes his build sounds like a classic case of feature creep. Version 1 was to be a simple doorbell, but [SuperKris] would soon learn that one does not simply replace an existing bell with a phone and get results. He did some research and found that the ringer inside the bakelite beauty needs much more voltage than the standard doorbell transformer supplies, so he designed a little H-bridge circuit to drive the solenoids. A few rounds of “while I’m at it” later, the phone was stuffed with electronics, including an Arduino and an NFR24 radio module that lets it connect to Domoticz, a home automation system. The phone’s rotary dial can now control up to 10 events and respond to alarms and alerts with different ring patterns. And, oh yes – it’s a doorbell too.

In general, we prefer to see old equipment restored rather than gutted and filled with new electronics. But we can certainly get behind any effort to retask old phones with no real place in modern telecommunications. We’ve seen a few of these before, like this desk telephone that can make cell calls.

Continue reading “Retro Wall Phone Becomes A Doorbell, And So Much More”

Ask Hackaday: Frequency Hopping On The NRF24l01+?

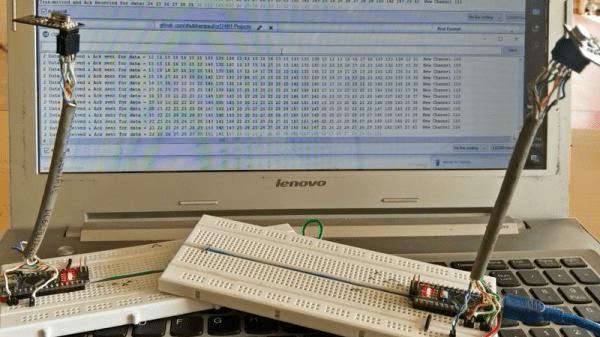
We’ve seen a lot of hacks with the nRF24l01+ 2.4 GHz radio modules. The tiny chips pack a lot of bang for the buck. Since the radios can switch frequencies relatively quickly, [Shubham Paul] decided to take advantage of this feature to make a rudimentary frequency-hopping communications channel.

The code is actually incredibly simple. Both the transmitter and receiver simply scan up and down over the defined channels. Because the clock speeds of any given pair of Arduinos are likely to be slightly different, it’s not a surprise that the radios eventually drift out of sync. Right now, as a quickie solution, [Shubham] is using a serial-port resynchronization: both are connected to the same computer, and he just tells them to get on the same channel. That’s not a horribly satisfying workaround. (But it’s a great start!)

Keeping two radios that are continually swapping channels in sync is no easy task, but it could possibly be made easier by taking advantage of the nRF’s acknowledge mode. If the delay between a sent acknowledge message and a received one were constant, these events (one on TX and one on RX) could be used to re-sync the two hopping cycles. All of this would probably require more temporal resolution than you’re going to get out of a microprocessor running Arduino code, but should be possible using hardware timers. But this is pure speculation. We briefly looked around and couldn’t find any working demos.

So Hackaday, how would you remotely sync two nRF24s on the cheap? Or is this a crazy idea? It might help to make transmissions more reliable in the face of 2.4 GHz band interference. Has anyone implemented their own frequency hopping scheme for the nRF24l01+?