Driving A PAL TV Over RF Thanks To PWM Harmonics

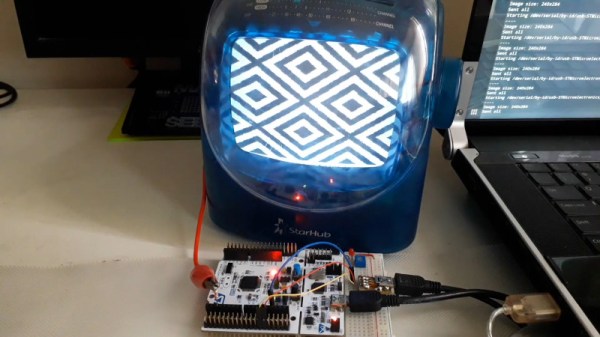
While most analog televisions come with composite video inputs on a yellow RCA jack, the feature is not universal. This problem was even more prevalent in the 1980s, and most home consoles got around the problem by instead feeding video to the television’s tuner with an RF modulator. [Manzel Seet] had just such a television which used the PAL standard. Wanting to display images from a microcontroller, he put together PAL-Streamer.

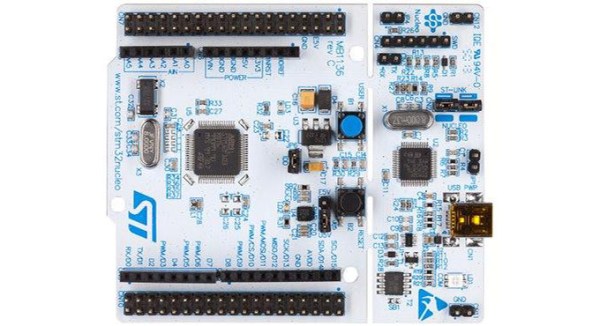
The aim of the project was to display images on an analog television with minimal investment in hardware over and above what [Manzel] already had on hand. To this end, the project was built using a STM32F411 Nucleo development board. Capable of running at clock speeds up to 100 MHz, there’s plenty of grunt to handle demanding tasks like outputting video signals to a TV.

To achieve the target frequency of VHF Channel 3 (61.25 MHz), [Manzel] elected to rely on the onboard PWM hardware, after being inspired by [CNLohr]’s ATTiny NTSC project. The project takes advantage of the odd harmonics of square waves. Setting the PWM output to operate at 6.86 MHz, the ninth harmonic ends up at around 61.71 MHz, close enough to be tuned in on the TV set. With the hard part done, [Manzel] then implemented a virtual COM port allowing an attached PC to send PNG images or GIF animations to the display.

It’s a fun project that shows it’s possible to drive all kinds of analog displays if you’re willing to be creative about how you do it. Files are available on GitHub for those eager to recreate the work. [Manzel] points out that this method does put out a lot of RF energy in the surrounding bands, but for direct hookup to an antenna input, it works just fine. We love to see creative video projects on microcontrollers, so if you’ve figured out how to get an Arduino Uno to do 1080P over HDMI, be sure to let us know. Video after the break.

Continue reading “Driving A PAL TV Over RF Thanks To PWM Harmonics”

Analog Clock Goes Digital, Or Vice Versa

Designing a good clock takes a lot of considerations. It’s not just hands, faces, and numbers anymore; there are also word clocks, electronic clocks, marble clocks, or water clocks, and just about anything else imaginable can be used to tell time. Of course, electronic clocks are great for their versatility, and this one shows off an analog-looking clock that is (of course) digital, leveraging all of the perks of analog with all of the upsides of digital electronics.

One of the key design considerations that [Sasa] had while building this piece was that it needed to be silent. LEDs certainly fit that description, so the decision was made to go with an WS2812b ring. It runs using a STM ST32F103 Nucleo board (and a cheaper version of it in later versions of this clock) which shows a red LED for the current hour, yellow LEDs for the traditional analog clock divisions, a green LED for the current minute, and glows the rest of the LEDs up to the current minute with a rainbow pattern.

This is a really clean, simple build with good design at its core, and would be easy to replicate if you’re looking for an eye-catching clock to build. As a bonus, all of the schematics and code are available on the project site, so everything you need is there. If you’re looking for more inspiration, there are some clocks that are even more unique, like this marble clock that is a work of art — but is anything but silent.

2048: Embedded Edition

Embedded touch version of 2048 tile game
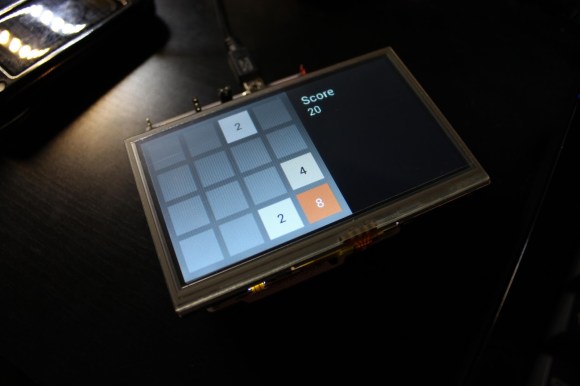
How ’bout that 2048 game? Pretty addictive, huh? Almost as addictive as embedded systems are, at least if you’re [Andrew]. Armed (pun intended) with a Nucleo F4 and a Gameduino 2 shield, he decided to have a go at making an embedded version of the popular tile pusher web game.

If you’re unfamiliar with the Nucleo boards from STMicroelectronics, check out our post on the Nucleo family from a couple of months ago. The Gameduino 2 shield ships with a 4.3″ touchscreen driven by an FT800 GPU EVE. [Andrew] wrote his own driver for it and his blog post goes into great detail about its programming model and the SPI read, write, and command functions he wrote. Full code is available from [Andrew]’s repo.

He started by generating a blank screen based on clues found in the Gameduino 2 source. Pretty soon he had rendered a rectangle and then a full 2048 board. A minor difference between [Andrew]’s creation and the original is that his always creates new tiles as ‘2’ while the web game cranks out the occasional ‘4’.

We were unable to embed [Andrew]’s gameplay videos, but you’ll find two on his blog.


STM32 Nucleo, The Mbed-Enabled, Arduino-Compatable Board

The STM32 line of microcontrollers – usually seen in the form of an ST Discovery dev board – are amazingly powerful and very popular micros seen in projects with some very hefty processing and memory requirements. Now, ST has released a great way to try out the STM32 line with the Nucleo board.

There are two really great features about these new Nucleo boards. First, they’re mbed compatable, making them a great way to get started in the ARM development world. Secondly, they have Arduino pin headers right on the board, giving you access to all your shields right out of the box.

Right now, there are four varieties of the Nucleo board based on the STM32F030, -F103, -F152, and -F401 microcontrollers. The STM32F401 is the high-powered variant, An ARM Cortex-M4 microcontroller running at 84 MHz, 512kB of Flash, and enough I/O for just about any project.

If you’d like to get your hands on one of the STM32 Nucleo boards, you can order a voucher to pick one up at Embedded World in Germany next week. Otherwise, you’re stuck ordering from Mouser or Farnell. Bonus: the high-end F401-based board is only $10 USD.