Four Cable Drawing Machine Pulls Our Strings

sandplotter

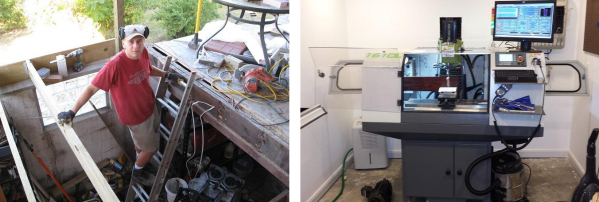
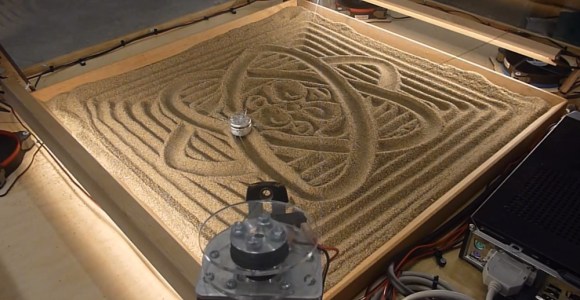
[David] has created a four cable drawing machine for the Telus Spark Science Centre in Canada. Hackaday has featured [David’s] unconventional drawing contraptions before, specifically his center pivot pen plotter. The drawing machine is a new take on a drawbot, and could be considered to be close cousins with [Dan’s] SkyCam. The premise is simple: A stepper motor with a reel of string is placed at each corner of a square. The strings for all four motors come together at a center weight. When all four strings are taut, the weight is lifted off the drawing surface. When a bit of slack is added into the strings, gravity pulls the weight down to touch the sand.

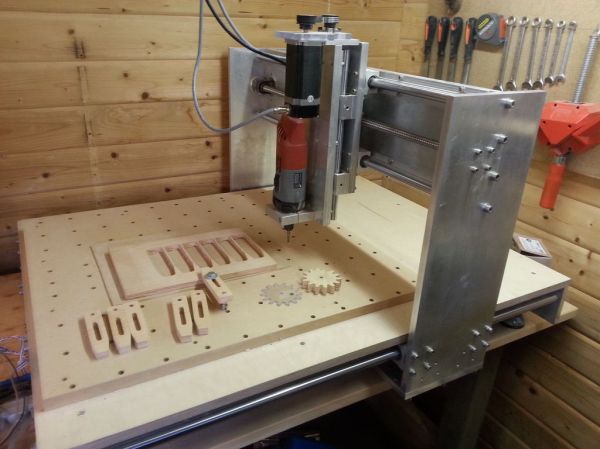
It’s at this point that a simple premise becomes a complex implementation. Moving the weight in one direction is a matter of reeling out string on one motor, and reeling in string on the other. But what about the two “un driven” strings? They have to be slack enough to allow movement in the driven direction, but not so slack that the weight can dig in and tumble on the sand, causing a tangle. To handle some of these questions, [David] called on [Kevin] to write some software. [Kevin] created a custom kinematics module for LinuxCNC to control the drawing machine. The drawing machine runs on Gerber Code, similar to a CNC. Simply feed the machine Cartesian coordinates, and [Kevin’s] module converts to steps.

Continue reading “Four Cable Drawing Machine Pulls Our Strings”

A Nightmare On CNC Street

[James Dressman] emailed us about his two-year journey of getting a large CNC machine running in his home. He doesn’t currently have a webpage, however his story was so incredible that we just had to feature it.   [James] started by doing plenty of research online, and ordering a new CNC. The real fun started when he opened up a wall to fit the 2300 pound monster into his home. [James] found so much insect and water damage that he ended up rebuilding the entire rear half of his home.

Once the CNC was safely set up, the fun still wasn’t over. Not all family members are keen on having an industrial machine tool in the house. In [James’] case it was the smell of way oil that drove his wife nuts. This was all before spindle problems with the tool itself began to rear their ugly head. Illness and family tragedy put everything on hold for several months, however once [James] strength returned, he attacked the problems with renewed vigor. It was a long and winding road, but he now has a fully functional CNC.

But don’t just take our word for it. Continue after the break to see his photo album and to hear James tell the story in his own words.

Continue reading “A Nightmare On CNC Street”

A Very Professional Homemade CNC Router

[Benne] has a small workshop at home so he decided to make a very versatile CNC router for his final project at school. It took him around 6 months to arrive at the result you can see in the image above and what is even more impressive is that he was only 17 years old at the time.

[Benne] used the free cad program Google Sketchup to draw the different parts he needed around the linear rails and ball screws he already had lying around. The CNC’s travel is 730x650x150mm, uses Nema 23 (3Nm) steppers, 15mm thick aluminum plates and 30x60mm aluminum extrusions. In his article, [Benne] gives great advice to those who would like to design their CNC like his, providing very useful links to manufacturers. He estimated the cost of his CNC to be around 1500 euros (about $2000). We’ll let you browse the many lines of his very detailed build log, which makes us wish to be as talented as him even at our age…

Home Made CNC Reuses Printer Parts

Do it yourself CNC machines can be never ending projects. Once you get one machine done, you want another. [Mario] found this out when he started work on his second CNC machine, TheMaker2. As its name implies, TheMaker2 is the successor to TheMaker1. It seems that [Mario] was trying to walk the fine line of precision at minimal cost. He wanted a rigid frame, so he chose to go with a moving table, rather than the moving gantry of TheMaker1. The frame is made up of galvanized steel stock, which makes it much stronger than many DIY CNCs out there. [Mario] had a friend weld the steel up for him, we hope he took the proper precautions when welding galvanized material.

Standard threaded rod was used as lead screws, with some very well made anti backlash nuts. Acme thread would have been a better choice here, however [Mario] doesn’t say if acme stock was available to him. Most of the mounts and small parts are made from easily worked PVC sheet stock. Precision rails were scavenged from old Ricoh copiers. Epson printers provided the tubing which became motor couplers.

One negative in this build are the stepper motors. [Mario] used NMB PM55L-048 motors he had pulled from HP printers. These motors have both a wide step angle (7.5 degrees) and a rather anemic torque. Thankfully [Mario] mentions upgrading NEMA 23 motors in the comments of TheMaker2’s instructables page.

Turn A Decommissioned Robot Into A CNC Machine

adeptRobot

Some of us may have been accused of living in Mom’s basement – [Benjamin] kicks it up a notch by keeping an industrial robot in his parent’s attic shed loft.
[Benjamin] was tasked with stripping down some retired equipment at work. It turns out the “retired equipment” was three Cartesian robots from Adept Robotics. These are large industrial XYZ platforms capable of high speed movements (3000 IPM rapids!).

Getting from a decommissioned machine to a working CNC is never a simple path. In this case [Ben] was able to make the transition relatively easily. Each axis of the robot has a 400 Watt Yaskawa servo with a 65k encoder and brake. The original Adept servo amps and control system was still working, so he kept it. The controllers were new enough that they communicate over a daisy chained IEEE1394 (Firewire) link. That is relatively modern compared to some of the conversions we’ve seen in the past.  The final piece of the puzzle was G-code creation Translating common G-code to a format his machine could recognize. Ben chose MeshCAM for the task.

One problem [Ben] ran into was stuttering on the X-axis. The original machines only had a single sided drive system on the X-axis. Single side is fine for an assembly machine that doesn’t see any tool load. However for a CNC machine that will see spindle loads, a single side drive creates a twisting force which threatens to rack the entire frame. He used one of the drive systems from his spare robot to convert his main machine to a double-sided drive, eliminating the issue.

Continue reading “Turn A Decommissioned Robot Into A CNC Machine”

PocketNC P5 Takes Desktop CNC To The 5th Dimension

What do you get when you put together a husband/wife team of a machinist and mechanical engineer? If you’re [Matt and Michelle Hertel], you get a 5 axis CNC, which we think was one of the hidden gems at Maker Faire NY.

Hobby CNC machines have grown by leaps and bounds over the last few years. Nearly all these machines have been 3 axis (X,Y,Z). 5 (and more) axis machines have been around for years in the industrial world. These higher level machines never have made the jump to the hobby/home shop world.

The P5’s two extra axis allow for extremely complex parts to be created in one setup. A good example of this would be a turbine wheel. Compound curves on (and behind) each blade would make this an impossible job for a 3 axis CNC. The P5 was machining these parts all weekend at Maker Faire NY. Even more impressive is the fact that it was cutting Delrin, not wax.

Continue reading “PocketNC P5 Takes Desktop CNC To The 5th Dimension”

BeagleBone Black Does CNC With RAMPS

[Bart] Wanted to try controlling a CNC with his BeagleBone black, but didn’t want to invest in a CNC Cape. No problem – he created his own translator board for RAMPSLinuxCNC for the BeagleBone Black has been available for a few months now, and [Bart] wanted to give it a try. He started experimenting with a single stepper motor and driver.  By the time he hooked up step, direction, and motor phases, [Bart] knew he needed a better solution.

Several CNC capes are available for the BeagleBone boards, but [Bart] had a RAMPS board just sitting around, waiting for a new project.  Most RepRap fans have heard of the RAMPS – or Reprap Arduino Mega Pololu Shield.  In fact, we covered them here just a few days ago as part of our 3D Printering series.   RAMPS handle all the I/O needed for 3D printing, which carries over quite nicely to other CNC applications as well.   The downside is that they’re specifically designed for the Arduino Mega series. Continue reading “BeagleBone Black Does CNC With RAMPS”