Controlling A Hot Plate’s Temperature For The Lab

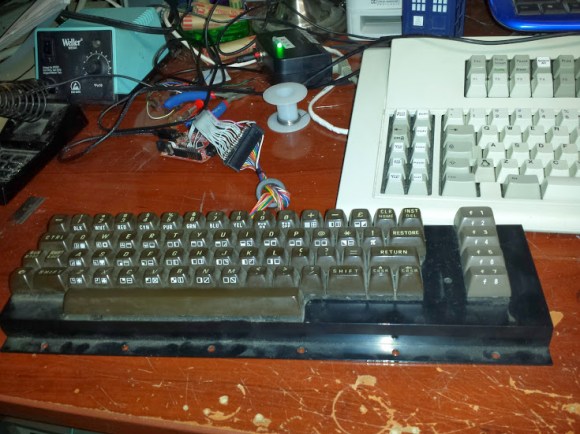
When you need precise heating — like for the acetone polishing shown above — the control hardware is everything. Buying a commercial, programmable, controller unit can cost a pretty penny. Instead of purchasing one, try creating one from scratch like [BrittLiv] did.

[BrittLiv] is a Chemical and Biological Engineer who wanted something that performs well enough to be relied upon as a lab tool. Her design utilizes a plain, old hot plate and with some temperature feedback to run custom temperature ramps from programs stored on an SD card.

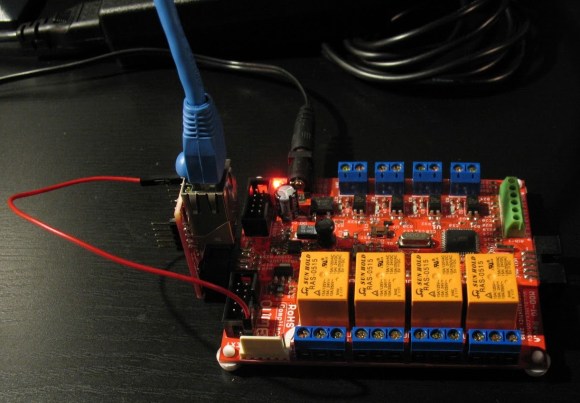
The system she developed was dealing directly with temperatures up to 338°F. The heating element is driven from mains, using an SSR for control but there is also a mechanical switch in there if you need to manually kill the element for some reason. An ATmega328 monitors the heating process via an MAX6675 thermocouple interface board. This control circuitry is powered from a transformer and bridge rectifier inside the case (but populated on a different circuit board).

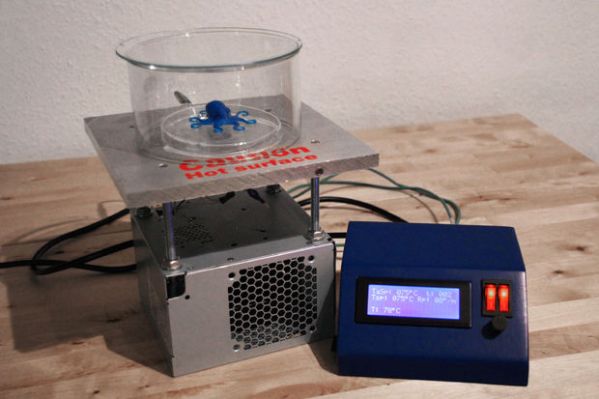
She didn’t stop after getting the circuit working. The project includes a nice case and user interface that will have visitors to your lab oohing and aahing.

Make That C64 Keyboard Work As A USB Keyboard

keyboard-to-usb-mapping

Let’s face it, we all have keyboard peculiarities. Don’t try to deny it, everyone who types a lot has an opinion of the keyboard they stroke so frequently. We know [Brian Benchoff] swears by his model M, and we’re guessing he was the one that bumped into [Evan] and convinced him to write about his conversion of a Commodore 64 keyboard for use as a USB device.

This is not [Evan’s] first rodeo. We recently saw him fixing up the worn off letters of his own model M. But this time around there’s some clever microcontroller work at play. Apparently mapping 122 keys using an Atmel AVR 32u4 chip (built in USB connectivity) is quite a task. Luckily someone’s already worked out all kinds of good things and is sharing the love with the Soarer’s Keyboard Controller Firmware. Of course it handles scanning, but also includes debounce, muxing, and the trick to scan more keys than the uC has pins for. We still don’t fully understand that bit of it. But [Evan] did post the config file he’s using so perhaps after we get elbow-deep in the code we’ll have a better understanding.

If you give this a try, we want to hear about it. Anyone have any modern keyboards they’re in love with? Leave a comment below.

Embedded Web Server Is All About Clever Formatting

embedded-web-server

Take a look around here and you’ll find all kinds of embedded web servers. This one doesn’t look all that interesting, especially because it’s just a NIC plugged into a development board. But for us the interesting part is in how [Andrew Rossignol] chose to format the webpage assets to best utilize the under-powered server.

The project was spawned as part of a class in Internet Embedded Systems which [Andrew] is taking. The board has an ATmega16 microcontroller and he’s using the ever popular ENC28J60 on that Ethernet adapter board. The TuxGraphics TCP/IP Stack takes care of communications with the network.

One constraint which [Andrew] imposed upon himself was to use just a single response which the available RAM limits to about  700 bytes. Any decent webpage needs to have at least some graphics but that’s tough with the size limit. He managed to display an AVR logo by optimizing an SVG in Inkscape then stripped the rest of the cruft using VIM (explained in the demo after the break). With that piece of Linux-fu in his pocket he set to work streamlining the CSS file. The webpage isn’t just static either. He displays the server up-time and even allows the relays and LEDs on the Olimex board to be controlled.

Despite the limitations of the ATmega family they still seem to do some amazing Internet-connected stuff. Here’s one used as a Minecraft server.

Continue reading “Embedded Web Server Is All About Clever Formatting”

OLinuXino Booting Android

We can’t say the name rolls off the tongue, but it is beginning to look like the OlinuXino is going to happen. Here you can see the prototype hardware booting Android. If this is the first time you’re seeing the hardware you can think of it in the same category as the Raspberry Pi. It’s a butt-kicking ARM platform that comes as a bare-board with which you can do what you please.

Olimex Ltd. put together the offering, which seems to be part of the name mash-up (Olimex + Linux + Arduino?). The board hosts an ARM Cortex-A8 processor which runs at 1 GHz. There’s a half a gigabyte of ram, four USB and one USB-OTG ports, and a big array of breakout pins. One eyebrow-raising choice was not to include an HDMI connector. Instead the board offers VGA and Audio outputs. There is a pin header meant for an LCD screen, as seen in the image above, so it could be that the intention here is for smaller or more portable applications. But like we said, the form factor really lets you do what you want.

Possibly the best part is the price. The target for the top-of-the-line board is 55 Euros (about $68) and that comes with WiFi and 4 GB of NAND storage on the board. There’s a bunch of posts on the project, including a look at the PCB routing work. This link to the A13 tag will give you the widest overview of the work so far.

[Thanks Acce]