A Lightweight Smart Home Server

Working towards automating a few things in a home often seems simple on the surface, but it’s easy for these projects to snowball into dozens of sensors and various servos, switches, and cameras strewn about one’s living space. The same sort of feature creep sneaks into some of the more popular self-hosted home server platforms as well, with things like openHAB requiring so much computing power that they barely function on something like a Raspberry Pi. [Paulo] thought there should be a more lightweight way of tackling a project like this, and set about building his own smart home server with help from some interesting software.

The project is based around the Dirigera hub from Ikea, partially because [Paulo] is planning to use other smart home devices from Ikea as he can easily find them where he is, and also because these devices tend to use Zigbee, a non-proprietary communications standard. This means that if he ever wants to swap out the hub for another one in the future, it won’t be difficult to do. From here the major hurdle is that using the default software from these devices is fairly limiting, so [Paulo] reached for a Raspbee 2 Zigbee gateway for use with a Raspberry Pi and an extremely lightweight and customizable web server called Mako to make this happen. Using Lua as the high-level language to tie everything together he was able to easily deploy the server to control the Ikea hub and devices and automate them in any way he sees fit.

While it is true that software like openHAB and others already exists to do virtually any home automation task that could be imagined, if you’re looking to do something with a bare minimum of computing power something like [Paulo]’s solution is likely going to be the fastest and most reliable method of getting a few things automated around the home. If you’re looking for something completely open source and built from the ground up, though, we have seen a few alternative smart home solutions like this one which don’t rely on any proprietary hardware or software, but do take a little bit more effort on the user’s part.


Simple MP3 Player Hides Home Automation Brilliance

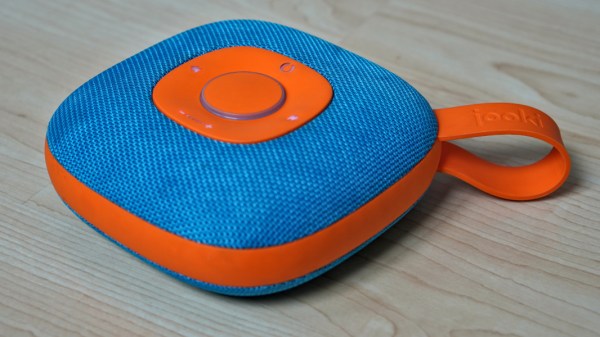
Like bubble wrap or the corkscrew, plenty of everyday objects have lost almost all ties to their original purpose. It could be that the original product had no market but was able to find one in an unexpected place, or simply that the original use case disappeared. We think that this MP3 player for children might arrive at a similar fate as a home automation controller thanks to a recent project by [Sebastian].

The MP3 player is known as a Jooki and works by using small figurines (and a few buttons) to control the device. Different figurines cause the MP3 player to change playlists, for example, but it turns out that the device is capable of communicating over MQTT. This means that [Sebastian] was able to use the MQTT messages from the Jooki to do all kinds of things beyond its intended use with openHAB, an open-source home automation system, such as dimming the lights and closing the blinds when he puts his son to bed.

This platform has considerable potential for hacking thanks to the lightweight communications system it uses under the hood. The Jooki is a little pricey, but if you happen to have one around, it’s an impressive tool that can go well beyond its original intended use.

HestiaPi: A Stylish Open Hardware Thermostat

A common complaint about open hardware and software is that the aesthetic aspects of the projects often leave something to be desired. This isn’t wholly surprising, as the type of hackers who are building these things tend to be more concerned with how well they work than what they look like. But there’s certainly nothing wrong with putting a little polish on a well designed system, especially if you want “normal” people to get excited about it.

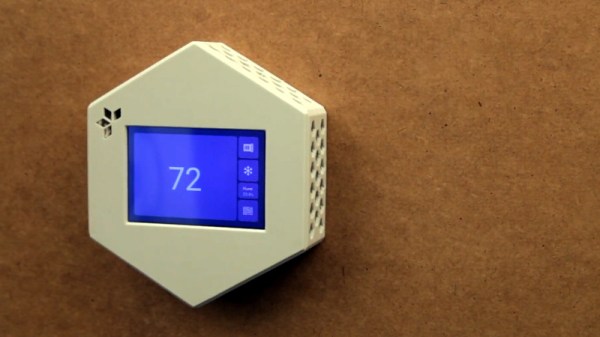
For a perfect example, look no further than the HestiaPi Touch. This entry into the 2019 Hackaday Prize promises to deliver all the home automation advantages of something like Google’s Nest “smart” thermostat without running the risk of your data being sold to the highest bidder. But even if we take our tinfoil hat out of the equation, it’s a very slick piece of hardware from a functional and visual standpoint.

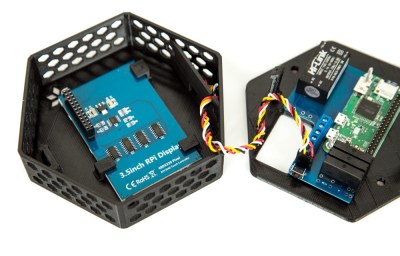
As you probably guessed from the name, the thermostat is powered by the Raspberry Pi Zero, which is connected to a custom PCB that includes a couple of relays and a connector for a BME280 environmental sensor. The clever design of the 3D printed case means that the 3.5 inch touch screen LCD on the front can connect directly to the Pi’s GPIO header when everything is buttoned up.

Of course, the hardware is only half the equation. To get the HestiaPi Touch talking to all the other smart gadgets in your life, it leverages the wildly popular OpenHAB platform. As demonstrated in the video after the break, this allows you to use the HestiaPi and its mobile companion application to not only control your home’s heating and air conditioning systems, but pretty much anything else you can think of.

The HestiaPi Touch has already blown past its funding goal on Crowd Supply, and the team is hard at work refining the hardware and software elements of the product; including looking at ways to utilize the unique honeycomb shape of the 3D printed enclosure to link it to other add-on modules.

Continue reading “HestiaPi: A Stylish Open Hardware Thermostat”

ESP8266 Home Monitor Is Stylishly Simplistic

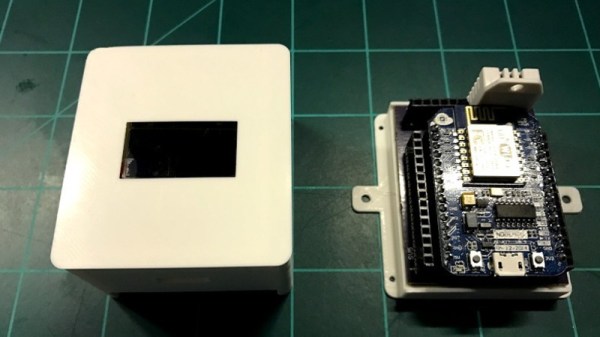
It’s often said that “Less is More”, and we think that the chic ESP8266 environmental monitor posted by Thingiverse user [bkpsu] definitely fits the bill. Dubbed “Kube”, the device is a 3D printed white cube with an OLED display in the center, which [bkpsu] says was designed specifically for the approval of his wife. Weirdly, she didn’t like the look of bare PCBs on the wall.

Multiple Kubes allow for whole-house monitoring.

Inside, things are a little more complex. The Kube uses the NodeMCU development board, and a custom breakout that [bkpsu] designed to interface with the display and sensors. For temperature and humidity monitoring, the Kube is using the ever-popular DHT22, and [bkpsu] mentions that he has future plans for things like motion sensors and direct control of RGB LED strips. All the data collected by the Kube is piped into openHAB via MQTT.

On the very detailed Thingiverse page, [bkpsu] gives background information on his design goals for the project, tips for printing out a high-quality case, a parts list with Amazon links, and pinout information for getting it all wired up. The PCB is even available on OSH Park for those who want a Kube of their own.

Even with all the stick home monitoring and automation products on the market today, many hackers simply can’t bring themselves to buying a turn-key commercial product. But we think with the results hackers have been getting rolling their own solutions, they just might be on to something.

Me Casa Es Techno Casa

“Jarvis, make me a sandwich” is not a reality yet. Though there exist a lot of home automation products out there today, commercial solutions just don’t make the cut for the self-respecting geek. So [Matias] took the DIY route with his La CasaC Home Automation project and achieved the functionality he was after.

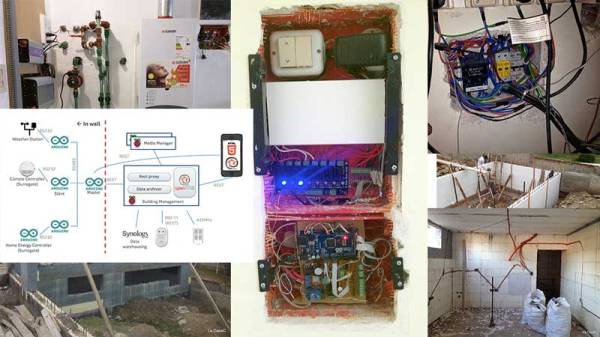
[Matias’] project is one of the most elaborate and large-scale DIY home automation projects we have seen in recent years. With over 200 nodes, this project took a number of years of planning and execution. The core of the design is the ever popular Raspberry Pi running OpenHAB to ease the pain of customization and integration with various protocols. To further simplify the ginormous task, the design uses RS485 to communicate between master and slave devices.

Each wall node is managed by a nearby Arduino which in turn talks to a central Arduino Mega. OpenHab takes care of the higher functions such as UI, integration with existing hardware such as the solar heater, media center control,  and RFID and keypad control. Sensor data aggregation and building management is done centrally with data funneled to a separate NAS system as long-term storage.

What makes this project awesome is that [Matias] did not integrate a Raspberry Pi into his house, no! He actually integrated his entire house around the system because this build includes the construction of the house as well. Take a look at this Google Photos Gallery to see the photographic progress of the build. That is amazing!

The code and snippets are available on GitHub for your viewing pleasure though that seems the easy part. If this inspired you, then also take a look at the Raspberry Pi Home Automation of a Gingerbread House if you’d like to try it out before fully committing.

Custom Parts Put IKEA Window Shades On IoT

No matter what the project is about, we’re always suckers for nicely integrated builds with good fit and finish. There’s a certain appeal to rat’s nest wiring on a breadboard, and such projects are valuable because they push the limits. But eventually you need to go from prototype to product, and that’s where this IKEA window shade automation project shines.

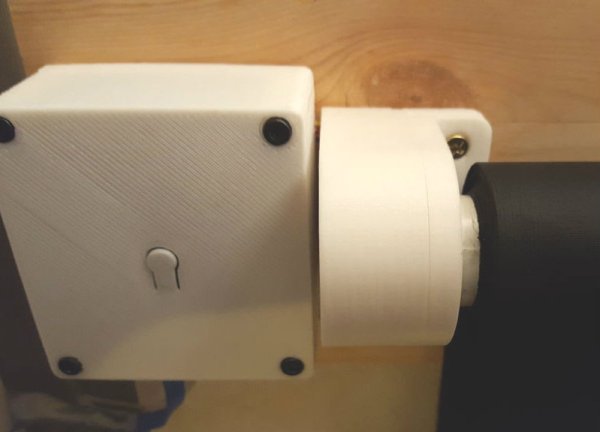
Integration is more than just putting everything in a nice box, especially for home automation gear – it really needs to blend. [ehsmaes] roller blind motorization project accomplishes that nicely with a 3D-printed case for the electronics, as well as a custom case for the geared stepper motor to drive the shade. The drive replaces the standard spring-loaded cap on the end of the IKEA Tupplur shade, and the neutral color of both cases blends nicely with the shade and surroundings. The control electronics include a NodeMCU and a motor shield; [eshmaes] warns that narrow shades work just fine off of USB power, but that wider windows will need a power boost. The IoT end of things is taken care of by MQTT and OpenHab, allowing the shades to be raised and lowered to any position. The short video below shows the calibration procedure for the shade.

Need a primer on MQTT? We’ve got you covered. Or perhaps you need to control the windows rather than the treatments.

Continue reading “Custom Parts Put IKEA Window Shades On IoT”

Using SDR To Take Control Of Your Home Security System

[Dan Englender] was working on implementing a home automation and security system, and while his house was teeming with sensors, they used a proprietary protocol which was not supported by the open source system he was trying to implement. The problem with home automation and security systems is the lack of standardization – or rather, the large number of (often incompatible) standards used to ensure consumers get tied in to one specific system. He has shared the result of his efforts at getting the two to talk to each other via his project decode345.

The result enabled him to receive signals from Honeywell’s 5800 series of wireless products and interface them with OpenHAB — a vendor and technology agnostic open source automation software. OpenHAB offers “bindings” that allow a wide variety of systems and hardware to be integrated. Unfortunately for [Dan], this exhaustive list does not yet include support for the (not very popular) 345MHz protocol used by the Honeywell 5800 system, hence his project. Continue reading “Using SDR To Take Control Of Your Home Security System”