Teensy 4 Pushed To The Limit With 1 GHz Overclock

Do you need a microcontroller that runs at 1 GHz? No, probably not. But that didn’t stop [Visual Micro] from trying, and the results are pretty interesting. Not only did the plucky little chip not cook itself, it actually seemed to run fairly well; with the already powerful microcontroller getting a considerable boost in performance.

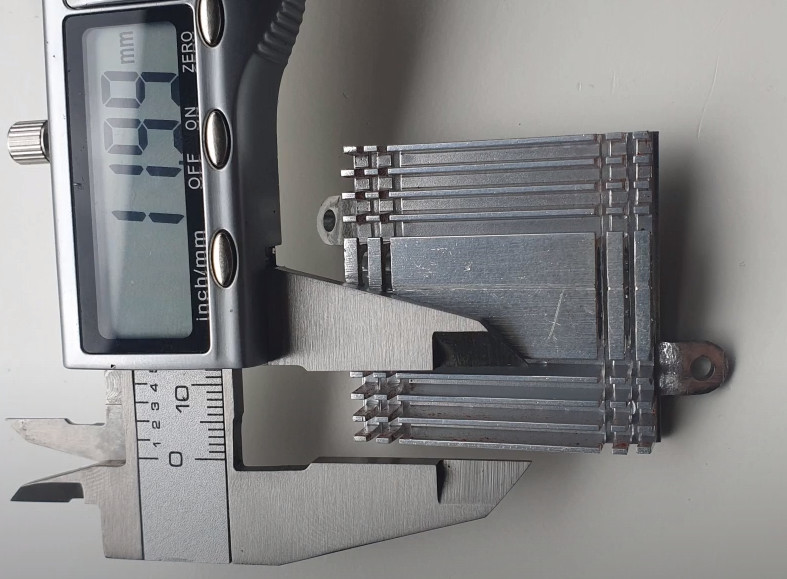
According to [Visual Micro] the Teensy 4.1, which normally has its ARM Cortex-M7 clocked at 600 MHz, can run at up to 800 MHz without any additional cooling. But beyond that, you’ll want to invite some extra surface area to the party. It’s easy enough to cut a chunk out of an old CPU/GPU cooler and stick it on with a dab of thermal compound, but of course there’s no shortage of commercially available heatsinks at this size that you could pick up cheap.

Cutting a custom heatsink.

With the heatsink installed, [Visual Micro] shows the Teensy running at around 62 °C during a benchmark. If that’s a little hot for your liking, they also experimented with an old laptop cooler which knocked the chip down to an impressive 38 °C while under load. It doesn’t look like a particularly practical setup to us, but at least the option is there.

[Visual Micro] unfortunately doesn’t go into a lot of detail about the benchmark results, but from what’s shown, it appears the overclock netted considerable gains. A chart shows that in the time it took a stock Teensy to calculate 15.2 million prime numbers, the overclocked chip managed to blow through 21.1 million. The timescale for this test is not immediately clear, but the improvement is obvious.

Even at the stock 600 MHz, the Teensy 4 is a very powerful MCU. Especially after the 4.1 refresh brought in support for additional peripherals and more RAM. But we suppose some people are never satisfied. Got a project in mind that could benefit from an overclocked Teensy? We’d love to hear about it.

Continue reading “Teensy 4 Pushed To The Limit With 1 GHz Overclock”

Die Lapping For Better CPU Performance

CPUs generate their heat in the silicon die that does all those wonderful calculations which make our computers work. But silicon conducts heat fairly poorly, so the thinner your CPU die, the better it will conduct heat out to the heatsink. This theoretically promises better cooling and thus more scope for performance. Thus, it follows that some overclockers have taken to lapping down their CPU dies to try and make a performance gain.

It’s not a simple process, as the team at [Linus Tech Tips] found out. First, the CPU must be decapped, which on the Intel chip in question requires heating to release the intermediate heat spreader. A special jig is also required to do the job accurately. Once the bare CPU is cleaned of all residual glue and heat compounds, it can then be delicately lapped with a second jig designed to avoid over-sanding the CPU.

After much delicate disassembly, lapping, and reassembly, the CPU appears to drop 3-4 degrees C in benchmarks. In overclocking terms, that’s not a whole lot. While the process is risky and complicated for little gain, the underlying premise has merit – Intel thinned things out in later chips to make minor gains themselves. Video after the break.

Continue reading “Die Lapping For Better CPU Performance”

More Than Just An Atari Look-Alike

The Raspberry Pi has been a boon for hackers with a penchant for retro gaming. Redditor [KaptinBadkruk] Wanted to get on board the game train and so built himself an Atari 2600-inspired Raspberry Pi 3 console!

A key goal was the option to play Nintendo 64 titles, so [KaptinBadkruk] had to overclock the Pi and then implement a cooling system. A heatsink, some copper pads, and a fan from an old 3D printer — all secured by a 3D printed mount — worked perfectly after giving the heatsink a quick trim. An old speaker and a mono amp from Adafruit — and a few snags later — had the sound set up, with the official RPi touchscreen as a display.

After settling on an Atari 2600-inspired look, [KaptinBadkruk] laboured through a few more obstacles in finishing it off — namely, power. He originally intended for this  project to be portable, but power issues meant that idea had to be sidelined until the next version. However — that is arguably offset by [KaptinBadkruk]’s favourite part: a slick 3D Printed item box from Mario Kart front and center completes the visual styling in an appropriately old-meets-new way.

That item block isn’t the first time a lightshow has accompanied an Atari console, but don’t let that stop you from sticking one in your pocket.

[Via /r/DIY]

Brazil Wins The Raspberry Pi Overclocking Olympics

[Alex Rissato] proudly reports that he now holds the record for highest benchmark score on HWBOT (machine translation); something he sees not only as a personal achievement but admirably, of national pride. Overclocking a Raspberry Pi is not as simple as achieving the highest operational clock rate. A record constitutes just the right combination of CPU clock, memory clock, GPU clock and finally the CPU core voltage. If you’ve managed to produce that special sauce, the combination must be satisfactorily cooled and most importantly be stable enough to pass an actual performance benchmark.

More POWAAA to the CPU!

[Alex] realized that the main hurdle to achieving the desired CPU clock was the internally generated and hence restricted, CPU core voltage; This is externally LC filtered and routed back to the CPU on a stock Pi. [Alex] de-soldered the filter on the PCB and provided the CPU with an externally generated core voltage.

Next, the cooling had to be tended to. Air cooling simply wouldn’t cut it, so a Peltier based heatsink interface had to be devised with the hot side immersed in a bucket of salt water. All of this translated to a comfy 16C at a clock speed of 1600 MHz.

Was all the effort justified? We certainly think it was! Despite falling short of the Pi zero CPU clock rate record, currently set at 1620MHz,  [Alex] earned the top spot in the HWBOT Prime overclocking benchmark. Brazil can now certainly add this to its trophy cabinet, arguably overshadowing the 129 Olympic medals.

Pi Keeps Cool At 1.5 GHz

Hackers have a long history of overclocking CPUs ranging from desktop computers to Arduinos. [Jacken] wanted a little more oomph for his Pi Zero-Raspberry Pi-based media center, so he naturally wanted to boost the clock frequency. Like most overclocking though, the biggest limit is how much heat you can dump off the chip.

[Jacken] removed the normal heat sink and built a new one out of inexpensive copper shim, thermal compound, and super glue. The result isn’t very pretty, but it does let him run the Zero Pi at 1.5 GHz reliably. The heat sink is very low profile and doesn’t interfere with plugging other things into the board. Naturally, your results may vary on clock frequency and stability.

Continue reading “Pi Keeps Cool At 1.5 GHz”

Overclocking The Raspberry Pi 3 For Tasty Speed Increases

Some people are never happy. [Jackenhack] got hold of a couple of shiny new Raspberry Pi 3s, and the first thing he did is to start overclocking them. Fortunately, he knows what he is doing, so none of the magic smoke escaped, but it seems not all Pis are happy with the process.

For one of the three seemingly identical Pi 3, adding heat sinks let him push the CPU from the native 1.2GHz up to 1.45GHz. That did involve a bit of overvolting (increasing the voltage to the CPU), but that can be easily done in software. He also experimented with adding heat sinks to the memory, then bumping up the speed of the memory to increase throughput. Again, he was able to make some impressive gains, bumping the speed up from the native 400 Mhz to 500 Mhz. Both of those are stable overclocks: he was able to run the system at 100% CPU load for an extended time, and has incorporated the overclocked Pi into his system that contributes to the NTP pool project.

However, when he tried the same overclock with the second of the Pi 3 victims test subjects, it failed due to the CPU overheating. So, it seems that there is a lot of variation in the individual bits of silicon on the Pi 3. Perhaps some liquid nitrogen would help? It did for an Arduino…

Clocking (or Overclocking) An AVR

Some guys build hot rods in their garage. Some guys overclock their PCs to ridiculously high clock frequencies (ahem… we might occasionally be guilty of this). [Nerd Ralph] decided to push an ATTiny13a to over twice its rated frequency.

It didn’t seem very difficult. [Ralph] used a 44.2 MHz can oscillator and set the device to use an external clock. He tested with a bit-banged UART and it worked as long as he kept the supply voltage at 5V. He also talks about some other ways to hack out an external oscillator to get higher than stock frequencies.

We wouldn’t suggest depending on an overclock on an important or commercial project. There could be long term effects or subtle issues. Naturally, you can’t depend on every part working the same at an untested frequency, either. But we’d be really interested in hear how you would test this overclocked chip for adverse effects.

Now, if you are just doing this for sport, a little liquid nitrogen will push your Arduino to 65 MHz (see the video after the break). We’ve covered pushing a 20MHz AVR to 30MHz before, but that’s a little less ratio than [Ralph] achieved.

Continue reading “Clocking (or Overclocking) An AVR”