For Hackaday readers who don’t spend their free time underwater, nitrox is a blend of nitrogen and oxygen that’s popular with scuba divers. Compared to atmospheric air, nitrox has a higher concentration of oxygen; which not only allows divers to spend more time underwater but also reduces the risk of decompression sickness. Of course when fiddling with the ratio of gases you breathe there’s a not inconsequential risk of dying, so nitrox diving requires special training and equipment to make sure the gas mixture is correct.
 Divers can verify the ratio of oxygen to nitrogen in their nitrox tanks with a portable analyzer, though as you might expect, they aren’t exactly cheap. But if you’re confident in your own hacking skills, [Eunjae Im] might have the solution for divers looking to save some cash. He’s come up with an Arduino based nitrox analyzer that can be built for considerably less than the cost of a commercial unit.
Now before you get the torches lit up, we should be clear: ultimately the accuracy, and therefore safety, of this device depends on the quality of the oxygen sensor used. [Eunjae] isn’t suggesting you get a bottom of the barrel sensor for this build, and in fact links to a replacement sensor that’s intended for commercial nitrox analyzers as a way to verify the unit is up to the task. The downside is that the sensor alone runs $80. If you want to go with something cheaper, you do so at your own risk.
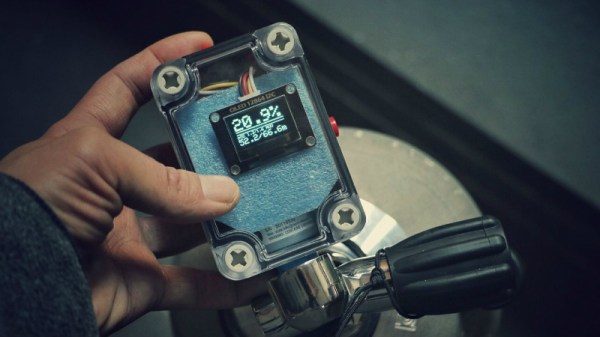
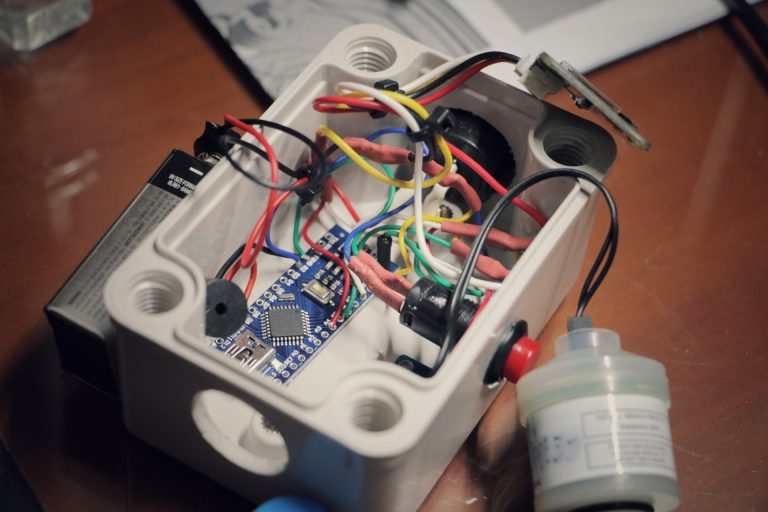
With a suitable sensor in hand, the project really boils down to building up an interface and enclosure for it. [Eunjae] is using an Arduino Nano, a 128×64 OLED screen, and a battery inside of a rugged waterproof case. He also added an ADS1115 16 Bit DAC between the oxygen sensor and the Arduino for fast and accurate readings over I2C. With the hardware assembled, calibrating the device is as simple as taking it outside and making sure you get an oxygen reading of 20.9% (the atmospheric normal).
While [Eunjae] is happy with his analyzer on the whole, he does see a few areas which could be improved in future revisions. The case is bulky and rather unattractive, something that could be addressed with a custom 3D printed case (though waterproofing it might be an issue). He also says the only reason he used a 9V alkaline battery was because he had it on hand, a small rechargeable battery pack would be a much more elegant solution.
We’ll go out on a limb and say that most Hackaday readers aren’t avid scuba divers. For better or for worse, we’re the sort of folks who stay in the shallow end of the pool. But when one of our ilk does dip below the waves, they really seem to go all out.
Continue reading “Arduino Nitrox Analyzer For The Submarine Hacker”