Tumble Polisher Smooths Parts With Ease

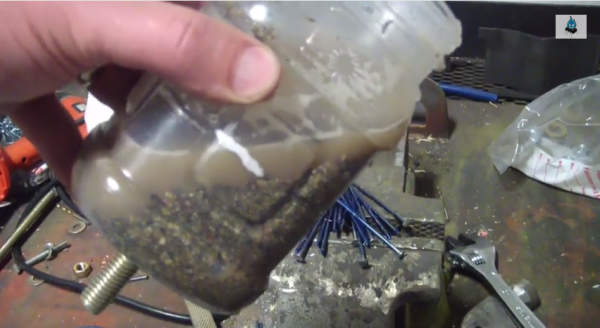
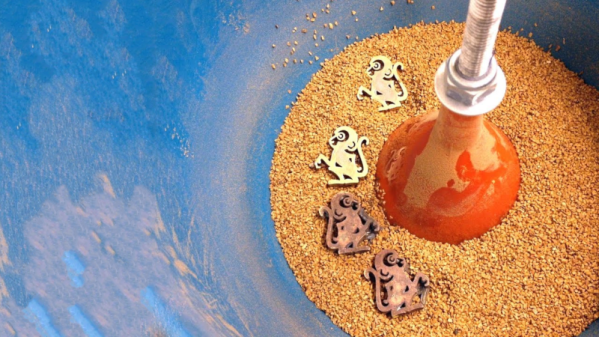
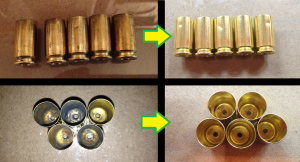
When you’re 3D printing parts, it’s easy to create pieces with all manner of complex geometry. However, you’re often stuck dealing with unsightly layer lines and other surface imperfections. [reitter_m] chooses to get around this through the use of a tumble polisher of his own design.

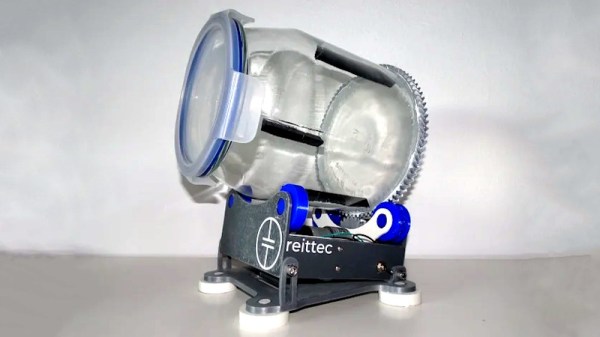
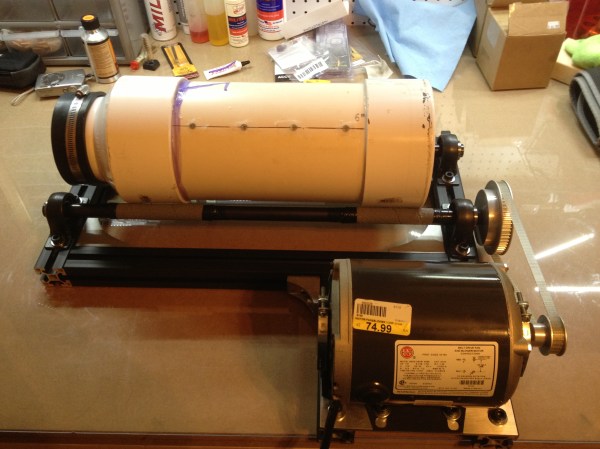
The polisher uses a drum made out of a glass jar sourced from IKEA. A 3D printed gear is printed to size, and then fitted around the outside. This allows the drum to be turned by a motor fitted into the base of a 3D printed cradle. A simple gear motor is used to spin the drum nice and slowly, powered by a 12 V, 500 mA supply.

It’s a build that uses readily available parts, and should be a cinch to recreate by anyone with a 3D printer. The later revision uses an even more common IKEA jar, making it even easier to copy the build no matter where you are in the world. It even uses herringbone gears which gives it a very offbeat look. We’ve seen other hacked tumbler projects too, like this one built around an old case fan. Video after the break.

Building A Vibration Tumbler On The Cheap

There are few tasks quite as laborious as sanding and polishing. Any job that takes a lot of time and elbow grease is a prime candidate for mechanical help, and this one is no exception. At the suggestion of friends, [VegOilGuy] decided it was time to invest in a vibration tumbler. Naturally, building it rather than buying it was the order of the day.

If you’ve ever used an electric sander, you’ll know they’re an excellent source of vibration. Initially, the intention was to build a tumbler with the sander being removable and still usable for its original purpose. A clamping base was constructed with cable ties, wood, and Bondo, but sadly to no avail. The Velcro connection to the plastic tumbler bowl was simply not robust enough to hold up to repeated use.

Instead, the sander was permanently bolted to the tumbler bowl, yielding more positive results. A funnel was then also added to the bowl, to improve media circulation and reduce the amount required. Initial tests were positive, with the tumbler successfully polishing some cast brass parts using crushed walnut shells. [VegOilGuy] is still looking for a more abrasive media to use for initial patina removal, however.

Sometimes the best tools are the ones you build yourself. In this case, it’s a cheap and easy way to get a vibration tumbler and the results are great. If sanders aren’t your speed, why not check out this fan based build instead? Video after the break.

Continue reading “Building A Vibration Tumbler On The Cheap”

Fan-Based Parts Tumbler Is A Breeze To Build

A parts tumbler is a great tool to have around. But if you don’t use it all the time, it’s hard to justify dropping hundreds of dollars on one. Fortunately, there are many ways to make your own tumbler while tailoring it to meet the need. Because really, as long as you get the medium moving enough to abrade the parts, you’re good.

[Daniele]’s parts tumbler is cool because it’s fairly easy to make, it’s really quiet, and it does the job quickly. This tumbler moves the medium by using an imbalanced plastic fan, which [Daniele] created by drilling a hole through one of the blades and fastening a short bolt and nut through it. If you’ve ever tried to stop a washing machine from walking away, you may be thinking this is a strange idea, because now he’s got a 4500 RPM vibration machine scuttling about the shop. So really, the true genius of this build lies in the great pains [Daniele] took to absorb all that vibration.

He’s got the fan float-mounted on rubber-lined springs and rubber mats under the washers involved in connecting the latching plastic box to the fan. Our favorite anti-vibration features are the twist-lock power connector and the custom silicone feet made from Motorsil D and cap bolts. We don’t know what the medium is here, but it’s got us thinking Grape-Nuts might work. Blow past the break to chew on the build video.

The only problem with this build is that this type of fan isn’t cheap, and using it this way will definitely shorten its life.

Not a fan of this type of tumbling? Here’s one that takes your drill for a spin.

Continue reading “Fan-Based Parts Tumbler Is A Breeze To Build”

DIY Parts Tumbler Cleans Your Parts Good

Part tumbling is a method of deburring and cleaning relatively small objects. This is done by capturing the parts and media inside a rotating container. The agitation continually moves the media around all surfaces and corners of the part, smoothing them out resulting in a uniform finish. The media can be anything from specialty ceramic shapes to ball bearings to even sand. This process can be done in either a wet or dry condition. Think about the beach, the rocks there are smooth. This is due to the waves repetitively rubbing together the sand and stones which result in smooth round shapes.

[imp22b] recently got into ammo reloading and needed a way to clean his used shell casings. The casings are brass and after a little research online, [imp22b] found that a wet tumbling process with stainless steel pins for media was a DIY proven method for this casing material. He then went on to find a commercially available tumbler to model his build after, in this case a Thumler Model B. There is certainly no need to re-invent the wheel here.

As you can see in the photo, aluminum extrusion was used as the frame. Mounted to the frame are 4 pillow block bearings with shafts between each pair. A motor drives one of the bearing-mounted rods which in turn rotates a container resting on the rods. [imp22b] started with a 1/15 hp motor that he had kicking around but that wasn’t powerful enough so he did have to step up to a 1/3 hp unit. The container is made from off the shelf PVC pipe pieces and holds the media and casings along with some water. A bit of Lemon Shine and Dawn detergents are also added and help clean the parts. After a few hours of tumbling, the casings look pretty darn good.

DIY Parts Tumbler

If you’re interested making your own simpler tumbler, check out this one that uses a hand drill or this one that uses a coffee can.

Unjettisoned Inkjet Turned Tumbler

printer parts tumbler
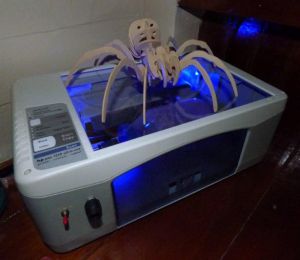
Don’t throw out that old printer! Not that you would, but even if you’ve already scavenged it for parts, you can use the shell and the rollers to make a rock/coin/what-have-you tumbler. If your printer is part scanner, it might end up looking as cool as [th3_jungle_inv3ntor]’s. You’ll have to laser-cut your own arachnid to supervise from above, though.

Somewhere between having an irreparable printer, being inspired by another tumbler, and the desire to make a mancala set for his sister-in-law, [th3_jungle_inv3ntor] was sufficiently motivated to get out his hacksaw and gut the printer. He used the main paper roller and its motor to do the tumblin’, and a smaller roller to help accommodate different jar sizes.

Aside from adding those sweet blue LEDs, he wired in a toggle switch, a speed control pot, and an LM317 to govern the tumbling rate. Unfortunately, the rocks in [th3_jungle_inv3ntor]’s town are too soft and crumbly, so he can’t make that mancala set after all. But hey, (almost) free stuff tumbler.

No dead printers lying around? If you have a drill and a vise, you could always make a tumbler that way, and nothing is compromised but the peaches jar.

A Peach Of A Homemade Parts Tumbler

[Chris] finds the average price of rock tumblers insulting. Almost as insulting, in fact, as prepackaged fruit salad made with Chinese peaches. While there may be little he can do about the peaches, he has given the finger to lapidary pricing by making his own tumbler on the very cheap.

Simply put, he drilled a hole in bottom of the peach vessel and then stuck a threaded rod through it. He held the rod in place with a nut and a washer. After securing the proper permits to source sand and water from his property, he put both in the jar along with some old nails that had paint and crud on them. [Chris] put the rod in the chuck of his drill and clamped the drill in his bench vise. Half an hour later, he had some nice, shiny nails. Make the jump to be amazed and entertained. If you prefer using balls, check out this homemade mill.

Continue reading “A Peach Of A Homemade Parts Tumbler”

Refurbishing A Vibratory Tumbler With A Dryer Motor

vibe

[Jake von Slatt] of the Steampunk Workshop is at again, this time refurbishing a cheap vibratory tumbler that had died after just one project.

The original Eastwood tumbler looked nice, but obviously didn’t go through much life-cycle testing at the company that designed it. Upon taking it apart, [Jake] discovered that the bearings in the motor were shot — after only a few hours of operation! Because of this he decided to start from scratch, keeping only the bowl, lid, and of course, the tumbling media.

[Jake’s] redesign makes use of Volkswagen brake drums for a very heavy duty base, a custom machined ball bearing plate made out of scrap aluminum, a flexible motor coupling made by welding a heavy spring onto two shafts, some more springs to balance the bowl, and a reclaimed dryer motor. It might not look pretty, but we think it’ll last a wee bit longer than the original.

He’s calling it his latest feat of post-apocalyptic engineering by using only parts on hand, and while we’d have to agree that his use of scrap material is impressive, we’d like to see him be able to power his rebuilt Bridgeport Mill off the grid when the apocalypse hits!

As always, he’s made an excellent video describing the project — don’t forget to check it out after the break.

Continue reading “Refurbishing A Vibratory Tumbler With A Dryer Motor”