Perfecting A Bluetooth N64 Controller

Love it or hate it, the Nintendo 64 controller doesn’t seem to be going anywhere. Dedicated fans are still looking for ways to use the unique trilobed controller with modern systems, and they won’t be satisfied until they perfectly replicate the original experience. [Shyri Villar] has been working on perfecting a blend of original and modern hardware that looks very promising.

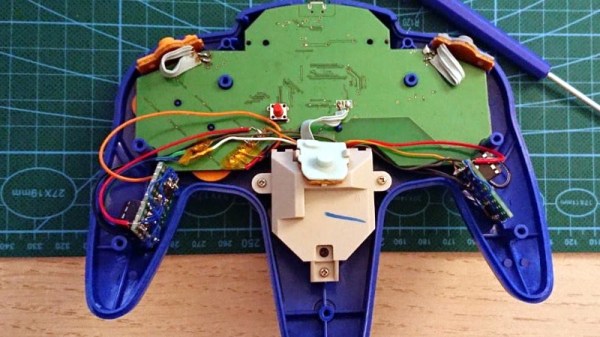
The project started when [Shyri] found that you could take the internals from a modern third party Bluetooth N64 controller made by 8BitDo and put them into the original controller’s case. This would give you the original buttons back, and overall a more authentic weight and feel. Unfortunately, this usually means dumping the original N64 joystick for the 8BitDo’s.

What [Shyri] wanted to do was install the 8BitDo PCB into an original N64 controller, but adapt Nintendo’s joystick to communicate with it. Unfortunately, since the original joystick used optical encoders and the 8BitDo version uses potentiometers, there’s something of a language gap.

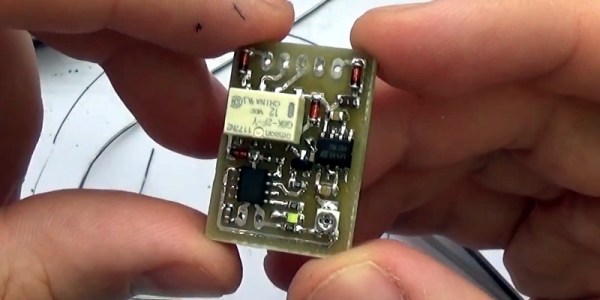
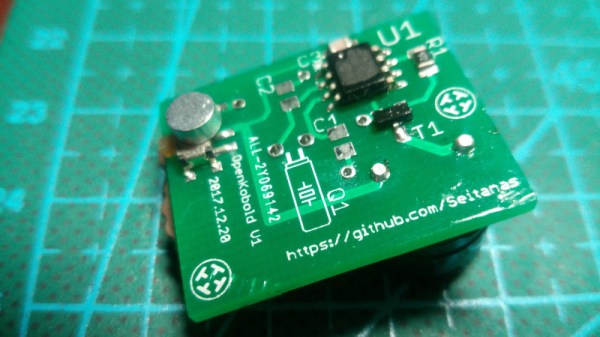
To bridge the divide, both the X and Y dimensions of the joystick get their own PIC12F675 microcontroller and X9C103S digital potentiometer. The microcontrollers read the X and Y values from the original joystick’s encoders, and use the digital potentiometers to provide the 8BitDo with the expected analog input. Right now the electronics are held on two scraps of perfboard tucked into the side “wings” of the controller, but hopefully we’ll see a custom PCB in the future.

If you’re more interested in going back in time with your trusty N64 controller, then you might be interested in learning more about how one hacker managed to hook it up to the MSX.

Headlight Mod For An Audi A3

If you have a car that is getting on in years, it may be missing some of the latest frills and features that the latest models sport. [Muris] has a slightly dated Audi A3 8P which did not have an AUTO setting for the headlights. In the newer models, this feature turns on the headlights when the ambient light falls below a threshold level (overcast conditions or when going through a tunnel), or when the windshield wipers are turned on. The light sensor is integrated behind the rear view mirror in a special mount, requiring an expensive windshield upgrade if he were to opt for the factory retrofit. Instead, he decided to build his own Automatic Headlights Sensor upgrade for his Audi A3.

His local regulations require the car headlights to be on all the time when the vehicle is in motion. So adding this feature may seem moot at first sight. But [Muris] programmed the headlights to be powered at 70% during daytime conditions and switch to 100% when his sensor detects low ambient light conditions. In the power save mode, all of the other non-essential lights (number plate, tail light) are also turned off to hopefully extend their life. He achieved this by using the VCDS (VAG-COM Diagnostic System) – a widely used aftermarket diagnostics tool for VW-Audi Group vehicles. His tiny circuit switches the lights between the two power settings.

His plan was to install the device without disturbing the original wiring or light switch assembly in any way. The low-powered device consists of a PIC micro-controller, an LDR (light dependent resistor) for light sensing and a low current relay which switches between the two modes. Setting the threshold at which the circuit switches the output is adjusted by a variable trimpot acting as a voltage divider with the LDR. [Muris] wired up a short custom harness which let him install this circuit between the default light switch and the car electronics. After switching on power, he has 15 seconds to enable or disable his unit by toggling the light switch five times, and that status gets stored in memory. The tiny board is assembled using SMD parts and is protected with a heatshrink sleeve. The circuit would work equally well with a lot of other cars, so If you’ve got one which could do with this feature upgrade, then [Muris] has the Eagle CAD files and code available for download on his blog.

Check out the video below where he runs a demo, describes his circuit in detail and then proceeds to assemble the PCB without using a vise or a third hand to hold the PCB. That’s a fancy watch he’s sporting at 00:50 s down the video.

Continue reading “Headlight Mod For An Audi A3”

Love Open Source But Hate People? Get OpenKobold

[Tadas Ustinavičius] writes in to tell us of his latest project, which combines his two great loves of open source and annoying people: OpenKobold. Named after the German mythical spirit that haunts people’s homes, this tiny device is fully open source (hardware and software) and ready to torment your friends and family for up to a year on a CR1220 battery.

The design of the OpenKobold is quite simple, and the open source nature of the project makes this an excellent case study for turning an idea into a fully functional physical object.

Beyond the battery and the buzzer module, the OpenKobold utilizes a PIC12F675, a transistor, and a few passive components. This spartan design allows for a PCB that measures only 25 x 20 mm, making it very easy to hide but fiendishly difficult to try to track down later on.

But the real magic is in the software. The firmware that [Tadas] has written for the PIC not only randomizes how often the buzzer goes off, but how long it will sound for. This makes predicting the OpenKobold with any sort of accuracy very difficult, confounding the poor soul who’s searching their home or office for this maddening little device.

Hackers have a long and storied history of creating elaborate pranks, putting the OpenKobold in very good company. From randomly replaying signals from a remote control to building robotic cardboard burglars, we’ve seen our fair share of elaborate pranks from the community.

Adjustable Voltage And Polarity Tester

polarity_tester

Instructables user [Rudolf] wrote in to share a handy little tool he created with ham radio operators in mind. Now and again, he found himself connecting to an unknown power supply, and rather than blow out all his expensive radio gear, he decided to put together a simple polarity and voltage tester that can be easily carried out in the field.

The tester features a pair of powerpole connectors, which are used quite often for connecting HAM gear. A PIC12F675 runs the show, acting as an adjustable comparator for detecting voltage levels. By default, his probe glows amber when the supply voltage is below 11.5V, turning green when the supply is between 11.5V and 15V. When the detected voltage is too high, the built-in LED glows a bright red. When the polarity is reversed, the LED flashes red regardless of the supply voltage.

All of these trigger levels can be set in the PIC’s code, which [Rudolf] is kind enough to include on his page, along with schematics for making your own.

How-to: Program PICs Using Linux

Arguably, Microchip’s PIC microcontrollers do not get enough posts here. One of the drawbacks for some of us is that Linux support for PICs is not very well known. The information is out there, but no one has laid out the process of going from writing C code to programming a chip. Written for Linux users that are familiar with microcontrollers, basic circuits, the C programming language, and can read a datasheet, this how-to should get you up and programming a PIC quickly with Linux.

Continue reading “How-to: Program PICs Using Linux”