Beach Sign

LED Sign Brightens Up The Beach After Dark

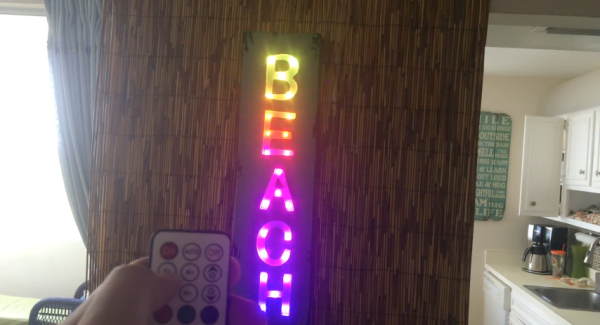
[Warrior_Rocker’s] family bought a fancy new sign for their beach house. The sign has the word “BEACH” spelled vertically. It originally came with blue LEDs to light up each letter. The problem was that the LEDs had a narrow beam that would blind people on the other side of the room. Also, there was no way to change the color of the LEDs, which would increase the fun factor. That’s why [Warrior] decided to upgrade the sign with multi-colored LEDs.

After removing the cardboard backing of the sign, [Warrior] removed the original LEDs by gently tapping on a stick with a hammer. He decided to use WS2811 LED pixels to replace the original LEDs. These pixel modules support multiple colors and are individually addressable. This would allow for a wide variety of colors and animations. The pixels came covered in a weatherproof resin material. [Warrior] baked the resin with a heat gun until it became brittle. He was then able to remove it entirely using some pliers and a utility knife. Finally, the pixels were held in place with some hot glue.

Rather then build a remote control from scratch, [Warrior] found a compatible RF remote under ten dollars. The LED controller was removed from its housing and soldered to the string of LEDs. It was then hot glued to a piece of cardboard and placed into the sign’s original battery compartment. Check out the video below for a demonstration. Continue reading “LED Sign Brightens Up The Beach After Dark”

ArduinoCamera

A Single Pixel Digital Camera With Arduino

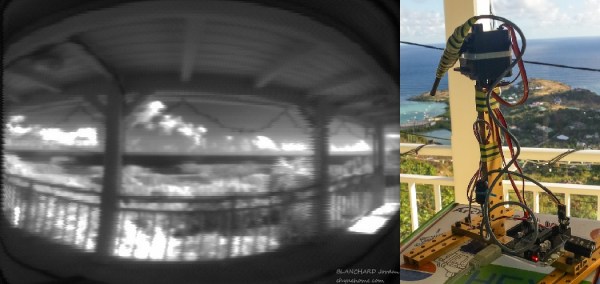
[Jordan] managed to cobble together his own version of a low resolution digital camera using just a few components. The image generated is pretty low resolution and is only in grey scale, but it’s pretty impressive what can be done with some basic hardware.

The heart of the camera is the image sensor. Most consumer digital cameras have tons of tiny receptors all jammed into the sensor. This allows for a larger resolution image, capturing more detail in a smaller space. Unfortunately this also usually means a higher price tag. [Jordan’s] sensor includes just a single pixel. The sensor is really just an infrared photodiode inside of a tube. The diode is connected to an analog input pin on an Arduino. The sensor can be pointed at an object, and the Arduino can sense the brightness of that one point.

In order to compile an actual image, [Jordan] needs to obtain readings of multiple points. Most cameras do this using the large array of pixels. Since [Jordan’s] camera only has a single pixel, he has to move it around and take each reading one at a time. To accomplish this, the Arduino is hooked up to two servo motors. This allows the sensor to be aimed horizontally and vertically. The Arduino slowly scans the sensor in a grid, taking readings along the way. A Processing application then takes each reading and compiles the final image.

Since this camera compiles an image so slowly, it sometimes has a problem with varying brightness. [Jordan] noticed this issue when clouds would pass over while he was taking an image. To fix this problem, he added an ambient light sensor. The Arduino can detect the amount of overall ambient light and then adjust each reading to compensate. He says it’s not perfect but the results are still an improvement. Maybe next time he can try it in color.

LED necklace

IBling Is An LED Display Necklace

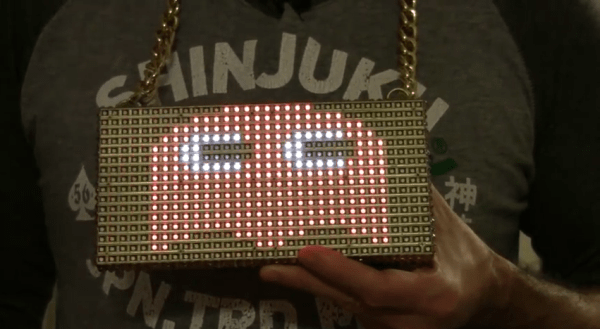
Are you tired of being ignored? Do you want a fashion accessory that says, “Pay attention to me!” If so, you should check out [Al’s] recent instructable. He’s built himself a necklace that includes a display made up of 512 individual LEDs.

This project was built from mostly off-the-shelf components, making it an easy beginner project. The LED display is actually a product that you can purchase for just $25. It includes 512 LEDs aligned in a 16 x 32 grid. The module is easily controlled with a Pixel maker’s kit. This board comes with built-in functionality to control one of these LED modules and can accept input from a variety of sources including Android or PC. The unit is powered from a 2000 mAH LiPo battery.

[Al] had to re-flash the firmware of the Pixel to set it to a low power mode. This mode allows him to get about seven hours of battery life with the 2000 mAH battery. Once the hardware was tested and confirmed to work correctly, [Al] had to pretty things up a bit. Some metallic gold spray paint and rhinestones transformed the project’s cyberpunk look into something you might see in a hip hop video, or at least maybe a Weird Al hip hop video.

The Pixel comes with several Android apps to control the display via Bluetooth. [Al] can choose one of several modes. The first mode allows for pushing animated gif’s to the display. Another will allow the user to specify text to scroll on the display. The user can even specify the text using voice recognition. The final mode allows the user to specify a twitter search string. The phone will push any new tweets matching the terms to the display as scrolling text.

Fail Of The Week: Physical Pixel Display

fotw-physical-pixel-display

This physical pixel display reminds us of a couple of different hacks that we’ve seen over the years. It looks impressive, but [Matt] couldn’t quite get it to work. It wasn’t the Kinect sensor and image interpretation that was the problem. It was a failure to get the hardware components seen above to perform reliably.

If you can’t figure out what this is supposed to do, take at look at the inFORM morphing table or the pixel wall installed at the Hyundai expo last year. [Matt’s] attempt is much more modest with a grid of just 10×6. The pixels themselves are ballpoint pens (he gets bonus points for cheap and easy materials). The pens move in and out thanks to some Bowden cables connected to hobby servos. The mechanical engineers have probably already figured out the fail… the pixels seem to get hung up and despite several revisions in the materials used , it couldn’t be fixed.

The hobby servos were chosen because they are much less expensive than proper linear actuators. We thought maybe [Matt] should build his own solenoids but that’s not a great idea because you can’t have variable depth that way (can you?).  Perhaps the pens should be vertical and the servos could pull on a string attached to the pen via a pulley with gravity to return them to the starting position? There’s got to be an inexpensive and relatively simple way get this thing working. Let us know how you’d get the project back on track by leaving a comment below.


2013-09-05-Hackaday-Fail-tips-tileFail of the Week is a Hackaday column which runs every Wednesday. Help keep the fun rolling by writing about your past failures and sending us a link to the story — or sending in links to fail write ups you find in your Internet travels.

Ambilight Clone Has Meaningful Amount Of Resolution

james-bond-ambilight-clone

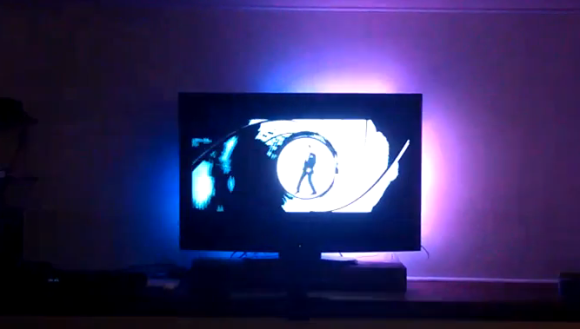
We don’t have an Ambilight clone on our own home theater, but seeing this one in action makes us wonder if we shouldn’t add it to the ever-growing list of projects we need to tackle (right below that POV display we’ve been putting off for years). [Falldeaf] built the colored light augmentation system using a set of WS2801 controlled LED pixels. There are a lot of them, and this results in the ‘meaningful resolution’ we mentioned in the title. The image on the screen is the opening to a James Bond film. You’ll remember that the camera shot down a rifle barrel follows him as he walks across the screen. There’s enough LEDs here to have to the light follow him across the screen as well. This is a nice touch that we don’t see in every Ambilight clone project.

A frame of fake-wood angle bracket holds each LED pixel in place. The entire assembly attaches to the VESA mounting holes on the back of the television. An Arduino addresses the lights while the Boblight package processes the video to acquire the lighting instructions. We think the hue is a bit off, but otherwise it’s a solid offering.

We’re still hoping the Microsoft IllumiRoom becomes a thing.

Continue reading “Ambilight Clone Has Meaningful Amount Of Resolution”

A Clock That Uses Sixty RGB Pixels

OLYMPUS DIGITAL CAMERA

Here’s a project inspired by a highly polished art piece. [Tobias] has been working on his own RGB LED clock which uses one light for each minute in an hour. He was inspired to start the project after seeing the Equinox clock. That one used a little PCB for each LED, and included an acrylic bezel and diffusers for each light. With the advent of LED pixel strings assembling one of these for yourself has become quite a bit easier.

The key part of the project is the laser-cut plywood frame which has a finger between each digit in order to perfectly space the lights. Each pixel is hot glued in place, with the Arduino board which drives them at the center of the frame. These lights are super bright, so [Tobias] also included a light dependent resistor which allows the system to measure ambient light and modulate the pixel brightness accordingly.

There are four parts to his project post so make sure you take some time to click around in order to get all the gritty details.

Three Conceptual Approaches To Driving A WS2811 LED Pixel

driving-a-ws2811

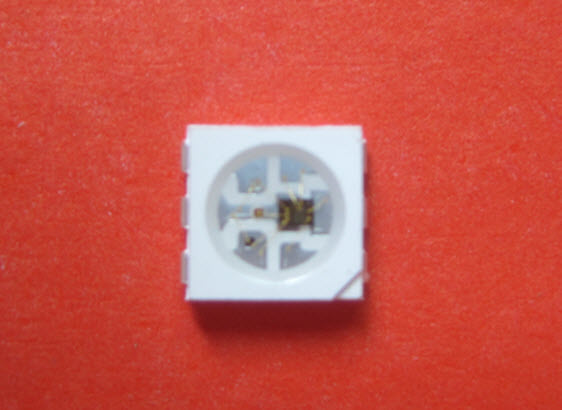
[Cunning_Fellow] published a post with three proof-of-concept approaches to driving a WS2811 LED pixel. We looked at a project early in December that used an AVR microcontroller to drive the RGB package. [Cunning_Fellow] saw this, and even though he doesn’t have any of these parts on hand he still spent the time hammering out ways to overcome the timing issues involved with address the device. His motto is “put up or shut up” when it comes to criticizing projects featured on Hackaday. We love seeing someone pick up an idea and run with it.

The approach in all three cases aims to conserve clock cycles when timing the communications. This leaves the developer as many cycles as possible to perform other tasks than simply telling the lights what to do. One approach is an assembly routine that is just a shade slower but groups all 14 free cycles into one block. The next looks at using external 7400 series hardware. The final technique is good old-fashioned bit banging.

[Photo Credit]