Plastic Welding Revisited

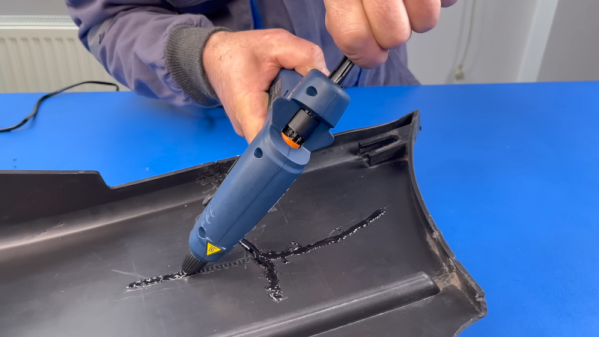
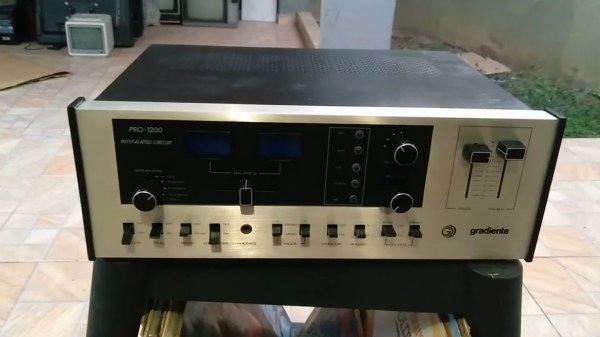
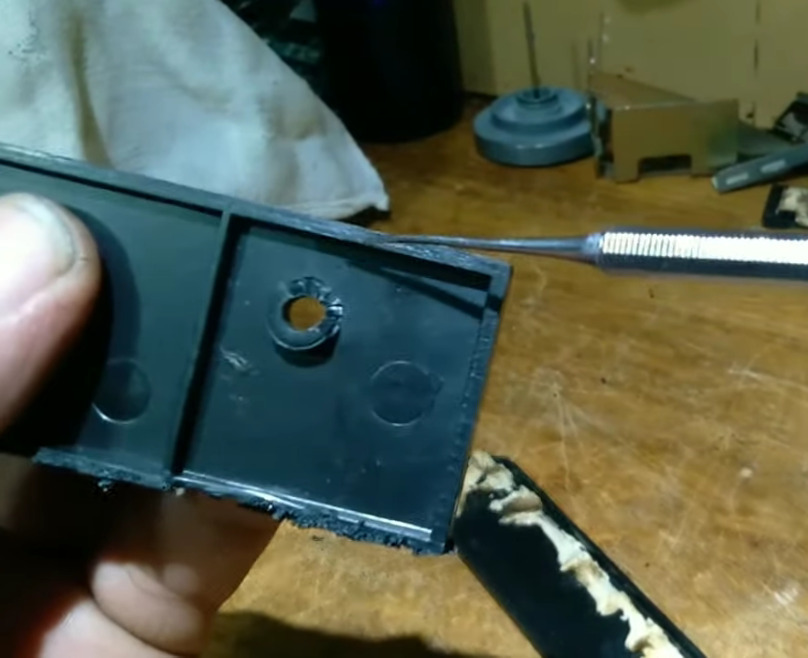
Last time we talked about a video that purported to do plastic welding, we mentioned that the process wasn’t really plastic welding as we understood it. Judging by the comments, many people agreed, but it was still an interesting technique. Now [Inventor 101] has a video about plastic repair that also talks about welding, although — again, we aren’t sure all of the techniques qualify.

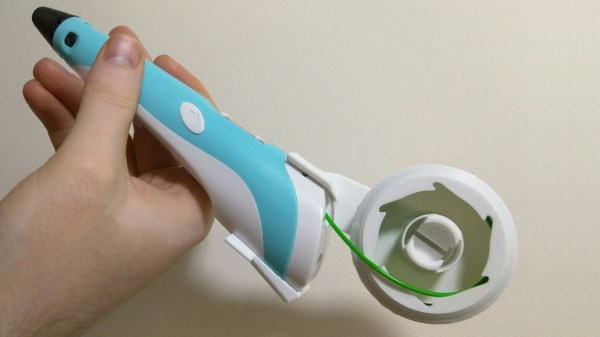
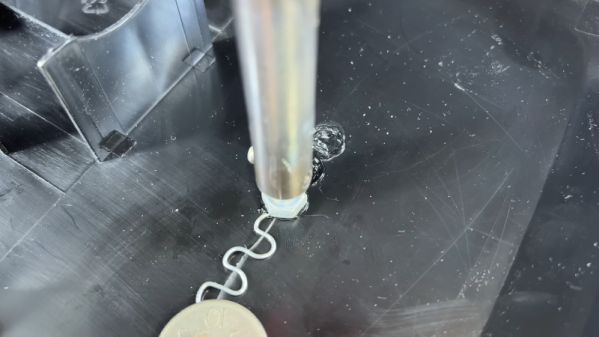
That’s not to say there aren’t some clever ideas, though. There are several variations on a theme, but the basic idea is to use a bolt or something similar in a soldering iron, metal reinforcement from things like wires and staples, and donor plastic from a zip tie. While we don’t think the nylon in a typical zip tie is the best way to repair anything other than nylon, if you were repairing something 3D printed, you could easily swap out the tie for filament of the same material, which — we think — would bond better.

Continue reading “Plastic Welding Revisited”

Zippy Plastic Welding

Plastic welding isn’t a new idea. But a recent video from [The Maker] shows an interesting twist. Given a broken piece of plastic, he secures it together with tape, machines out a channel around the cracks, and then melts zip ties into the channels. Honestly, although he mentions plastic welding and soldering, we aren’t sure this isn’t just simple gluing, but it did give us some ideas. Watch the video below and you’ll probably get the same ideas.

The ingenuity here isn’t necessarily using hot plastic to glue together two pieces — that’s just a hot glue gun, after all. Rather, it occurred to us that the key here was machining out the places where significant amounts of the hot plastic could bond the two pieces together. He cut the channels with a rotary tool, buffed them, and used a hot knife to give them some internal texture. But with a 3D printer, you could build these channels into parts that were made to interlock.

Continue reading “Zippy Plastic Welding”

Drastic Plastic: Enclosure Rebuild Uses Donor Material

Although 3D printers are great, people tend to use them as a universal hammer wherein almost everything becomes a nail that’s just begging to be struck. So as hacker appetites become finicky with the same old fare, it’s refreshing to see an enclosure restoration done in such an old-school fashion. To wit: [Doidão Santos]’ classic repair of the crumbling side fairings on a vintage amplifier.

Yes, instead of designing replacement pieces, printing them, and hiding the layered evidence with paint or an acetone blur, [Doidão] called upon a broken sound system whose chassis bore a relief in the corners similar to that of the amplifier.

After cutting out two matched pieces of donated plastic, [Doidão] taped them together and welded ’em with a soldering iron outfitted with a curved-but-flattened spade tip that looks ideal for this purpose. Although the donor enclosure provided much-needed relief, one corner was lacking in this aesthetic, so [Doidão] cast a little bit of molten plastic using the relief as a mold.

Once the pieces were tacked together, [Doidão] filed them down, sanded them, polished them to a nice shine, and installed them on the amplifier. They look great, and no one will be the wiser. But if we were in [Doidão]’s shoes, we’d tell everyone what we’d done. Be sure to check it out after the break.

Ready for more fantastic plastic resto-hacks? Let us introduce you to [drygol].

Continue reading “Drastic Plastic: Enclosure Rebuild Uses Donor Material”

Commodore SX-64 Keyboard Upgraded From Trash To Treasure

Released in 1984, the Commodore SX-64 Executive Computer was one of the first portable luggable color computers. It cost twice as much as a Commodore 64, had a tiny 5″ diagonal screen, and couldn’t actually support both 5¼” drives as advertised. On the upside, people say it had a slightly better keyboard than its classic cousin.

[Drygol] agreed to restore the keyboard from a friend’s Commodore SX-64 sight-unseen, and boy was this thing in bad shape. Most people would probably consider the condition a shame and write it off as a lost cause, since two of the corners were missing most of their plastic. But [Drygol] isn’t most people. [Drygol] had mad restoration skills to begin with, and this project honed them to a razor’s edge.

Plenty of the other vintage computer restorations [Drygol] has done required plastic welding, which uses heat or a lot of friction to smooth over cracks. Some of those have not stood the test of time, so he’s now in the habit of stabilizing cracks with brass mesh before filling them with fiberglass putty.

The best part is how [Drygol] managed to rebuild the corners using the same methods, soldering the brass mesh at the 90° joins, and reinforcing them with thick copper wire before beginning the painstaking putty/sand/putty process. The use of blank copper clad boards as straight edges and thickness gauges is genius.

There’s a whole lot to learn here, and the adventure beings with something that probably keeps a lot of people from trying stuff like this in the first place: how do you safely remove the badges?

You’re right, plastic welding is awesome. There even used to be a toy plastic welder. But there’s no need to troll the electronic auction bay to give it a try — just use a cheap soldering iron.

3D Printering: Printing Sticks For A PLA Hot Glue Gun

When is a hot glue stick not a hot glue stick? When it’s PLA, of course! A glue gun that dispenses molten PLA instead of hot glue turned out to be a handy tool for joining 3D-printed objects together, once I had figured out how to print my own “glue” sticks out of PLA. The result is a bit like a plus-sized 3D-printing pen, but much simpler and capable of much heavier extrusion. But it wasn’t quite as simple as shoving scrap PLA into a hot glue gun and mashing the trigger; a few glitches needed to be ironed out.

Why Use a Glue Gun for PLA?

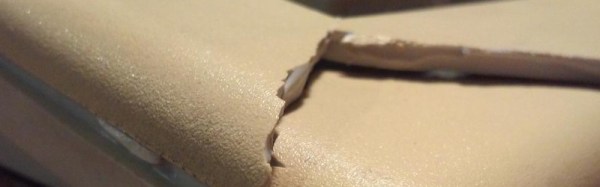
Some solutions come from no more than looking at two dissimilar things while in the right mindset, and realizing they can be mashed together. In this case I had recently segmented a large, hollow, 3D model into smaller 3D-printer-sized pieces and printed them all out, but found myself with a problem. I now had a large number of curved, thin-walled pieces that needed to be connected flush with one another. These were essentially butt joints on all sides — the weakest kind of joint — offering very little surface for gluing. On top of it all, the curved surfaces meant clamping was impractical, and any movement of the pieces while gluing would result in other pieces not lining up.

An advantage was that only the outside of my hollow model was a presentation surface; the inside could be ugly. A hot glue gun is worth considering for a job like this. The idea would be to hold two pieces with the presentation sides lined up properly with each other, then anchor the seams together by applying melted glue on the inside (non-presentation) side of the joint. Let the hot glue cool and harden, and repeat. It’s a workable process, but I felt that hot glue just wasn’t the right thing to use in this case. Hot glue can be slow to cool completely, and will always have a bit of flexibility to it. I wanted to work fast, and I wanted the joints to be hard and stiff. What I really wanted was melted PLA instead of glue, but I had no way to do it. Friction welding the 3D-printed pieces was a possibility but I doubted how maneuverable my rotary tool would be in awkward orientations. I was considering ordering a 3D-printing pen to use as a small PLA spot welder when I laid eyes on my cheap desktop glue gun.

Continue reading “3D Printering: Printing Sticks For A PLA Hot Glue Gun”

Mini Spool System For 3D Printing Pen Tidies Things Up

3D printing pens may be toys to some, but they can be genuinely useful tools to repair 3D prints, rescue a support structure, or weld together different pieces. However, [BManx2000] found that the way the filament simply sticks out of the back of a 3D printing pen like a bizarre tailfeather was troublesome.

The solution? A Mini Spool System for 3D Printing Pens, with which you can use your 3D printing pen to weld together the parts after printing them. The unit holds 1.75mm filament coiled under its own tension in a tidy package that doesn’t interfere with feeding. Since different 3D pens are shaped differently, the interface to the pen is a separate piece that can be modified or changed as needed without affecting the rest of the design.

We’ve seen some interesting innovations with filament holders before, like this entirely 3D printed filament holder, but a mini spool for a 3D pen is definitely a new one.

Broken Plastic? No Problem!

When a computer case has survived several decades from being a new toy through being an unloved relic to being rediscovered and finding its way into the hands of an enthusiast, it is inevitable that it will have picked up some damage along the way. It will be scuffed, maybe cracked, and often broken. If it has faced the ordeal of an international courier after an eBay sale then the likelihood of a break increases significantly.

If you receive a vintage computer in the post and find it cracked or broken, never fear. [Drygol] has a solution, a guide to plastic welding with a soldering iron.

After a thorough cleaning, the technique is to hold the sides of the break together, run the iron along it to melt the plastic together, and scrape the overflowed plastic back into the resulting trench before it solidifies. With careful sanding, a spot of polyester putty, and some spray paint, the broken case can be returned to new condition.

There is a video showing the process, in this case repairing a crack on a Commodore 64 case.

Continue reading “Broken Plastic? No Problem!”