OTA ESP32 GUI Makes Updates Simple

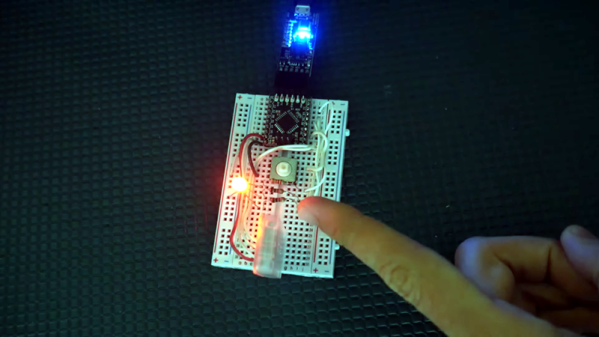
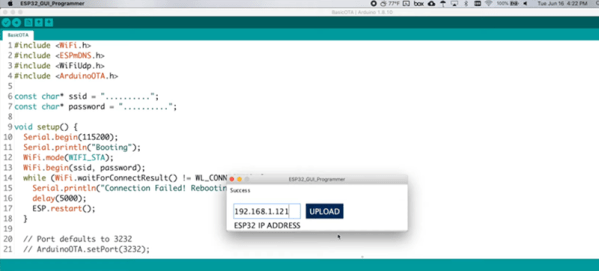
One of the disadvantages of having cheap WiFi-capable boards like those based on the ESP32 is that you have to update them. If you have even a few in every room of your house, it can be a pain to pull them out and connect them to a cable for programming. Over the air programming is a great answer, and [Kevin] shows how you can control the update via a simple GUI. You can see a video demonstration of how it works below.

[Kevin] uses a ready-made OTA library to do the work, but creates a GUI configuration and downloader tool. There is a manual step to force the board into the OTA mode, which might be a mild inconvenience, but it improves security since you need physical access to the device to do an update.

Continue reading “OTA ESP32 GUI Makes Updates Simple”

Arduino Does Multitouch

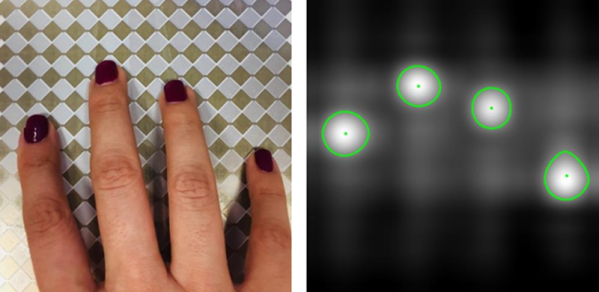
A lot of consumer gadgets use touch sensors now. It is a cheap and reliable way to replace a variety of knobs and switches on everything from headphones to automobiles. However, creating a custom touch controller for a one-off project can be daunting. A recent ACM paper shows how just about any capacitive sensor can work as a multitouch sensor with nothing more than an Arduino although a PC running processing interprets the data for higher-level functions.

The key is that the Arduino excites the grid using PWM and then examines the signal coming out of the grid. Finger poking changes the response quite a bit and the Arduino can sense it using the analog to digital converters onboard. You can find the actual software kit online. The tutorial document is probably more interesting than the ACM paper if you only want to use the kit.

The optimum drive frequency is 10 MHz. The examples rely on harmonics of a lower frequency PWM signal to get there. The analog conversion, of course, isn’t that fast but since your finger touch rate is relatively slow, they treat the signal as an amplitude-modulated input which is very easy to decode.

The sensors can be conductive ink, thread, or copper strips. There are several example applications, including a 3D printed bunny you can pet, a control panel on a sleeve, and an interactive greeting card.

The sensor forms an image and OpenCV detects the actual touch configuration. It appears you can use the raw data from the Arduino, too, but it might be a little harder.

We imagine aluminum foil would work with this technique. If you get to the point of laying out a PCB, this might come in handy.

Hand-Made Drum Carder Gets Wool Ready For Spinning

Making a natural fiber like wool into something useful like a sweater involves a lot of steps. We might be familiar with shearing the sheep, spinning the wool into yarn, or knitting and weaving, but between shearing and spinning there’s another unfamiliar process you’ll have to go through. Known as carding, it helps align the fibers so they are able to be spun, and of course it requires either an expensive tool, or one you build on your own.

This drum carder is exactly what it sounds like. It uses two drums covered in a metal mesh, spinning at different speeds, which pull the fibers into an orderly shape. Small drum carders like this can run around $600 but with some quality wood and a lathe you can easily make one for a fraction. Making the series of drums is fairly straightforward with a lathe, and from there you need to make sure they are connected with a quality belt or chain and then covered in the appropriate metal mesh.

[kris] notes in the reddit comments section that he’d like for a second version to spin a little faster and be a little more durable, but this is a great working carder nonetheless. From there you’ll want to move on to spinning the wool into yarn, which you can do with either a wheel or an electric motor.

Continue reading “Hand-Made Drum Carder Gets Wool Ready For Spinning”

Bluetooth Control With Chrome

All the cool projects now can connect to a computer or phone for control, right? But it is a pain to create an app to run on different platforms to talk to your project. [Kevin Darrah] says no and shows how you can use Google Chrome to do the dirty work. He takes a garden-variety Arduino and a cheap Bluetooth interface board and then controls it from Chrome. You can see the video below.

The HM-10 board is cheap and could connect to nearly anything. The control application uses Processing, which is the software the Arduino system derives from. So how do you get to Chrome from Processing? Easy. The p5.js library allows Processing to work from within Chrome. There’s also a Bluetooth BLE library for P5.

Continue reading “Bluetooth Control With Chrome”

How To Get Started With Fadecandy And LEDs

The internet is awash with millions of stunning LED projects, and for that, we are all very thankful. For those outside the hacker/maker matrix, it can be difficult to know how to approach such a build. Never fear, for [Amy Goodchild] has put together a beginner’s guide to building pretty glowables, using Fadecandy and Processing.

Fadecandy is a platform specifically designed to drive WS2812B LEDs for artistic purposes. This allows users to focus on the visual side of things without getting bogged down with the hassle of selecting the right microcontroller and choosing the applicable libraries. It works great in combination with Processing, a piece of software designed for coders experimenting with visual arts. Through a USB link, any graphics drawn by processing can be mapped to the LEDs attached to the Fadecandy controller.

[Amy] does a great job of explaining how to do everything required, from purchasing the right equipment, through wiring everything up, and then getting it all humming along with the correct software. If you’ve ever wanted to build a big flashy project with a ton of LEDs, this would be a great place to start.

We’ve seen Fadecandy put to good use before, too. Video after the break.

Continue reading “How To Get Started With Fadecandy And LEDs”

Interactive LED Dome Glows With The Best Of Them

With the price and availability of components these days, it’s easier than ever to throw a whole pile of LEDs at a build and get them flashing away. The hard part is doing it well. [Amy Goodchild] is an artist, and has a knack for producing rather beautiful LED projects. The When in Dome installation is no exception.

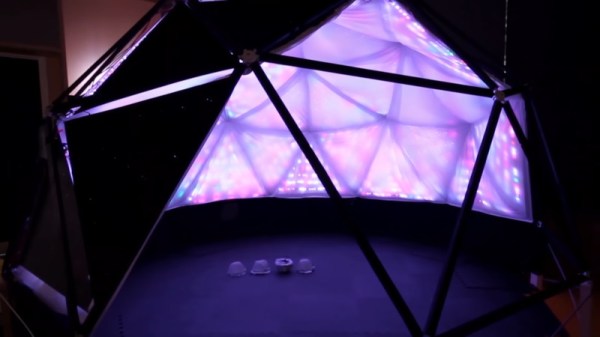
The build is based around a large geodesic dome, fitted with LED panels that glow and react to the occupants inside. Using the Microsoft Kinect as a sensor enables the dome to map out what’s happening in 3D space, and use this data to guide its animations. WS2812B LED strips were used, in combination with a Fadecandy controller along with Processing. This is a powerful combination which makes designing attractive LED effects easier, without forcing users to go to the effort of writing their own libraries or optimizing their microcontroller code.

For those more interested in the dome itself, you’ll be happy to know that [Amy] doesn’t skimp on the details there either. The build actually started as a commercially available kit, though there’s still plenty of manual cutting, screwing, and painting required. She does an excellent job documenting the dome build through a series of videos, and walks the reader through some of the design decisions she made (and would remake, if given the chance).

People love geodesic domes at the best of times; adding an interactive LED installation just takes things to the next level. We’ve seen them used as greenhouses too, and they make a great hackerspace project as well. Video after the break.

Continue reading “Interactive LED Dome Glows With The Best Of Them”

This Robot Barfs Comics!

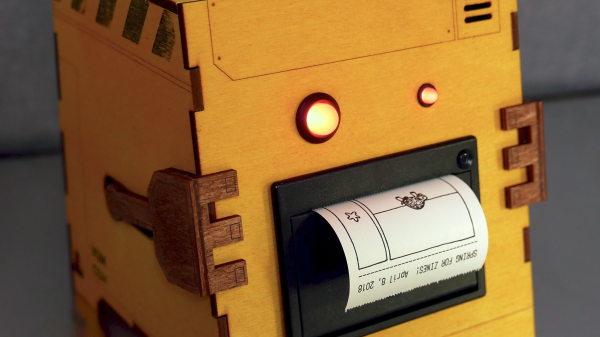
If there’s one thing that’s more fun than a comic, it’s a randomly generated comic. Well, perhaps that’s not true, but Reddit user [cadinb] wrote some software to generate a random comic strip and then built a robot case for it. Push a button on the robot and you’re presented with a randomly generated comic strip from the robot’s mouth.

The software that [cadinb] wrote is in Processing, an open source programming language and “sketchbook” for learning to code if you’re coming from a visual arts background. The Processing code determines how the images are cropped and placed and what kind of background they get. Each image is hand drawn by [cadinb] and has information associated with it so the code knows what the main focus of the image is. Once the panels are created, the final image is passed on to a thermal printer for printing. Everything is controlled from a Python script running on a Raspberry Pi and the code, strip artwork, and case is all available online to check out.

Now that the comic can print, a case is needed for the printer and controls. [cadinb] designed a case in Illustrator after creating a prototype out of foam core. The design was laser cut and then coloured – the main body with fabric dye and the arms stained with coffee!

Now [cadinb] has a robot that can sit on his table at conventions and a fan can press a button and have a randomly generated comic strip printed out before their eyes! We have a neat article about printing a comic on a strand of hair, and one about bringing the Banana Jr. 6000 to life!

Continue reading “This Robot Barfs Comics!”