Laser Z-Axis Table Comes Into Focus

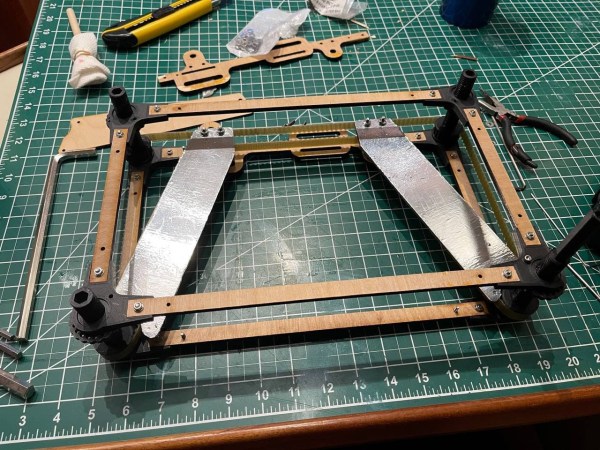
Laser cutters and 3D printers are game-changing tools to have in the workshop. They make rapid prototyping or repairs to existing projects a breeze as they can churn out new parts with high precision in a very short amount of time. The flip side of that, though, is that they can require quite a bit of maintenance. [Timo] has learned this lesson over his years-long saga owning a laser cutter, although he has attempted to remedy most of the problems on his own, this time by building a Z-axis table on his own rather than buying an expensive commercial offering.

The Z-axis table is especially important for lasers because a precise distance from the lens to the workpiece is needed to ensure the beams’s focal point is correctly positioned. Ensuring this distance is uniform over the entire bed can be a project all on its own. For this build, [Timo] started by building a simple table that allowed all four corners to be adjusted, but quickly moved on to a belt-driven solution that uses a stepper motor in order to adjust the entire workspace. The key to the build was learning about his specific laser’s focal distance which he found experimentally by cutting a slot in an angled piece of wood and measuring the height where the cut was the cleanest.

After everything was built, [Timo] ended up with a Z-axis table that is easily adjustable to the specific height required by his laser. Having a laser cutter on hand to bootstrap this project definitely helped, and it also seems to be an improvement on any of the commercial offerings as well. This also illustrates a specific example of how a laser cutter may be among the best tools for prototyping parts and building one-off or custom tools of any sort.

iPod Prototype

IPod, Therefore I Am: Looking Back At An Original IPod Prototype

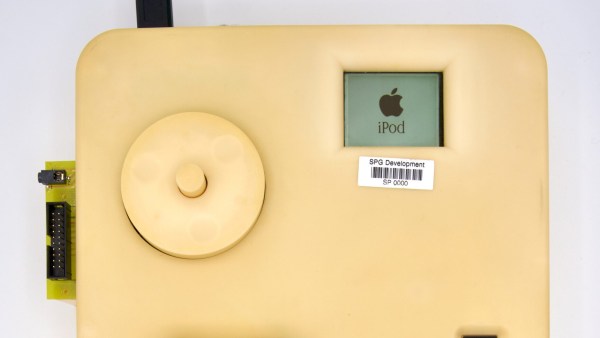
Have you ever wondered what consumer electronics look like when they’re in the ugly prototype stages? So have we. And thanks to [Cabel] of at Panic.com, we have a rare glimpse at a prototype first generation Apple iPod.

In the days before you could just stream your favorite music directly from your phone and into your Bluetooth speaker, pods, or car, there was the Sony Walkman and various portable tape players. Then there were portable CD players. As MP3’s became a popular format, CD players that could play MP3’s on home made CD’s were popular. Some portable digital media players came to market in the mid 1990’s. But in October of 2001, the scene changed forever when Apple unveiled the first generation iPod.

Of course, the iPod didn’t start out being so svelte, shiny, and downright cool. This engineering prototype has been hiding in [Cabel]’s closet for almost 20 years and they’ve just now decided to share with us its hilariously oversized case, JTAG port, and square pushbuttons that look like they came from a local electronics supply house. As [Cabel] brings out in the excellent writeup, the hardware itself is very close to production level, and the date on the prototype is very near the actual product launch.

Of course prototyping is an essential part of building any product, production or otherwise. Having a gander at such pre-production devices like this, or these off-ear speaker prototype for Valve’s VR headset reminds us just how important even the ugliest prototypes can be.

Have you got any pre-production nuggets to share with the world? Be sure to let us know by dropping a note in the Tip Line, and thanks to [jp] who sent this one in!


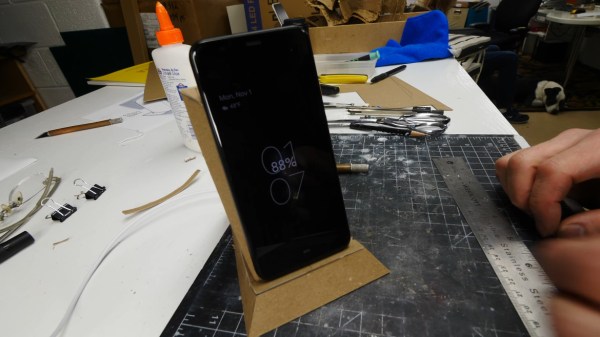
Chipboard prototype of a wireless phone charger with style.

Prototyping Your Way To Better Prototypes

If you’ve ever made a prototype of something before making the “real” one or even the final prototype, you probably already know that hands-on design time can’t be beat. There’s really no substitute for the insight you will glean from having a three-dimensional thing to hold and turn over in your hands for a full assessment. Sometimes you need to prototype an object more than once before investing time, money, and materials into making the final prototype for presentation.

This is [Eric Strebel]’s second video in series about making an eco-friendly wireless phone charger. He made a paper prototype in the first video, and in this follow-up, he refines the idea further and makes a chipboard version of the charger before the final molded paper pulp prototype. The main advantage of the chipboard version is to design the parts so that each one will be easier to pull from its mold in a single piece without any undercuts.

By building the chipboard version first, [Eric] is able to better understand the manufacturing and assembly needs of this particular widget. This way, he can work out the kinks before spending a bunch of time in CAD to create a 3D-printed mold and making the paper pulp prototype itself. He emphasizes that this process is quite different from the 2.5D method of laser-cutting a single piece of chipboard and folding it up into a 3D object like it was a cereal box, which is likely to hide design issues. Be sure to check out the video after the break.

We think this prototype is quite nice-looking, and believe that everything deserves good design. Why should a wireless charger be any different? [Eric] has prototyped in a lot of media, but he seems especially skilled in the art of foam core board. Start with the masterclass and you’ll have a better appreciation for his foam armored vehicle and one of the many ways he smooths out foam parts.

Continue reading “Prototyping Your Way To Better Prototypes”

Industrial Design Hack Chat

Join us on Wednesday, September 8 at noon Pacific for the Industrial Design Hack Chat with Eric Strebel!

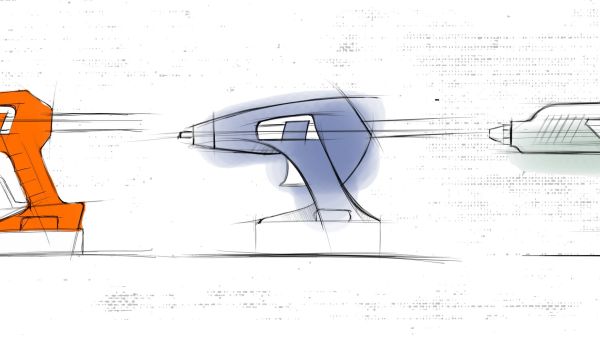
At Hackaday, we celebrate all kinds of hardware hacks, and we try not to judge based on appearance. After all, every product starts out on the breadboard, or as a prototype built with hot glue and tape. What’s important is getting it to work, at least at first. But there comes a time when you’ve got to think about how to make your project look like something people want to use, how to position controls and displays in a logical and attractive way, and how to make sure your thing can actually be built.

Turning a project into a product is the job of an industrial designer. Pretty much everything you use, from the toothbrush by your sink to the car you drive to work in bears the marks of industrial design, some more successfully than others. Eric Strebel has been doing industrial design for years, and he keeps feeding us a steady diet of design tips and tricks through his popular YouTube channel. He’ll stop by the Hack Chat to get a little more in-depth on industrial design principles, and how you can make your projects look as good as they work.

join-hack-chatOur Hack Chats are live community events in the Hackaday.io Hack Chat group messaging. This week we’ll be sitting down on Wednesday, September 8 at 12:00 PM Pacific time. If time zones have you tied up, we have a handy time zone converter.

Differential Drive Doesn’t Quite Work As Expected

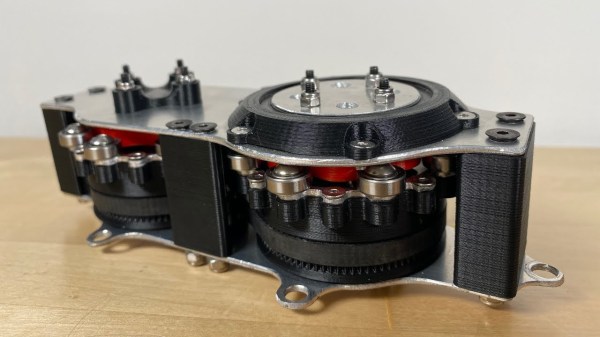
Placing two motors together in a shared drive is a simple enough task. By using something like a chain or a belt to couple them, or even placing them on the same shaft, the torque can be effectively doubled without too much hassle. But finding a way to keep the torque the same while adding the speeds of the motors, rather than the torques, is a little bit more complicated. [Levi Janssen] takes us through his prototype gearbox that attempts to do just that, although not everything works exactly as he predicts.

The prototype is based on the same principles as a differential, but reverses the direction of power flow. In something like a car, a single input from a driveshaft is sent to two output shafts that can vary in speed. In this differential drive, two input shafts at varying speeds drive a single output shaft that has a speed that is the sum of the two input speeds. Not only would this allow for higher output speeds than either of the two motors but in theory it could allow for arbitrarily fine speed control by spinning the two motors in opposite directions.

The first design uses two BLDC motors coupled to their own cycloidal drives. Each motor is placed in a housing which can rotate, and the housings are coupled to each other with a belt. This allows the secondary motor to spin the housing of the primary motor without impacting the actual speed that the primary motor is spinning. It’s all a lot to take in, but watching the video once (or twice) definitely helps to wrap one’s mind around it.

The tests of the drive didn’t go quite as planned when [Levi] got around to measuring the stall torque. It turns out that torque can’t be summed in the way he was expecting, although the drive is still able to increase the speed higher than either of the two motors. It still has some limited uses though as he notes in the video, but didn’t meet all of his expectations. It’s still an interesting build and great proof-of-concept otherwise though, and if you’re not clear on some of the design choices he made there are some other builds out there that take deep dives into cycloidal gearing or even a teardown of a standard automotive differential.

Continue reading “Differential Drive Doesn’t Quite Work As Expected”

What If I Never Make Version Two?

When you make something, what does version one look like? What I mean is, how much thought do you put into the design? Do you try to make it look nice as you go along, or do you just build something that functions and say screw the presentation? Do you try to solve for everything upfront, or just plow through it and promise to fix your mistakes in version two? What if you never make version two?

No matter what you like to make, there’s a first time for everything. And it doesn’t seem to matter if you need the thing you’re making or just want to have it around: it’s a given that version one will probably be a bit rough around the edges. That’s just how it goes. Even if you’re well-versed in a skill, when you try a new type of project or a new pattern, it will be a new experience. For example, I’ve sewn a dozen different purses, but when I took on a new challenge I found I was only somewhat prepared to make my first backpack.

Great is the enemy of good, and perfection is the enemy of progress. Shooting for a pristine prototype on the first go steep and rocky path that never leads to finishing the build. So our goal here is to decide what makes rev1 good enough that we still love it, even if rev2 never happens.

Continue reading “What If I Never Make Version Two?”

Cardboard Models Trace Design Process Of Vintage Tektronix Miniscopes

There aren’t many brands that inspire the kind of passion and fervency among its customers as Tektronix does. The venerable Oregon-based manufacturer of top-end test equipment has produced more collectible gear over the last 75 years than just about anyone else.

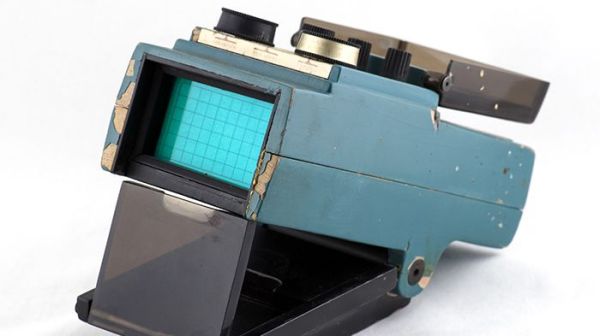
Over that time they have had plenty of innovations, and in the 1970s they started looking into miniaturizing their flagship oscilloscopes. The vintageTEK museum, run by current and former employees, has a review of the design process of the 200 series of portable oscilloscopes that’s really interesting. At a time when scopes were portable in the way a packed suitcase is portable, making a useful instrument in a pocketable form factor was quite a challenge — even for big pockets.

The article goes into great detail on the back-and-forth between the industrial designers, with their endless stream of models, and the engineers who would actually have to stuff a working scope into whatever case they came up with. The models from the museum’s collection are wonderful bits of history and show where the industrial designers really pushed for some innovative designs.

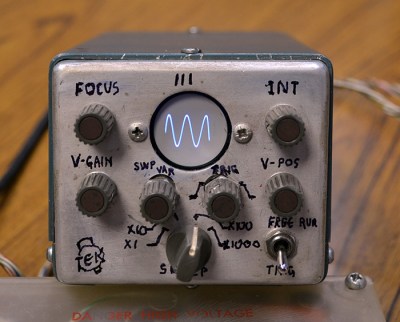
Some of the models are clearly derived from the design of the big bench scopes, but some have innovative flip-down covers and other interesting elements that never made it to production. Most of the models are cardboard, but some were made of aluminum in the machine shop and sport the familiar “Tek blue” livery. But the pièce de résistance of the collection is a working engineering model of what would become the 200-series of miniscopes, a handmade prototype with a tiny round CRT and crudely labeled controls.

The vintageTEK museum sounds like another bucket-list stop for computer and technology history buffs. Tek has been doing things their own way for a long time, and stopping by the museum is sure to be a treat.

Thanks to [Tanner Bass] for the tip.