Paper Punching Machine Looks Like Cute Piece Of Computer History Past

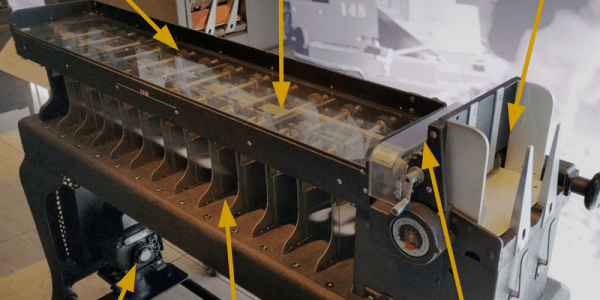
Computing used to run on punch cards. Great stacks of cards would run middling programs, with data output onto more punched cards in turn. [Nii] has built a machine in this vein, capable of punching binary into paper tape. 

The machine is run by a stepper motor, which is charged with feeding the paper tape through the machine in steady steps. A series of vertically-actuated solenoids punch holes in the paper tape as directed. The machine buzzes and clicks away like the best electromechanical computing devices of the mid-century era.

To what end, we couldn’t possibly say. One user noted the machine was punching seemingly random binary into the paper tape, and [Nii] has not provided any explanation as to the machine’s higher purpose. Regardless, whatever it is doing, it looks like it’s doing it well. Feel free to speculate in the comments.

Impressively, the petite device will be demonstrated at MF-TOKYO, the 7th Annual Metal Forming Fair in Tokyo this year. We’re sure the clickity-clack will be muchly appreciated in person.  Video after the break.

Continue reading “Paper Punching Machine Looks Like Cute Piece Of Computer History Past”

I’ll See Your Seven-Segment Mechanical Display And Raise You To 16 Segments

Mechanical multi-segment displays have become quite a thing lately, and we couldn’t be more pleased about it. The degree of mechanical ingenuity needed to make these things not only work but look good while doing it never ceases to amaze us, especially as the number of segments increases. So we submit this over-the-top 16-segment mechanical display (Nitter) for your approval.

The original tweet by [Kango Suzuki] doesn’t have a lot of detail, especially if you can’t read Japanese, but we did a little digging and found the video shown below. It shows a lot more detail on how this mechanism works, as well as some of the challenges that cropped up while developing it. Everything is 3D printed, and flipping the state of each of the 16 segments is accomplished with a rack-and-pinion mechanism, with the pinions printed right into each two-sided cylindrical segment. The racks are connected to pushrods that hit a punch card inserted into a slot in the rear of the display. The card has holes corresponding to the pattern to be displayed; when it’s pushed home, the card activates a mechanism that slides all the racks that line up with holes and flips their segments.

This isn’t the first multi-segment mechanical masterpiece from [Kango Suzuki] that we’ve featured, of course. This wooden seven-segment display works with cams rather than punch cards, but you can clearly see the hoe the earlier mechanism developed into the current work. Both are great, and we’re looking forward to the next segment count escalation in the mechanical display wars.

Continue reading “I’ll See Your Seven-Segment Mechanical Display And Raise You To 16 Segments”

Taking A Walk Down [Computer] Memory Lane

There’s nothing quite like going to a museum and being given a tour by a docent who really knows their way around the exhibits. When that docent has first hand experience in the subject matter, the experience is enhanced even further. So you can imagine our excitement when hacker, maker, and former DEC mainframe memory engineer [Ned Utzig] published a tour of what he calls “Memories of Weird Memories of Computers Past.” [Ned] expertly guides us through each technology, adding flavor and nuance to an already fascinating subject.

The tour begins with early storage media such as IBM punch cards, and then walks us through time to the paper tape, vacuum tubes, and even complex vats of mercury — all used for the sake of storing data either permanently or temporarily.

Next in the exhibit is an impressive CRT hack that isn’t unlike modern DRAM. The tour continues on to ferrite core memory such as that used on mainframes, minicomputers, and even the Apollo Guidance Computer. Each type is examined for its strengths and weaknesses and its place in computing history.

We really appreciated the imaginative question posed toward the end of the article. We won’t give it away here- it’s worth it to go give The Mad Ned Memo a read.

Is obsolete technology your cup of tea? Perhaps an Arduino based experiment with core memory will scratch the itch, or maybe storing data in thin air will bring back memories of computers gone by.

Building A 60s Toy The Way It Should Have Been

The original Hasbro “Think-a-Tron”, a toy from the dawn of the computer revolution, was billed with the slogan, “It thinks! It answers! It remembers!” It, of course, did only one of these things, but that didn’t stop the marketers of the day from crushing the hopes and dreams of budding computer scientists and their eager parents just to make a few bucks. It’s not like we’re bitter or anything — just saying.

In an effort to right past wrongs, [Michael Gardi] rebuilt the 1960s “thinking machine” toy with modern components. The original may not have lived up to the hype, but at least did a decent job of evoking the room-filling computers of the day is a plastic cabinet with a dot-matrix-like display. The toy uses “punch-cards” with printed trivia questions that are inserted into the machine to be answered. A disk with punched holes spins between a light bulb and the display lenses, while a clever linkage mechanism reads the position of a notch in the edge of the card and stops the wheel to display the letter of the correct answer.

[Michael]’s update to the Think-aTron incorporates what would have qualified as extraterrestrial technology had it appeared in the 1960s. A 35-LED matrix with a 3D-printed diffuser and case form the display, with trivia questions and their answer as a QR code standing in for the punch-cards.He also added a pair of user consoles, so players can lock-in and answer before an ESP32-Cam reads the QR code and displays the answer on the LED matrix, after playing some suitable “thinking music” through a speaker.

As usual with [Michael]’s retrocomputing recreations, the level of detail here is fantastic. We especially like the custom buttons; controls like these seem to be one of his specialties judging by his slide switches and his motorized rotary switch.

Continue reading “Building A 60s Toy The Way It Should Have Been”

Servos Do The Plucking In This MIDI Music Box

It started with a cheap, punch-card programmable manual music box. Thirty-one hobby servos later, it ended as an automated MIDI music box, with a short pit stop as a keyboard-driven MIDI device.

If you think you’ve seen the music box in [Mitxela]’s video below before, you’re right. [Martin], musician, inventor, and father of the marvelous marble music machine, took an interest in these music boxes and their programming a while back. Like [Martin], [Mitxela] started his music box project with punch card programming, but he quickly grew tired of the bothersome process, even after automating production with a laser cutter. He decided to do away with the punch cards completely and devised a method to pluck all 30 notes using a few large handfuls of hobby servos. One servo, converted to continuous rotation, spins the drum, with the rest linked to small laser-cut acrylic plectrums via stiff brass wire. The fingers imitate the punched holes passing over the drum and pluck the notes according to MIDI messages. The whole thing can draw quite a bit of current, so in addition to a beefy power supply, [Mitxela] optimized the code to minimize power requirements. This had the happy consequence of reducing the latency enough to allow the music box to be played from a MIDI keyboard in real time.

A lot of work went into this one, but [Mitxela] isn’t resting on his laurels; he has a full slate of improvements that he wants to tackle, not least of which is SD card support for MIDI files to turn this into a jukebox. We’re looking forward to the updates.

Continue reading “Servos Do The Plucking In This MIDI Music Box”

Punch Cards

Before the Commodore 64, the IBM PC, and even the Apple I, most computers took input data from a type of non-magnetic storage medium that is rarely used today: the punched card. These pieces of cardstock held programs, data, and pretty much everything used to run computers in the before-time. But with all of that paper floating around, how did a programmer or user keep up with everything? Enter the punch card sorter and [Ken Shirriff[‘s eloquent explanation of how these machines operate.

Card sorters work by reading information on the punched card and shuffling the cards into a series of stacks. As [Ken] explains, the cards can be run through the machine multiple times if they need to be sorted into more groups than the machine can manage during one run, using a radix sort algorithm.

The card reader that [Ken] examines in detail uses vacuum tubes and relays to handle the logical operation to handle memory and logic operations. This particular specimen is more than half a century old, rather robust, and a perfect piece for the Computer History Museum in Mountain View.

It’s always interesting to go back and examine (mostly) obsolete technology. There are often some things that get lost in the shuffle (so to speak). Even today, punched cards live on in the automation world, where it’s still an efficient way of programming various robots and other equipment. Another place that it lives on is in voting machines in jurisdictions where physical votes must be cast. Hanging chads, anyone?

Continue reading “Punch Cards”

Punch Card Reader For The 10 Types Of People In The World

Punch card data input is so 1890 US Census, right? Maybe not, if your goal is to educate kids about binary numbers and how they can encode characters. In which case, this paper clip and metal tape punch card reader might be just the thing you need.

Built as part of the educational outreach efforts of the MakeICT hackerspace, this project allows kids and adults to play with binary numbers and get some instant feedback. The reader itself is a simple affair of wood and plastic; bent paperclips make contact with a foil tape strip and LEDs show the state of the five input bits. A card is provided to students with spaces for the letters of a word that they want to input, along with a table to translate each letter into a number. Students use a paper punch to encode each character in binary. As the card is pulled through the reader, the letters are spoken by the Pi in turn and the whole word is pronounced at the end.

We’ll no doubt hear quibbles with the decision not to use ASCII for the character set, but we can see the logic in keeping the number of bits to a minimum and not distracting from the learning process. What’s cool about this is that it engages kids on so many levels. They learn about binary numbers, encoding systems, interfacing a computer to the real world, and if they care to delve deeper, they can learn about the code behind everything. It’s a great hook into the hacking arts.

And once the kids learn a thing or two, maybe they can use this punch-card Twitter interface to tweet their new-found knowledge.


Raspberry_Pi_LogoSmall

The Raspberry Pi Zero contest is presented by Hackaday and Adafruit. Prizes include Raspberry Pi Zeros from Adafruit and gift cards to The Hackaday Store!
See All the Entries || Enter Your Project Now!