Raspberry Pi 4 Offers Up 2 GB For The Price Of One

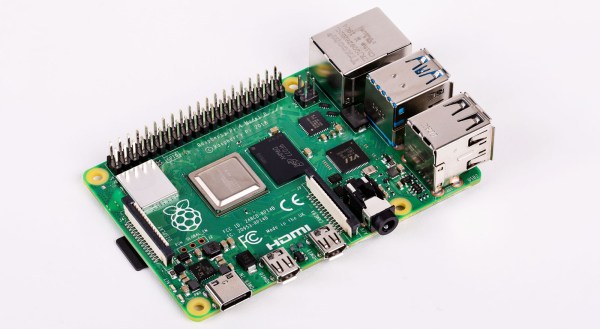
The Raspberry Pi 4 represents a significant performance increase over previous generations, unlocking potential applications that were simply beyond the abilities of these diminutive Single Board Computers (SBCs) in the past. Some would even argue that the Pi 4, with a quad-core Cortex-A72 running at 1.5 GHz, now holds its own as a lightweight ARM desktop computer for those interested in finally breaking free from x86.

In light of the considerable upgrade in processing power, the choice to outfit the base model Pi 4 with just 1 GB of RAM always seemed a bit odd. So it’s little surprise that the Raspberry Pi Foundation has decided to shift things around and lower the price of the 2 GB model to the traditional $35. In a blog post this morning, Eben Upton said that with RAM prices falling over the last year, the company thought it was time they passed the savings onto the customer.

This change comes just two days before the Pi’s 8th birthday. There has been speculation that the Pi 4 is capable of operating with 8 GB of RAM and unveiling that news to coincide with this anniversary would have been a clever marketing move. Alas, it looks like we’ll have to continue to wait.

For those who are invested in the 1 GB model, have no fear. Rather than delete the product from the lineup entirely, the company will be keeping it available for anyone who needs it. So if you’ve got a commercial or industrial application that might not take kindly to the hardware getting switched out, you’ll still have a source of spares. That said, the pricing for the 1 GB model won’t be changing, so there’s no cost advantage to using it in new designs.

Combined with news that compatibility issues the Pi 4 had with generic USB-C power supplies was fixed with an under the radar board revision, it seems there’s never been a better time to upgrade to the latest and greatest version of everyone’s favorite Linux board. Happy Birthday, Raspberry Pi.

A Turing-Complete CPU From RAM

Building a general-purpose computer means that you’ll have to take a lot of use cases into consideration, and while the end product might be useful for a lot of situations, it will inherently contain a lot of inefficiencies. On the other hand, if you want your computer to do one thing and do it very well, you can optimize to extremes and still get results. This computer, built from RAM, is just such an example.

The single task in this case was to build a computer that can compute the Fibonacci sequence.  Since it only does one thing, another part of the computer that can be simplified (besides the parts list) is the instruction set. In this case, the computer uses a single instruction: byte-byte-jump. Essentially all this computer does is copy one byte to another, and then perform an unconditional jump. Doing this single task properly is enough to build every other operation from, so this was chosen for simplicity even though the science behind why this works is a little less intuitive.

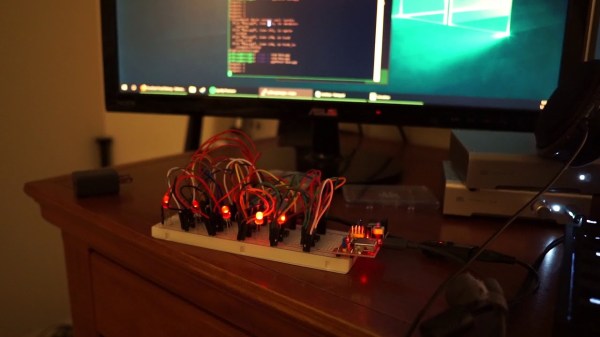
Of course, a single instruction set requires a lot of clock cycles to work (around 200 for a single operation). The hardware used in this build is also interesting and although it uses a Raspberry Pi to handle some of the minutiae, it’s still mostly done entirely in RAM chips, only cost around $15, and is a fascinating illustration of some of the more interesting fundamentals of computer science. If you’re interested, you can build similar computers out of 74-series chips as well.

Spintronic RAM Gets A Little Closer To SRAM

Sometimes it seems as though everything old is new again. The earliest computers used magnetic memory such as magnetic core. As practical as that was compared to making for example each bit of memory be a vacuum tube or relay flip flop, newer technology such as SRAM and DRAM displaced core and similar technologies. However, some of the newest technologies once again use magnetic fields. FRAM or ferroelectric RAM and magnetoresistive or MRAM both use magnetic fields to store data. Now Japanese researchers think they are on track to make MRAM more competitive with traditional RAM chips.

The Tokyo Institute of Technology researchers use new material combinations to make chips that store data based on the spin of electrons — the underlying reason for the way magnets behave. Their recent paper discusses USMR or Unidirectional spin Hall magnetoresistance and using this effect could greatly simplify the construction of MRAM cells.

Continue reading “Spintronic RAM Gets A Little Closer To SRAM”

Steamed Hams Localized Entirely Within A Printed Circuit Board

Maybe you’ve heard of a TV show called The Simpsons. Steamed Hams make a one-gag appearance in an unforgettable luncheon where Principal Skinner poker-faces his way out of a disaster with Superintendent Chalmers. Meanwhile, over on imgur, [Agumander] has put a black and white screencap from Steamed Hams in a printed circuit board.

The memory for this chip is an AT28C64, a 64 kilobit or 8 kilobyte steamed RAM. You call it a steamed RAM despite the fact that it is obviously a ROM. There is no microcontroller on this board or really anything resembling programmable logic. Everything is just logic chips. This board displays a 256×256 1 bit per pixel image over composite video. The sync is generated with the help of a 14MHz crystal and some circuitry taken from the original PONG board. Other than that, it’s just a bunch of NANDs and ORs that roll through the address space of the ROM and spit values out over a composite video port.

The build began by breadboarding everything save for a nifty solderless breadboard power adapter. Three ROM chips were programmed with different images — a cat, something to do with vaporwave, and some guy that looks like the poster from Eraserhead. Everything worked on the breadboard — yes, even at 14 MHz — so the build moved on to a printed circuit board.

The result is fantastic, and should work well on anything with a composite video port. We’re awarding bonus points for putting a socket on the ROM, simply so [Agumander] can change the image without whipping out the desoldering braid. If you need a refresher on Steamed Hams, it’s from the 7th season Simpsons episode ’22 Short Films About Springfield’.

Give Your Raspberry Pi SD Card A Break: Log To RAM

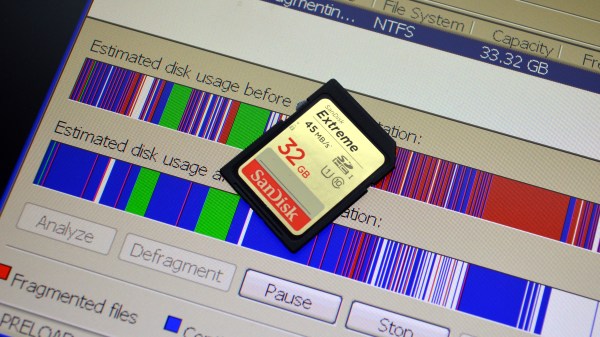
The fragility of SD cards is the weak link in the Raspberry Pi ecosystem. Most of us seem to have at least one Pi tucked away somewhere, running a Magic Mirror, driving security cameras, or even taking care of a media library. But chances are, that Pi is writing lots and lots of log files. Logging is good — it helps when tracking down issues — but uncontrolled logging can lead to problems down the road with the Pi’s SD card.

[Erich Styger] has a neat way to avoid SD card logging issues on Raspberry Pi, he calls it a solution to reduce “thrashing” of the SD card. The problem is that flash memory segments wear out after a fairly low number of erase cycles, and the SD card’s wear-leveling algorithm will eventually cordon off enough of the card to cause file system issues. His “Log2Ram” is a simple Unix shell script that sets up a mount point for logging in RAM rather than on the SD card.

The idea is that any application or service sending log entries to /var/log will actually be writing them to virtual log files, which won’t rack up any activity on the SD card. Every hour, a cron job sweeps the virtual logs out to the SD card, greatly reducing its wear. There’s still a chance to lose logging data before it’s swept to disk, but if you have relatively stable system it’s a small price to pay for the long-term health of a Pi that’s out of sight and out of mind.

One thing we really like about [Erich]’s project is that it’s a great example of shell scripting and Linux admin concepts. If you need more information on such things, check out [Al Williams’] Linux-Fu series. It goes back quite a way, so settle in for some good binge reading.

Hacking 16GB Into An Old PC That Doesn’t Want That Much

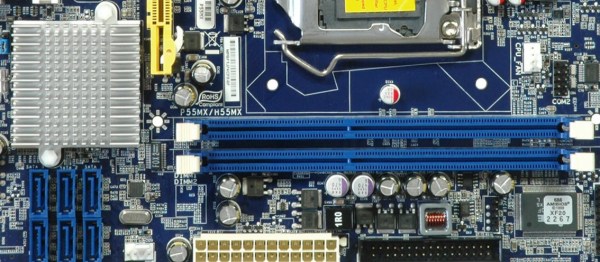
From the title, you might think this post is going to be some lame story about someone plugging in some RAM and maybe updating a BIOS. That’s where you’d be wrong. [Downtown Doug Brown] has a much more interesting and instructive story.

[Doug] found his motherboard was rated for 8 GB maximum and decided he’d make 16 GB of RAM work despite the limitation. He updated the BIOS and it worked — in Linux. He was able to see all the memory and it tested good. If that was it, you wouldn’t be reading about it here. The story gets interesting when he tried to boot Windows 10 and it refused, showing its kinder and gentler blue screen of death. For many people, that would be the end of the story, especially since Windows 10 doesn’t give you much information about why it crashed.

Like so many problems, this one had to be peeled back like an onion. The first thing to do was to change the Windows registry to allow the blue screen to output some technical information that was present in older versions of Windows. The error code indicated that the issue had to do with the BIOS reporting overlapping memory regions.

With some investigating in Linux, whose log files get a lot more BIOS information, [Doug] realized the E820 interface was returning a memory region that conflicted with ACPI’s information. It seems as though the motherboard was reserving space at the top of the 8 GB range for PCI operations which was punching a hole in the system’s (now larger) memory. Turning off a setting in the BIOS fixed the problem, but only because it makes Linux and Windows both see only 4GB of memory. That also wouldn’t be a very interesting story. [Doug] theorized that if he could move the mapping area to the top of the 16 GB range, things would work.

What follows is a great exposition of the Linux tools for reading and changing system information. Did he get it to work? Read the post and find out. But we will tell you that he did manage to have grub patch his system information.

Most of the motherboard hacks we’ve seen relate to hardware, not software. Of course, you could just buy a new motherboard. If you need ideas for what to do with the old one, here you go.

Inefficient NeoPixel Control Solved With Hardware Hackery

Everyone loves NeoPixels. Individually addressable RGB LEDs at a low price. Just attach an Arduino, load the demo code, and enjoy your blinking lights.

But it turns out that demo code isn’t very efficient. [Ben Heck] practically did a spit take when he discovered that the ESP32 sample code for NeoPixels used a uint32 to store each bit of data. This meant 96 bytes of RAM were required for each LED. With 4k of RAM, you can control 42 LEDs. That’s the same amount of RAM that the Apollo Guidance Computer needed to get to the moon!

His adventure is based on the thought that you should be able to generate these signals with hardware SPI. First, he takes a look at Adafruit’s DMA-Driven NeoPixel example. While this is far more efficient than the ESP32 demo code, it still requires 3 SPI bits per bit of NeoPixel data. [Ben] eventually provides us with an efficient solution for SPI contro using a couple of 7400 series chips:

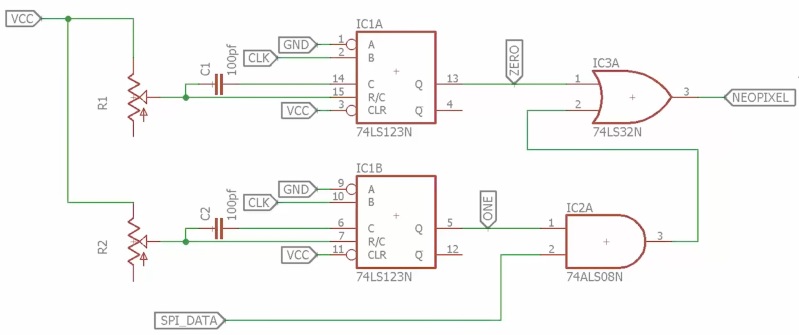
Schematic of SPI to NeoPixel circuit using 74HC123

[Ben]’s solution uses some external hardware to reduce software requirements. The 74HC123 dual multi-vibrator is used to generate the two pulse lengths needed for the NeoPixels. The timing for each multi-vibrator is set by an external resistor and capacitor, which are chosen to meet the NeoPixel timing specifications.

The 74HC123s are clocked by the SPI clock signal, and the SPI data is fed into an AND gate with the long pulse. (In NeoPixel terms, a long pulse is a logical 1.) When the SPI data is 1, the long pulse is passed through to the NeoPixels. Otherwise, only the short pulse is passed through.

This solution only requires a 74HC123, an AND gate, and an OR gate. The total cost is well under a dollar. Anyone looking to drive NeoPixels with a resource-constrained microcontroller might want to give this design a try. It also serves as a reminder that some problems are better solved in hardware instead of software.

Continue reading “Inefficient NeoPixel Control Solved With Hardware Hackery”