A Big 3D Printer Built Using The Power Of Procrastination

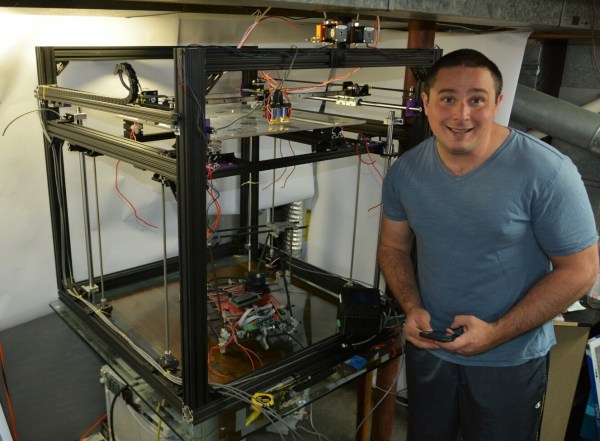
When we wrote about [Dan Beaven]’s resin printer a while back he enthusiastically ensured us that, thanks to the recent wave of attention, he would finally finish the project. That’s why today we are covering his entirely unrelated 2 cubic foot print volume FDM printer. 

As we mentioned, [Dan] is no stranger to 3D printers. His addiction has progressed so far that he needs bigger and bigger parts, but when he looked at the price of printers that could sate his thirst… it wasn’t good. We assume this is the time he decided to leverage his resin printer procrastination to build a massive printer for himself.

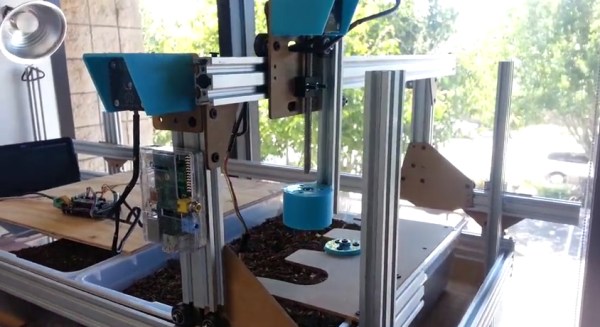
The frame is aluminum extrusion. The bed is an 1/4″ thick aluminum plate supported just a little bit in from each corner. He can use the 4 motors to level the platform, which is a killer feature on a machine this big. More or less it’s fairly standard mechanically.

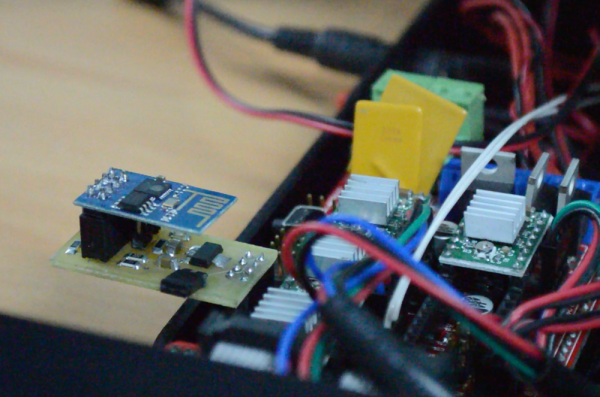
We are interested in his interesting addition of a FLIR thermal sensor to see live heat distribution. We also applaud him on his redundant safety systems (such as a smoke sensor that’s separately powered from the machine).

All the files are available on his site if you’re procrastinating on something and would like one for yourself.

New Part Day: Smoothie For RAMPS

When it comes to 3D printer controllers, there are two main schools of thought. The first group is RAMPS or RAMBo which are respectively a 3D printer controller ‘shield’ for the Arduino Mega and a stand-alone controller board. These boards have been the standard for DIY 3D printers for a very long time, and are the brains for quite a few printers from the biggest manufacturers. The other school of thought trundles down the path of ARM, with the most popular boards running the Smoothie firmware. There are advantages to running a printer with an ARM microcontroller, and the SmoothieBoard is fantastic.

Re-ARM for RAMPS — a Kickstarter that went live this week — is the middle ground between these two schools of thought. It’s a motherboard for RAMPS, but brings the power of a 32-bit LPC1768 ARM processor for all that smooth acceleration, fine control, and expansion abilities the SmoothieBoard brings.

Continue reading “New Part Day: Smoothie For RAMPS”

Hello RAMPS, Meet ESP8266

The proliferation of  DIY 3D printers has been helped in large measure by the awesome open-source RepRap project. A major part of this project is the RAMPS board – a single control board / shield to which all of the other parts of the printer can be easily hooked up. A USB connection to a computer is the usual link of choice, unless the RAMPS board has the SD-Card option to allow the 3D printer to operate untethered. [Chetan Patil] from CreatorBot built a breakout board to help attach either the ESP8266 WiFi or the HC-05 Bluetooth module to the Aux-1 header on the RAMPS board. This lets him stream G-code to the printer and allow remote control and monitoring.

While the cheap ESP8266 modules are the current flavor of the season with Hackers, getting them to work can be quite a hair tearing exercise. So [Chetan] did some hacking to figure out the tool chain for developing on the ESP module and found that LUA API from NodeMcu would be a good start. The breakout board is nothing more than a few headers for the ESP8266, the HC-05 and the Aux-1 connections, with a few resistors, a switch to set boot loader mode and a 3.3V regulator. If you’re new to the ESP8266, use this quick, handy, guide by [Peter Jennings] to get started with the NodeMCU and Lualoader. [Chetan]’s code for flashing on the ESP8266, along with the Eagle board design files are available via his Github repo. Just flash the code to the ESP8266 and you’re ready to go.

One gotcha to be aware of is to plug in the ESP module after the printer has booted up. Otherwise the initial communication from the ESP module causes the printer to lock up. We are sure this is something that can be taken care of with an improved breakout board design. Maybe use a digital signal from the Arduino Mega on the RAMPS board to keep the ESP module disabled for a while during start up, perhaps? The video after the break gives a short overview of the hack.

Continue reading “Hello RAMPS, Meet ESP8266”

CNC Plotter Uses Only The Good DVD Drive Parts

It wasn’t that long ago that wanting to own your own 3D printer meant learning as much as you possibly could about CNC machines and then boostrapping your first printer. Now you can borrow time on one pretty easily, and somewhat affordably buy your own. If you take either of these routes you don’t need to know much about CNC, but why not use the tool to learn? This is what [Wootin24] did when building a 3D printed plotter with DVD drive parts.

Plotters made from scrapped floppy, optical drives, and printers are a popular hand, and well worth a weekend of your time. This one, however, is quite a bit different. [Wootin24] used the drives to source just the important parts for CNC precision: the rods, motors, motors, and bearings. The difference is that he designed and 3D printed his own mounting brackets rather than making do with what the optical drive parts are attached to.

This guide focuses on the gantries and the mechanics that drive them… it’s up to you to supply the motor drivers and electrical side of things. He suggests RAMPS but admins he used a simple motor driver and Arduino since they were handy.

Farmbot Progress

THP Semifinalist: Farmbot

The FarmBot team has been pretty busy with their CNC Farming and Gathering machine. The idea is to automate the farming process with precise deployment of tools: plows, seed injection, watering, sensors, etc. An Arduino with an added RAMPS handles the movement, and a Raspi provides internet connectivity. Their prototype has already experienced four major iterations: the first revision addressed bigger issues such as frame/track stability and simplification of parts. Now they’re locking down the specifics on internet-of-things integration and coding for advanced movement functions.

The most recent upgrade provides a significant improvement by overhauling the implementation of the tools. Originally, the team envisioned a single, multi-function tool head design that carried everything around all the time. Problem is, the tool that’s in-use probably works best if it’s lower than the others, and piling them all onto one piece spells trouble. The solution? a universal tool mounting system, of course. You can see them testing their design in a video after the break.

If the FarmBot progress isn’t impressive enough—and admittedly we’d have called project lead [Rory Aronson] crazy for attempting to pull this off…but he did it—the FarmBot crew started and successfully funded an entire sub-project through Kickstarter. OpenFarm is an open-source database set to become the go-to wiki for all things farming and gardening. It’s the result of [Rory] encountering an overwhelming amount of generic, poorly written advice on plant growing, so he just crowdsourced a solution. You know, no sweat.


SpaceWrencherThe project featured in this post is a semifinalist in The Hackaday Prize.

Continue reading “THP Semifinalist: Farmbot”

Better Lasing With Pulses

laser

The folks at the Lansing, Michigan hackerspace built themselves a 40 Watt laser cutter. It’s an awesome machine capable of cutting plywood and acrylic, and is even powered by a RAMPS board, something normally found in 3D printers. They wanted a little more power out of their 40 Watt tube, though, and found pulsing the laser was the best way to do that.

Unlike the fancy Epilog and Full Spectrum Laser machines, the Buildlog.net 2.x laser cutter found in the Lansing Hackerspace didn’t use Pulse-Per-Inch (PPI) control until very recently. When a laser tube is turned on, the output power of the laser is much higher – nearly double the set value – for a few milliseconds. By pulsing the laser in 2-3 ms bursts, it’s possible to have a higher effective output from a laser, and has the nice added benefit of keeping the laser cooler. The only problem, then, is figuring out how to pulse the laser as a function of the distance traveled.

To do this, the laser cutter must accurately know the position of the laser head at all times. This could be done with encoders, which would require a new solution for each controller board. Since laser cutters are usually driven by stepper motors controlled with step and direction signals, a much better solution would be to count these signals coming from the CNC computer before it goes to the RAMPS driver, and turn the laser on and off as it moves around the bed.

A few tests were done using various PPI settings, each one inch long, shown in the pic above. At 200 PPI, the laser creates a continuous line, and at higher PPI settings, the lines are smoother, but get progressively wider. The difference between PPI settings and having the laser constantly on is subtle, but it’s there; it’s not quite the difference between an axe and a scalpel, but it is a bit like the difference between a scalpel and a steak knife.

It’s an impressive build for sure, and something that brings what is essentially a homebrew laser cutter a lot closer to the quality of cutters costing thousands of dollars. Awesome work.


BeagleBone Black + RAMPS

CRAMPS

The BeagleBone Black, with an impressive amount of computing power and a whole bunch of I/O, would make an impressive CNC controller, save for two shortcomings: The BBB isn’t in stock anywhere, and CNC capes are a little on the pricey side. [Marc Peltier] can’t do anything about finding a distributor that doesn’t have the BeagleBone on backorder for you, but he did come up with an adapter for the very popular RAMPS-FD 3D printer controller board (Forum, French, Here’s the Google translation matrix).

The RAMPS-FD is an extension of the RAMPS board and a shield for the Arduino Due. Both the Due and BBB work on 3.3 V, meaning controlling the RAMPS-FD is simply a matter of finding the correct wiring diagram and pin assignments on the BeagleBone. [Marc] solved this problem by using the settings from the BeBoPr cape and using the existing BeBoPr LinuxCNC configuration.

The end result of [Marc]’s tinkering is something a lot like [Charles Steinkueler]’s CNC capes for the BeagleBone Black we saw at the Midwest RepRap Fest. [Charles] isn’t selling his capes, but no one else seems to be selling BeagleBone Blacks, either.

Continue reading “BeagleBone Black + RAMPS”