CNC Etch-A-Sketch: Stop Motion Is Logical Next Step

It happens to everyone. You get your hands on an Etch-A-Sketch for the first time, and armed with the knowledge of how it works, you’re sure you can draw things other than rectangles and staircases. And then you find out the awful truth: you are not as precise as you think you are, and if you’re [QuintBUILDS], the circles you try to draw look like lemons, potatoes, or microbes.

Okay, yes, this definitely isn’t the first CNC-ified Etch-A-Sketch we’ve seen, but it just might be the coolest one. It’s certainly the most kid-friendly, anyway.

Most importantly, you can still pick it up and shake it to clear the screen, a feature sorely lacking in many of the auto-sketchers we scratch about. And if you’re not fully satisfied by this hack, be sure to check out the stop-motion video after the break that turns this baby into a touch-screen video player for Flatlanders.

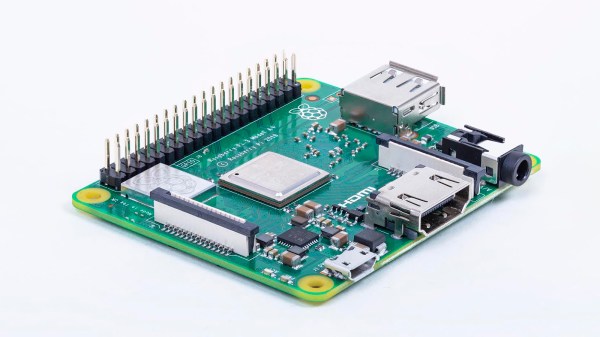
Turn it over and you’ll find a Raspberry Pi 3 and a CNC hat. The knobs are belt-driven from a pair of NEMA-17 size stepper motors that interface to the knobs with tight-fitting pulleys. Power comes from four 18650s, and is metered by a battery management board that provides both overcharge and drain protection. At some point in the future, [QuintBUILDS] plans to move to a battery pack, because the cell holder is electrically unstable.

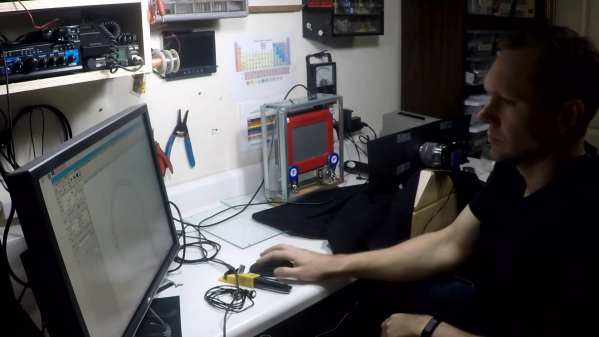
We love the welded frame and acrylic enclosure because they make the thing sturdy and portable. Also, we’re suckers for see-through enclosures. They’re clearly superior if you want to do what [QuintBUILDS] did and take it to an elementary school science fair to show the kids just how cool science can be if you stick with it.

If you don’t think motorized Etch-A-Sketches can be useful, maybe you just haven’t seen this clock build yet.

Continue reading “CNC Etch-A-Sketch: Stop Motion Is Logical Next Step”

Over-Engineered Cat Door Makes Purrfect Sense

On paper, pet doors are pretty great. You don’t have to keep letting the cat in and out, and there should be fewer scratches on the door overall. Unfortunately, your average pet door is indiscriminate, and will let any old creature waltz right in. Well, [Jeremiah] was tired of uninvited critters, so he built a motorized door with a built-in bouncer. Now, only animals with pre-approved BLE tags can get in.

The bouncer is a Raspi 3 running Node-RED, which scans continuously for BLE advertisements from the cats’ collars. [Jeremiah] settled on Tile tags because they’re reliable and cat-proof. The first version used an Arduino and RFID tags for the cats, but they had to get too close to the door to trigger it.

We love [Jeremiah]’s choice of door actuator, a 12V retractable car antenna. [Jeremiah] uses the antenna itself to lift and lower the removable lockout panel that comes with the door. He removed the circuit that retracts the antenna when power is lost, so that power outages don’t become free-for-alls for shelter-seeking animals.

There’s also a nice feature for slow creatures—the door won’t close until 15 seconds after the last BLE ad, so they cats won’t ever have to Indiana Jones it through the opening. Magnetic switches currently limit the door travel at the top and bottom, though [Jeremiah] will eventually replace them with standard switches. Paw at the break until you get a walk-through video.

Cats will be cats, and the ones that go outside will probably rack up a body count. Here’s a cat door that looks for victims clenched between cat jaws and starts a 15-minute lockout period.

Continue reading “Over-Engineered Cat Door Makes Purrfect Sense”

Scratch Built Media Player Channels 1980s Design

No, you aren’t looking at a 30 year old Teac graphic equalizer that somebody modified. The MWA-002 Network Music Player created by [GuzziGuy] is built entirely from new components, and easily ranks up there with some of the most gorgeous pieces of homebrew audio gear we’ve ever seen. Combining modular hardware with modern manufacturing techniques, this 1980s inspired build is a testament to how far we’ve come in terms of what’s possible for the dedicated hacker and maker.

The enclosure, though it looks all the world like a repurposed piece of vintage hardware, was built with the help of a CNC router. It’s constructed from pieces of solid oak, plywood, and veneered MDF that have all been meticulously routed out and cut. Even the front panel text was engraved with the CNC and then filled in with black paint to make the letters pop.

Internally, the MWA-002 is powered by a Raspberry Pi 3 running Mopidy to play both local tracks and streaming audio. Not satisfied with the Pi’s built-in capabilities, [GuzziGuy] is using a Behringer UCA202 to produce CD-quality audio, which is then fed into a TPA3116 amplifier. In turn, the output from the amplifier is terminated in a set of female jacks on the player. Just like the stereo equipment of yore, this player is designed to be connected to a larger audio system and doesn’t have any internal speakers.

The primary display is a 256×64 Futaba GP1212A02A FVD which has that era-appropriate glow while still delivering modern features. [GuzziGuy] says it was more difficult to interface with this I2C display than the LCDs he used in the past due to the lack of available libraries, but we think the final product is proof it was worth the effort. He bought both the VFD spectrum analyzer and LED VU meter as turn-key modules, but the center equalizer controls are completely custom; with dual MCP3008 ADCs to read the state of the sliders and the Linux Audio Developer’s Simple Plugin API (LADSPA) to tweak the Pi’s audio output accordingly.

We’re no strangers to beautiful pieces of audio gear here at Hackaday, but generally speaking, most projects involve modernizing or augmenting an existing device. While those projects are to be admired, the engineering that goes into creating something of this caliber from modular components and raw building materials is really an accomplishment on a whole different level.

Remote ADS-B Install Listens In On All The Aircraft Transmissions With RTL-SDR Trio, Phones Home On Cellular

When installing almost any kind of radio gear, the three factors that matter most are the same as in real estate: location, location, location. An unobstructed location at the highest possible elevation gives the antenna the furthest radio horizon as well as the biggest bang for the installation buck. But remote installations create problems, too, particularly with maintenance, which can be a chore.

So when [tsimota] got a chance to relocate one of his Automatic Dependent Surveillance-Broadcast (ADS-B) receivers to a remote site, he made sure the remote gear was as bulletproof as possible. In a detailed write up with a ton of pictures, [tsimota] shows the impressive amount of effort he put into the build.

The system has a Raspberry Pi 3 with solid-state drive running the ADS-B software, a powered USB hub for three separate RTL-SDR dongles for various aircraft monitoring channels, a remote FlightAware dongle to monitor ADS-B, and both internal and external temperature sensors. Everything is snuggled into a weatherproof case that has filtered ventilation fans to keep things cool, and even sports a magnetic reed tamper switch to let him know if the box is opened. An LTE modem pipes the data back to the Inter, a GSM-controlled outlet allows remote reboots, and a UPS keeps the whole thing running if the power blips atop the 15-m building the system now lives on.

Nobody appreciates a quality remote installation as much as we do, and this is a great example of doing it right. Our only quibble would be the use of a breadboard for the sensors, but in a low-vibration location, it should work fine. If you’ve got the itch to build an ADS-B ground station but don’t want to jump in with both feet quite yet, this beginner’s guide from a few years back is a great place to start.

Grate Design On This Cutting Edge Raspberry Pi Case

Love ’em or hate ’em, you’ve got to hand it to Apple: they really know how to push people’s buttons with design. Their industrial designers can make a product so irresistible – and their marketing team can cannonball the hype train sufficiently – that people will stand in line for days to buy a new product, and shell out unfathomable amounts of money for the privilege.

But what if you’re a poor college student without the budget for such treasures of industrial design? Simple – you take matters into your own hands and stuff a Raspberry Pi into a cheese grater. That’s what a group of engineering students from the University of Aveiro in Portugal called [NeRD-AETTUA] did, in obvious homage to the world’s most expensive cheese grater. The video below for the aptly named RasPro is somewhat less slick that Apple’s promos for the Mac Pro, but it still gets the basics across. Like the painstakingly machined brushed aluminum housing on the Mac, the IKEA cheese grater on the RasPro is just a skin. It covers a 3D-printed chassis that houses a beefy power supply and fan to go along with the Raspberry Pi 3. There’s also a speaker for blasting the tunes, which seems to be the primary use for the RasPro.

All things considered, the cheese grater design isn’t really that bad a form factor for a Pi case. If that doesn’t appeal, though, take your pick: laser-cut plywood, an Altoids tin, or even inside your PC.

Continue reading “Grate Design On This Cutting Edge Raspberry Pi Case”

Portable Pi Teensy Thumboard

Even on the go, there is no substitute for a physical keyboard with buttons that move and click. Sure, you could solder a bunch of tactile switches to some perfboard, but how about going all out and making something robust as [Anthony DiGirolamo] did for his Teensy Thumboard. Everything is insertion-mount so it is an approachable project for anyone who knows the dangerous end of a soldering iron, and that also makes it easy to hack on.

Each pin of the Teensy has an adjacent empty hole tied to it for easy access, and the serial data pins are exposed at the top of the board. All the holes use standard 0.1″ (2.54mm) spacing. The I/O points used by the keyboard are labeled, and the rest of them can use the space under the controller where proto-board style holes add some extra space for an IMU or whatever sensors suit your slant.

Most impressive is the shell, which is freely available on Thingiverse, where you can also find a bill of materials with links to everything you will need in case you don’t have drawers full of those tactile switches.

If this looks familiar, you have probably seen the PocketCHIP, and it is no secret that this project is an homage to that versatile pocket computer. We appreciate this kind of love for PocketCHIP, especially since they are now a limited commodity.

The Smaller, More Powerful Raspberry Pi 3 Model A+

It’s that time of year again, and the Raspberry Pi Foundation has some new hardware for you. This time, it’s an improved version of the Raspberry Pi Model A, bringing it the speed and power of its bigger brother, the Raspberry Pi Model 3 B+.

The Raspberry Pi Model A is the weird middle child of the Raspberry Pi lineup, or maybe it’s the Goldilocks choice. It’s not as powerful and doesn’t have the USB ports or Ethernet jack found in the latest revision of the family, the Raspberry Pi Model 3 B+, and it’s not as small or as cheap as the Raspberry Pi Zero W. If you’re running a Pi as just something that takes in power and spits out data on the GPIO pins, the Model A might be all you need.

The full specs include:

  • Broadcom BCM2837B0 Cortex A-53 running at 1.4GHz
  • 512 MB of LPDDR2 SRAM
  • 2.4 GHz and 5 GHz 802.11 b/g/n/ac wireless LAN, Bluetooth 4.2/BLE
  • Full size HDMI
  • MIPI DSI display port / CSI camera port
  • Stereo Output and composite video port

In short, we’re looking at a cut-down version of the Raspberry Pi Model 3 B+ released earlier this year, without an Ethernet port and only one USB port. The wireless chipset is hidden under a lovely embossed can, and until we get our hands on this new model and a pair of pliers, we’re assuming this is a CYW43455, the Cypress chipset found in the Pi 3 B+.

The price of the Raspberry Pi 3 Model A+ will be $25 USD, with availability soon at the usual retailers. Since there’s no such thing as a Pi Zero 3 yet, if you’re looking for a powerful Linux computer, with wireless, in a small form factor, you’re not going to do much better than this little guy. You could of course desolder a Pi 3 B+, but for now this is the smallest, most powerful single board computer with good software support.