Playing Audio On The Pi Pico With No DAC To Speak Of

Normally, if you want to play music or other audio on a microcontroller, you need to get yourself a DAC. Or at least, that’s the easiest way to go about it and the one most likely to get you good, intelligible audio. You don’t have to go that way, though, as [antirez] demonstrates.

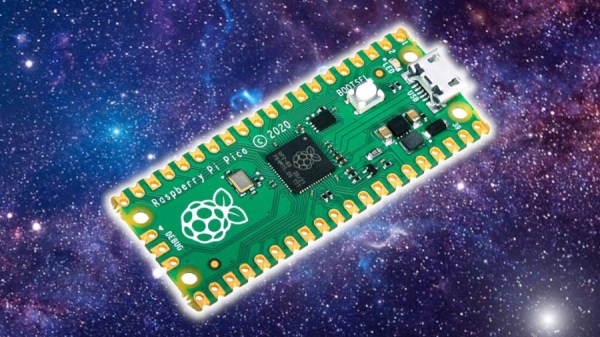
[antirez] decided to do this with a Pi Pico, but it’s applicable to other microcontrollers too. It’s all done with a single pin and a PWM output. The PWM output is set to a very high frequency beyond human hearing. In this case, it was 100 KHz. Then, the duty cycle of the PWM is changed to essentially output various average voltage levels at the pin. Vary the output voltage as per your desired sound file by using each sample to vary the duty cycle of the PWM. Voila! You can output whatever sound you want on that pin! [antirez] steps through the basics of doing this, including processing simple WAV files into a raw format that can be dumped into MicroPython code.

There’s no sound sample on the project page, and we’d have to assume it sounds pretty crunchy when hooked up to a speaker. And yet, it could prove a useful technique if you’re designing your own audio greeting cards or something, so keep that in mind!

Your Cat Needs Its Own TV

Cats are wonderful creatures to have around, and they provide us with hours of entertainment. So why not do a little something to entertain them in return? That’s exactly what [Becky Stern] did by making a cat TV that shows YouTube videos of birds and other cat-approved content. Not all cats seem to care about TV, but [Becky]’s cat Benchley really gets into it.

As you may have guessed, this is a fairly simple build, consisting largely of a Raspberry Pi, a speaker, and a screen — a 5″ HDMI LCD display to be exact. Seems like a nice size for cats. After getting the cat-puter up and running, [Becky] set about designing a 3D-printed enclosure to turn it into a TV. The first draft looked great in marble-effect filament, but lacked breathing holes for the Pi, so the final version has a nice honeycomb pattern that is too small for curious cat paws to fit through.

What their paws can do is accidentally pause the video via the touch screen, so [Becky] swapped the USB cable for a charge-only to prevent this. Be sure to check out the build video after the break, because there is plenty of cat cuteness to be had. [Benchley] was so into it that he went looking around back for cats and squirrels inside the box.

Would you rather not encourage your cats to lie about the house watching TV all day? Make them play piano for their dinner.

Continue reading “Your Cat Needs Its Own TV”

Raspinamp: It Really Replicates Questionable Activities Involving Llamas

In the late 90s as MP3s and various file sharing platforms became more common, most of us were looking for better players than the default media players that came with our operating systems, if they were included at all. To avoid tragedies like Windows Media Center, plenty of us switched to Winamp instead, a much more customizable piece of software that helped pave the way for the digital music revolution of that era. Although there are new, official versions of Winamp currently available, nothing really tops the nostalgia of the original few releases of the software which this project faithfully replicates in handheld form.

The handheld music player uses a standard Raspberry Pi (in this case, a 3B) and a 3.5″ TFT touchscreen display, all enclosed in a clear plastic case. With all of the Pi configuration out of the way, including getting the touchscreen working properly, the software can be set up. It uses QMMP as a media player with a Winamp skin since QMMP works well on Linux systems with limited resources. After getting it installed there’s still some configuration to do to get the Pi to start it at boot and also to fit the player perfectly into the confines of the screen without any of the desktop showing around the edges.

Although it doesn’t use the original Winamp software directly, as that would involve a number of compatibility layers and/or legacy hardware at this point, we still think it’s a faithful recreation of how the original looked and felt on our Windows 98 machines. With a battery and a sizable SD card, this could have been the portable MP3 player many of us never knew we wanted until the iPod came out in the early 00s, and would certainly still work today for those of us not chained to a streaming service. A Raspberry Pi is not the only platform that can replicate the Winamp experience, though. This player does a similar job with the PyPortal instead.

Continue reading “Raspinamp: It Really Replicates Questionable Activities Involving Llamas”

Thumbs Up To This Pico MIDI Kalimba

The kalimba, or thumb piano, is an easy way to make some music even if you have next to no idea what you’re doing. The only real downside is that they are limited to the twinkly sounds of metal tines being plucked by thumbs.

[Jeremy Cook] broke the sonic possibilities wide open by converting a couple of kalimbas into capacitive-touch MIDI instruments using the Raspberry Pi Pico. He started with a small one that is curiously made of solid wood. Usually these instruments are at least partially hollow to allow air to resonate inside the body.

After soldering up all the 1 MΩ resistors necessary to utilize the capacitive touch capabilities of the Pico, [Jeremy] found it a bit difficult to play individual notes on such a small instrument, so he made version two out of a much larger specimen.

This time, [Jeremy] cooked up a custom PCB which he is calling the Pico Touch 2, which adds the necessary resistors at the SMD level for capacitive touch sensing and in turn cleans up the wiring a bit. Be sure to check it out in action after the break.

Okay, so you don’t have an iota of musical talent. You could always build a kalimba that plays itself.

Continue reading “Thumbs Up To This Pico MIDI Kalimba”

RGB LED Disco Ball Reacts To Sound And Color

Although disco music and dancing may be long dead, the disco ball lives on as a staple of dance parties everywhere. [Tim van de Vathorst] spent a considerable amount of time reinventing the disco ball into something covered with RGB LEDs that reacts to sound and uses a color sensor to change hue based on whatever it’s presented with.

[Tim] started by modeling the disco ball after a soccer ball with a mixture of pentagons and hexagons. Then it was off to the laser cutter to cut it out of 3mm plywood sheets. Once assembled, [Tim] added LED strips across all the faces and wired them up. Then it was time to figure out how to hold the guts together inside of the ball. Back to the drawing board and laser cutter [Tim] went to design a simple two-piece skeleton to hold the Raspberry Pi and the power supply.

In order to do some of the really interesting effects, [Tim] had to make sure that the faces were divvied up correctly in code. That was difficult and involved a really big array, but the result looks worth the trouble. Finally, [Tim] covered the ball in white acrylic to diffuse the LEDs. As you will see in the build/demo video after the break, the ball turned out really well. The only real problem is that the camera doesn’t work very well without light, which is something good parties are usually short on. [Tim] might add a spotlight or something in the future.

Do you prefer the mirrored look of the standard disco ball? Peep the tiny one in this Disco Containment Unit.

Continue reading “RGB LED Disco Ball Reacts To Sound And Color”

render of the Amiga juggler demo

The Juggler: In Rust

Back on the theme of learning to program by taking on a meaningful project — we have another raytracing demo — this time using Rust on the Raspberry Pi. [Unfastener] saw our previous article about writing a simple raytracer in spectrum BASIC and got inspired to try something similar. The plan was to recreate the famous juggler 3D demo, from the early days of 3D rendering on the Amiga.

The juggler story starts with an Amiga programmer called [Eric Graham] who created ssg, the first ray tracer application on a personal computer. A demo was shown to Commodore, who didn’t believe it was done on their platform, but a quick follow-up with the actual software used soon quelled their doubts. Once convinced, they purchased the rights to the demo for a couple of thousand dollars (in 1986 money, mind you) to use in promotional materials. [Eric] developed ssg into the popular Sculpt 3D, which became available also on Mac and Windows platforms, and kick-started a whole industry of personal 3D modelling and ray tracing.

Anyway, back to the point. [Unfastener] needed to get up the considerable Rust learning curve, and the best way to do that is to let someone else take care of some of the awkward details of dealing with GUI, and just concentrate on the application. To that end, they use the softbuffer and winit Rust crates that deal with the (important, yet frankly uninteresting) details of building frame buffers and pushing the pixels out to the window manager in a cross-platform way. Vecmath takes care of — you guessed it — the vector math. There’s no point reinventing that wheel either. Whilst [Unfastener] mentions the original Amiga demo took about an hour per frame to render, this implementation runs in real-time. To that end, the code performs a timed pre-render to determine the most acceptable resolution to get an acceptable frame rate, achieving a respectable 30 or so frames per second on a Pi 5, with the older Pis needing to drop the resolution a little. This goes to show how efficient Rust code can be and, how capable the new Pi is. How far we have come.

We saw another interesting rust-based raytracer a while back, which is kinda fun. We’ve also covered rust in other applications a few times, like inside the Linux kernel. Finally here’s our guide to getting started with rust, in case you need any more motivation to have a crack at this upcoming language.

Cheap Microscope Can Take Amazing Images With Some Simple Upgrades

[Birdbrain] is trying to make their own microfluidic devices. To aid in this quest, they need a quality microscope to see what they’re doing. Instead of buying one outright, they purchased a cheap microscope and upgraded it to do the job instead.

Usability and performance is greatly improved over the stock unit, which was really only fit for learning purposes.

The cheap education-grade microscope cost around $50 USD, had few features, and wasn’t much chop out of the box. The worst part was the sample stage — which was poorly adjustable in the up-and-down axis and could only track about two centimeters up and down. There was no X or Y axis panning either, and it lacked a proper condensor iris, too. Oh, and the included camera module had a resolution of just 240p.

To fix these problems, the microscope was first outfitted with a fully redesigned X-Y-Z stage built out of old components from a salvaged DVD drive and an additional NEMA stepper motor. Camera-wise, it was hooked up with a 2K Raspberry Pi Camera Module 3 running at 10 to 15 frames per second, which broadcasts video over a local network for easy viewing on an external monitor. It also gained an epi-illumination setup for doing reflected light microscopy.

If you’re eager to build a quality microscope with all the controls you personally dream of, this could be a relevant project for you to study. We’ve featured some other builds along these lines before, too. Video after the break.

Continue reading “Cheap Microscope Can Take Amazing Images With Some Simple Upgrades”