Hackaday Prize Entry: A Raspberry Pi Project

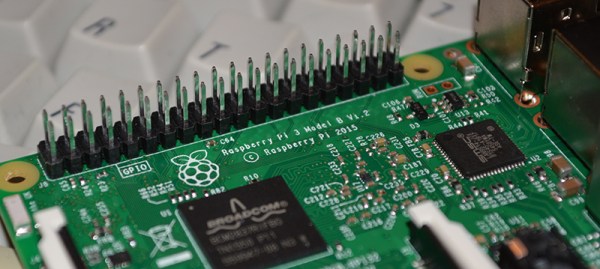
There’s no piece of technology that has been more useful, more influential on the next generation of sysadmins and engineers, and more polarizing than the Raspberry Pi. For $35 (or just $5), you get a complete single board computer, capable of running Linux, and powerful enough to do useful work. For the 2016 Hackaday Prize, [Arsenijs] has created the perfect Raspberry Pi project. It’s everything you expect a Pi-powered project to be, and more.

While the Raspberry Pi, and the community surrounding the Raspberry Pi, get a lot of flak for the relatively simple approach to most projects which are effectively just casemods, critics of these projects forget the historical context of tiny personal computers. Back in the early ‘aughts, when Mini ITX motherboards were just being released, websites popped up that would feature Mini ITX casemods and nothing else. While computers stuffed into an NES, an old radio, or the AMD logo are rather banal projects today, I assure you they were just as pedestrian 15 years ago as well. Still, the creators of these Mini ITX case mods became the hardware hackers of today. It all started with simple builds, a Dremel, and some Bondo.

[Arsenijs] takes his Raspberry Pi project a bit further than a simple casemod, drawing influence from a Raspberry Pi smartphone, a Raspberry Pi security system, a Portable Raspberry Pi, and a Raspberry Pi wrist computer. These are all excellent projects in their own right, but [Arsenijs] is putting his own special twist on the project: he’s using a Raspberry Pi, and a few Raspberry Pi accessories.

While this project is first and foremost a Raspberry Pi project, [Arsenijs] isn’t limiting himself to the platform with the Broadcom chip. The team behind this Raspberry Pi project was busy porting the project to Odroid when the Banana Pi came out. This changed everything, a refactor was required, and then the Orange Pi was announced. Keeping up with technology is hard, and is a big factor in why this Raspberry Pi project hasn’t delivered yet. You can say a lot of things about the Raspberry Pi foundation, but at least their boards make a good attempt at forward compatibility.

Already [Arsenijs]’ Raspberry Pi project is one of the more popular projects on Hackaday.io, and is in the running for being one of the most popular projects in this year’s Hackaday Prize. Whether that popularity will translate into a minor win for this year’s Hackaday Prize remains to be seen, but it seems for [Arsenijs] that doesn’t matter; he’s already on the bleeding edge of Raspberry Pi projects.

The HackadayPrize2016 is Sponsored by:

Don’t Take Photos Of Your Arduino 101 Either, It’s Light Sensitive

Wafer level chips are cheap and very tiny, but as [Kevin Darrah] shows, vulnerable to bright light without the protective plastic casings standard on other chip packages.

We covered a similar phenomenon when the Raspberry Pi 2 came out. A user was taking photos of his Pi to document a project. Whenever his camera flash went off, it would reset the board.

[Kevin] got a new Arduino 101 board into his lab. The board has a processor from Intel, an accelerometer, and Bluetooth Low Energy out of the box while staying within the same relative price bracket as the Atmel versions. He was admiring the board, when he noticed that one of the components glittered under the light. Curious, he pulled open the schematic for the board, and found that it was the chip that switched power between the barrel jack and the USB. Not only that, it was a wafer level package.

So, he got out his camera and a laser. Sure enough, both would cause the power to drop off for as long as the package was exposed to the strong light. The Raspberry Pi foundation later wrote about this phenomenon in more detail. They say it won’t affect normal use, but if you’re going to expose your device to high energy light, simply put it inside a case or cover the chip with tape, Sugru, or a non-conductive paint to shield it.

EDIT: [Kevin] also tested it under the sun and found conditions in which it would reset. Videos after the break.

Continue reading “Don’t Take Photos Of Your Arduino 101 Either, It’s Light Sensitive”

An Open Source Lead Tester

If you’ve ever needed an example of colossal failure of government actors, you need only to look at Flint, Michigan’s water crisis. After the city of Flint changed water supplies from Detroit to the Flint river, city officials failed to add the correct corrosion inhibitors. This meant that lead dissolved into the water, thousands of children were exposed to lead in drinking water, a government coverup ensued, [Erin Brockovich] showed up, the foreman of the Flint water plant was found dead, and the City Hall office containing the water records was broken into.

Perhaps inspired by Flint, [Matthew] is working on an Open Source Lead Tester for his entry into the 2016 Hackaday Prize.

[Matthew]’s lead tester doesn’t test the water directly. Instead, it uses a photodiode and RGB LED to look at the color of a lead test strip. These results are recorded, and with a bit of a software backend, an entire city can be mapped for lead contamination in a few days with just a few of these devices.

One problem [Matthew] has run into is the fact the Pi does not have analog to digital conversion, making reading a photodiode a little harder than just plugging a single part into a pin header and watching an analog value rise and fall. That really shouldn’t be a problem – ADCs are cheap, especially if you only need a single channel of analog input with low resolution. [Matthew] is also looking into using the Pi webcam for measuring the lead test strip. There are a lot of decisions to make, but any functional device that comes out of this project will be very useful in normal, functioning governments. And hopefully in Flint, Michigan too.

The HackadayPrize2016 is Sponsored by:

USB-less WiFi For The Pi Zero

Since the introduction of the Raspberry Pi Zero, the hacker, maker, and hobbyist electronics world has been thrown into turmoil. ‘The Raspberry Pi Foundation is corrupt,’ the detractors said, ‘and the Pi Zero is just a marketing ploy to get their name out.’ Others chimed in that the Raspberry Pi Zero doesn’t even exist. Despite what a million monkeys on a million keyboards say, the Raspberry Pi Zero does exist and is very cool, despite how limited it is. There’s only one USB port, but that doesn’t mean you can’t have WiFi. [ajlitt] came up with a WiFi hat for the Pi Zero that goes right through the GPIO pins, and shouldn’t cost more than a few dollars to implement on any Raspberry Pi.

There is no Ethernet port on the Pi, and apart from a single USB OTG port, no apparent high-speed interfaces to the outside world. On the other hand, there’s a few things hidden deep down in the SoC on the Pi including two MMC controllers. One of these controllers is used for the SD card, but the second can be broken out on a few GPIO pins. By tapping into those pins and configuring the kernel just right, SDIO is available on the GPIO pins, giving the Pi WiFi through a cheap ESP8266 module.

We’ve seen [ajlitt]’s work on SDIO devices on the Pi before, but he’s slowly been reworking this build with the Pi Zero in mind. It didn’t begin as a project for the Hackaday Prize, but already it’s one of the more popular entries so far. Of course there are thousands of projects on Hackaday.io that aren’t entered into the Hackaday Prize this year, and if you’re behind one of those, this is your call to step up.

The HackadayPrize2016 is Sponsored by:

Introducing The Raspberry Pi 3

TL;DR: The Raspberry Pi 3 Model B is out now. This latest model includes 802.11n WiFi, Bluetooth 4.0, and a quad-core 64-bit ARM Cortex A53 running at 1.2 GHz. It’s a usable desktop computer. Available now at the usual Pi retailers for $35.

News of the latest Raspberry Pi swept around the Internet like wildfire this last weekend, thanks to a published FCC docs showing a Pi with on-board WiFi and Bluetooth. While we thank the dozens of Hackaday readers that wrote in to tell us about the leaked FCC documents, our lips have been sealed until now. We’ve been doing a few hands-on tests with the Pi 3 for about two weeks now, and the reality of the Pi 3 is much cooler than a few leaked FCC docs will tell you.

The Raspberry Pi 3 Model B features a quad-core 64-bit ARM Cortex A53 clocked at 1.2 GHz. This puts the Pi 3 roughly 50% faster than the Pi 2. Compared to the Pi 2, the RAM remains the same – 1GB of LPDDR2-900 SDRAM, and the graphics capabilities, provided by the VideoCore IV GPU, are the same as they ever were. As the leaked FCC docs will tell you, the Pi 3 now includes on-board 802.11n WiFi and Bluetooth 4.0. WiFi, wireless keyboards, and wireless mice now work out of the box.

Continue reading “Introducing The Raspberry Pi 3”

Raspberry Pi Zero – Programming Over USB

Raspberry Pi Zero – Turning The Pi Into A USB Gadget, Over USB

[gbaman] has figured out a simpler way to program the new Raspberry Pi Zero over USB without modifying the board. Why is this useful? One example which appealed to us was setting the Zero’s USB port up as a mass storage device. Imagine plugging in your Pi powered robot, dragging and dropping a Python script into the mass storage device that shows up, and pressing a button on the robot to run the new script. Pretty fancy for $5.00.

You can get the PI to emulate a whole range of devices from a USB MIDI controller to a simple USB serial interface. We’re excited to see what uses people come up with. Unfortunately the Pi Zero is still out of stock most everywhere as we wait for the next production run to finish. Though if you’ve got one, why not check out a few of our thoughts and experiences with the device!

[gbaman] based his work off the work done by [Dave-0] and others over at the Raspberry Pi forums. [LadyAda] also has a version of this hack, which we covered, that involves soldering a header to the pi and using a UART adapter.

[via Hacker News]

Yet Another Pi Zero USB Hub

The Raspberry Pi Zero was back in stock at Adafruit this week – for about eight minutes. That means a few more people get Pi Zeros, many more will put them up on eBay, and everyone is working on their own version of a Pi Zero USB hub. The latest version of a Pi Zero hub comes from [Nate], and he’s doing this one right. His Pi USB adapter adds four USB ports and features not found in other DIY USB hubs like fuses and ESD protection.

As with other Pi Zero USB hub add-ons, this build relies on a USB hub controller, a few passives, and not much else. The chip used in this hub is the FE1.1s chip, a highly integrated 4-port hub controller that can be found through the usual Chinese resellers. This hub controller doesn’t require much, just a 12MHz crystal, a few passives, and four USB jacks.

Of particular interest is how [Nate] is connecting this hub to the Pi Zero. He’s left the option open for using either a USB cable, or soldering the USB’s differential pairs directly between the Pi and the hub. In either case, the hub should work, and with the addition of the zeners, fuses, and other parts that keep the hub from frying itself, [Nate] might have a very nice project on his hands.