A Bright Idea For Reflow Soldering

There are almost as many ways to reflow a surface-mount circuit board as there are hackers. Today, we add another method to the list. [Dasaki] converted a halogen floodlight into an SMT oven, and did so with all the bells and whistles. Check the video below the break.

We’ve actually seen the low-tech version of this hack before, but it’s nothing we would want to use on a daily basis. [Dasaki] needed to get 100 boards done, so it was worth the effort to get it right.

Continue reading “A Bright Idea For Reflow Soldering”

An Hour To Surface Mount

Most of us have made the transition from through hole parts to surface mount. There are lots of scattered tutorials, but if you want to learn some techniques or compare your technique to someone else’s, you might enjoy [Moto Geek’s] hour-long video on how he does surface mount with reflow soldering. You can see the video below.

What makes the video interesting is that it is an hour long and covers the gamut from where to get cheap PCBs, to a homebrew pick and place pencil. [Moto Geek] uses a stencil with solder paste, and he provides links to the materials he uses. Continue reading “An Hour To Surface Mount”

Reflow Soldering At Another Level

We’re used to reflow soldering of our PCBs at the hacker level, for quite a few years people have been reflowing with toaster ovens, skillets, and similar pieces of domestic equipment and equipping them with temperature controllers and timers. We take one or two boards, screen print a layer of solder paste on the pads by using a stencil, and place our surface-mount components with a pair of tweezers before putting them in the oven. It’s a process that requires  care and attention, but it’s fairly straightforward once mastered and we can create small runs of high quality boards.

But what about the same process at a professional level, what do you do when your board isn’t a matchbox-sized panel from OSH Park with less than 50 or so parts but a densely-packed multilayer board  about the size of a small tablet computer and with many hundreds of parts? In theory the same process of screen print and pick and place applies, but in practice to achieve a succesful result a lot more care and planning has to go into the process.

This is being written the morning after a marathon session encompassing all of the working day and half of the night. I was hand-stuffing a row of large high-density boards with components ranging from 0402 passives to large QFPs and everything else in between. I can’t describe the board in question because it is a commercially sensitive prototype for the industrial customer of the friend I was putting in the day’s work for, but it’s worth going through the minutiae of successfully assembling a small batch of prototypes at this level. Apologies then, any pictures will be rather generic.

Continue reading “Reflow Soldering At Another Level”

Tools Of The Trade – Reflow

In our previous issues in this series on making circuit boards, we covered placing solder paste and placing components. Now it’s time to bake our cake!

There are a variety of methods for reflowing a circuit board, but they all rely on a single principle: heat up the solder paste (a mixture of flux and solder) until the flux burns off and the solder becomes liquid, and then cool it down. Accomplishing this once or twice is easy; once you’ve played with a hot plate you’ll swear off through hole. Scaling it up and doing it repeatedly with high yield is extremely challenging, though. Continue reading “Tools Of The Trade – Reflow”

PTC Heaters For Reflow Soldering

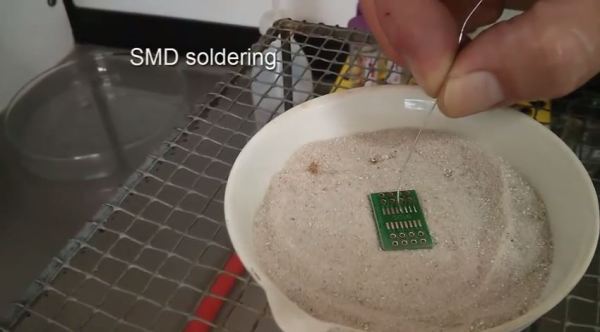
Reflow soldering – setting components on a PCB in blobs of solder paste and heating the whole assembly at once to melt all joints simultaneously – has been the subject of many ingenious hacks. Once it was the sole preserve of industrial users with specialist microprocessor-controlled ovens, now there are a myriad Arduino-controlled toaster ovens, hot air blowers, and hotplates that allow hackers and makers to get in on the reflow act too.

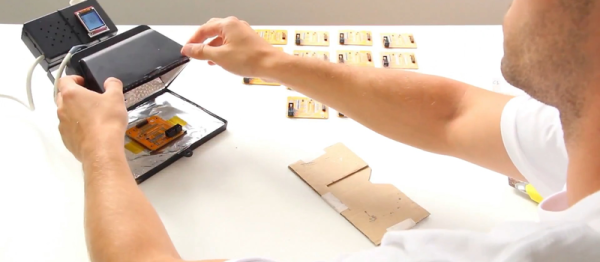
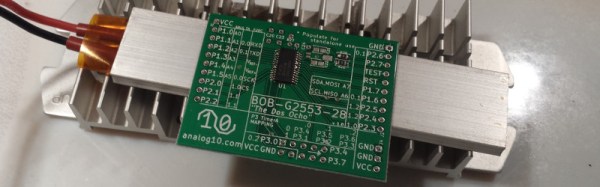
This morning a fresh idea in the reflow soldering arena has come our way. It’s not the most earth-shattering, but it does have some advantages so is worth a second look. [Analog Two] has successfully used a PTC heating element as a reflow soldering hotplate.

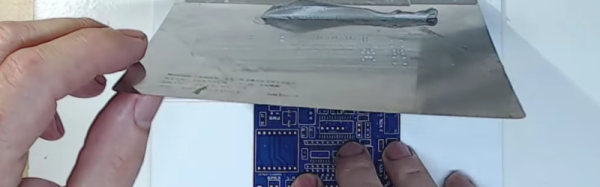
PTC heating elements are thermistors with a positive temperature coefficient. As their temperature rises, so does their electrical resistance. By careful selection of materials they can be manufactured with a sharp increase in resistance at a particular temperature. Thus when an electrical current is passed through them they heat up until they reach that temperature, then the current decreases as the resistance goes up, and they do not heat beyond that point. Thus as heaters they are intrinsically self-regulating. From our point of view they have another advantage, they are also cheap. Fitted as they are to thousands of domestic heating products they are readily available, indeed [Analog Two] found his on Amazon.

The heater chosen was a 200W 110V model with a temperature of 230 Celcius to match the solder he was using. They are also available for other mains voltages, and even at 12 and 24V for automotive applications. He reports that the time to reflow was about 90 seconds.

We’ve mentioned the advantages of this heater as its price and regulated temperature. Looking at the pictures though a disadvantage is its size. This is a reflow plate for small boards. There are larger PTC heater elements available though, it would be interesting to hear people’s experiences reflowing with them.

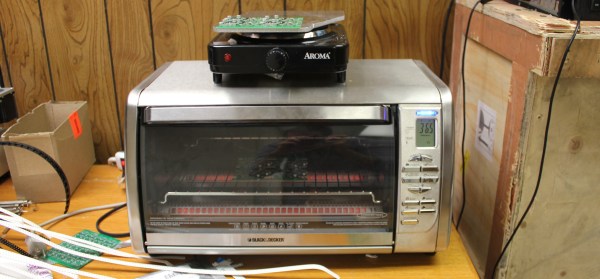
Hotplates for reflow soldering have featured before a few times here at Hackaday. We recently had this tiny plate, but we’ve also had a PID-controlled plate, and an Arduino-controlled domestic hotplate. We’re sure this is an avenue with further to go.

An Open Source Cortex-M0 Halogen Reflow Oven Controller With LCD

reflow oven controller

Homemade reflow ovens are a great inexpensive way to quickly solder multiple prototypes at once. [Andy] may just have built one of the best ones we’ve featured so far on Hackaday. For his project a £25 1300W 12litre halogen oven was chosen because of its low cost and fast heating time, the latter being required to follow typical reflow profile ramp-up stages.

To control the AC power [Andy] first bought a chinese Fotek Solid State Relay (SSR) on ebay, which was quickly replaced by an american one after reading concerning reports on the internet. He then made the same ‘mistake’ by buying the typical MAX6675 thermocouple-to-digital converter from the same website, as he spent much time understanding why the measurements were wrong when the IC was just defective. His final build is based around a 640×360 TFT LCD that he previously reverse engineered, the cortex-M0 STM32F051C8T7, a SPI flash, some power regulators and buttons. The firmware was written in C++ and we’ll let our readers visit [Andy]’s page to see how well  his oven performs.

SMD Soldering On… Hot Sand?

Need to do some SMD soldering? No tools? No problem! Here’s a creative method that could be a handy tool to add to your belt: SMD soldering using hot sand.

[Oliver Krohn] recently released this little video demonstrating how to perform re-flow soldering using hot sand. He’s using a bunsen burner to heat up a ceramic pot of sand to use as a kind of hot plate. It seems to work pretty well, and it’s a very unique way of doing it — if you wanted to get a bit more technical, you could also throw a temperature probe in the sand to get a much finer heat control!

Of course there are lots of other ways of doing re-flow soldering, like using a re-purposed toaster oven, frying up some circuits on a skillet after you’ve had your bacon, or if you want to be fancy, you could even build your own toolkit for it!

Anyway, stick around for the epic video of SMD soldering on hot sand.

Continue reading “SMD Soldering On… Hot Sand?”