Pandemic Gives Passersby A Window On Cyborg Control

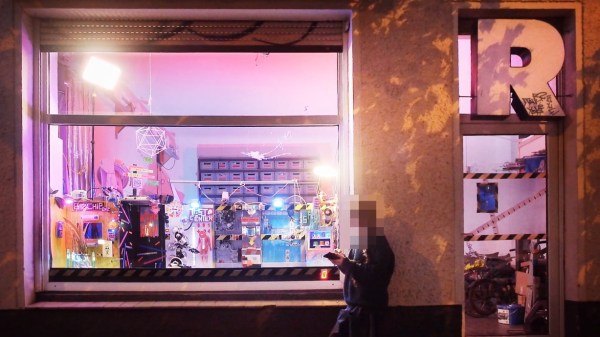
What’s this? Another fabulous creation from [Niklas Roy] and [Kati Hyyppä] that combines art and electronics with our zeitgeist and a lot of recycled bits and bobs? You got it. Their workshop in eastern Berlin used to be a retail shop and has a large display window as a result. This seems perfect for a pair of artists in a pandemic, because they can communicate with the community through the things they display in the window. Most recently, it was this interactive cyborg baby we are choosing to call Cybaby.

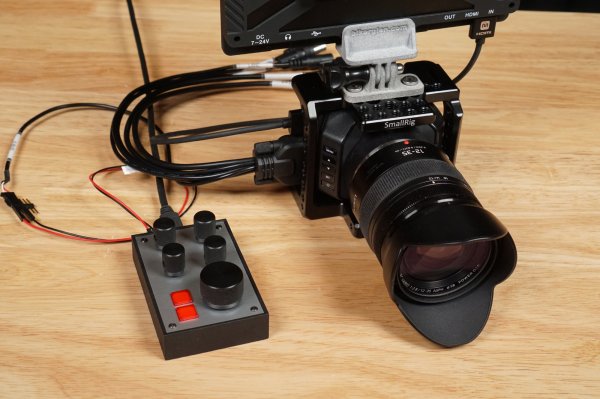
You might recognize Cybaby as one of the very hackable Robosapien robots, but with a baby doll head. (It also has a single red eye that really pulls its look together.) In the window, Cybaby comes alive and toddles around against a backdrop that grew and evolved over several weeks this spring and summer. Passersby were able to join the network and control Cybaby from outside with their smartphone to make it walk around, press various buttons that change its environment, and trigger a few sensors here and there. Robosapien has been around for about 20 years, so there is already Arduino code out there that essentially simulates its R/C signals. [Niklas] and [Kati] used a NodeMCU (ESP12-E) to send pulses to the IR input of the robot.

Back on the zany zeitgeist front, there’s a hair salon, a convenience store, and a nightclub for dancing that requires a successful trip through the testing center first (naturally). Oh, and there’s a lab next door to the nightclub that can’t be accessed by Cybaby no matter what it tries or how it cries. Check it out after the break.

There’s a dearth of Robosapien posts for some reason, so here’s what [Niklas] and [Kati] had in their window before the World of Cybaby — a really cool pen plotter that prints out messages sent by people walking by.

Continue reading “Pandemic Gives Passersby A Window On Cyborg Control”

Litter Buggies Haul Trash Off The Beach

There is a depressing amount of trash in our oceans, and a lot of it is washes up on beaches. [Glenn Morris] has turned collecting all this trash into a favourite pastime, using a series of custom radio-controlled Litter Buggies to haul the load.

The most basic versions of these buggies are off the shelf RC rock crawlers, usually a Traxxas TRX-4, with a basket mounted in place of the body. However, [Glenn] has developed the buggies far beyond that, making extensive use of 3D printing to create purpose-built trash haulers. He has created several frame systems to hold removable baskets, buckets, lights and tools. Most of the buggies use lithium power tool batteries to allow quick swapping, and the electric motors, ESCs and gearing is selected for low speed and high torque. Since the buggies spend a lot of time exposed to salt water, almost all the steel hardware on the chassis are replaced with stainless steel. To allow for one handed control, [Glenn] attached 3D printed levers to the steering knobs of the standard RC controllers, allowing steering to be done with his thumb.

We really like what [Glenn] has been doing with these buggies, and think they might be a good platforms for adding some autonomous capabilities. Add a smartphone for target following or obstacle avoidance, or some solar panels and a GPS autopilot system.

Continue reading “Litter Buggies Haul Trash Off The Beach”

An OSHW IR Remote Control Powered By The ATtiny13A

The new hotness in consumer electronics might be RF remotes based on protocols like Bluetooth Low Energy, but there’s still plenty of life left in the classic infrared remote. Especially with projects like TinyRemoteXL from [Stefan Wagner], which let you build and program an IR “clicker” of your own. Whether you want to spin up your own custom universal remote or create a beefed up version of the TV-B-Gone, this open source effort is a great place to start.

The original TinyRemote.

As you might have guessed from the name, this project is actually a larger version of the TinyRemote that [Stefan] put together previously. The documentation for that project goes a bit more into the nuts and bolts of talking IR, and is definitely worth a read if you’re into the low level stuff. For the original five button TinyRemote, the hardware consists of little more than a ATtiny13A microcontroller, a pair of IR LEDs, and the transistors to drive them.

But on the XL, things are a bit trickier as there are now twelve buttons for the ATtiny13A to read. Obviously there aren’t enough pins to read so many buttons directly, but with a combination of BAS16TW diode arrays and resistors, [Stefan] is able to detect what button was pressed using the chip’s interrupt pin and ADC. Certainly a handy trick to have in the back of your mind, and the open source nature of this project gives you a great chance to see how it’s implemented.

Between this project and the impressive development board [Djordje Mandic] released recently, it seems we’re looking at something of an infrared hacking revival. Earlier this year we even saw the commercial release of an IR-equipped ESP8266 board.

Astronomic Patio Light Timer

Not satisfied with the handheld remote control for his outdoor patio lights, [timabram] decided to build an automatic timer using an ESP8266. He’s using a set of string lights from Costco, but as you dig into his project you’ll see the method he uses can be applied to almost any set of lights that have a remote.

He does this by connecting GPIO pins from the ESP8266 GPIO into the remote control in order to simulate a user pressing the button. Both boards are packaged together in a 3D-printed enclosure that utilizes the front portion of the remote control, so that manual operation is still possible.

His firmware gets the date and time from an NTP server, and then makes an API call to an online service that returns the local sunrise and sunset times for a specific location. He tries to minimize the power consumption by experimenting with different intervals to wakeup from deep sleep and ping the time server. But in the end, he realizes the RF remote control carries quite some distance, and installed the unit inside a closet where it could be powered by adaptors connected to the mains.

We wondered how the remote control knows if the lights are on or off, and [timabram] notes this is a shortcoming which could be addressed in a future version. If you’ve ever seen a mechanical version of an astronomic timer switch, packed full of gears and dials and setting pins, you can really appreciate a no-moving-parts solutions like this project. If you want to make one that doesn’t use the internet, check out this Arduino-based solution that we wrote about back in 2013.

Arduino Compatible IR Blaster Keeps TVs At Bay

The TV-B-Gone is a well known piece of kit in hacker circles: just point it at a noisy TV in a public space, hit the button, and one of the hundreds of IR remote codes for “Power Off” that it blinks out in rapid succession is more than likely to get the intended response. Unfortunately, while a neat conversation starter, its practical use is limited to a single function. But not so with this programmable IR development board that creator [Djordje Mandic] describes as a “TV-B-Gone on steroids”.

Sure you can point it at a random TV and turn it off with a single button press, but you can also plug the board into your computer and control it directly through the serial connection provided by its CP2104 chip. Using a simple plain-text control protocol, the user can modify the behavior of the device and monitor its status. [Djordje] imagines this feature being used in conjunction with a smartphone application for covert applications. To that end, the device’s support for an onboard battery should keep it from draining the phone during extended operations.

Of course you could do something else entirely with it simply by firing up the Arduino IDE and writing some new code for the device’s ATmega328P microcontroller. As with the IR-enabled ESP8266 development board we looked at a few months ago, there are plenty of applications for an all-in-one board that allows you to communicate with the wide world of IR devices.

Continue reading “Arduino Compatible IR Blaster Keeps TVs At Bay”

Adding Remote Controls To A Blackmagic Studio Camera Without Breaking The Bank

What to do when one ends up in the possession of a 4K studio camera, but without the requisite hardware and software to remotely control it? When [Glen Akins] ended up in this situation, he took the reasonable option here and developed his own knob-based remote control to adjust exposure and focus on the Blackmagic Designs Micro Studio Camera 4K. Without a remote control option, the only adjustment options are via fiddly small buttons on the camera itself, which wouldn’t have been a fun experience during the webcam usage that this camera would be used for.

This camera is normally controlled via the control channel on the SDI input which also handles the video output from the camera. For larger installations the proprietary ATEM software is commonly used, and there’s a $99 Arduino expansion board as well that’s apparently rarely stocked. With SDI not an option, the second option was LANC, which runs into pretty much the same issue with proprietary protocols and very expensive hardware.

Behind door number three is the more curious control option of the Futaba S.BUS protocol. Originally created for remotely controlling radio-controlled aircraft and similar remotely controlled systems, the thought here appears to be that this studio camera can also be used with systems that already have an S.BUS receiver, such as large drones.

With this S.BUS protocol having been reverse-engineered for a while now, it was a fairly straightforward procedure from there to create an MCU-based board with a lot of encoder knobs on it that map to a specific adjustment on the camera. The result of [Glen]’s labor can be found on GitHub.

Main image: The finished knob-box with the Blackmagic Designs camera. (Credit: Glen Akins)

3D Printed Tank Takes On The Elements

Commercially available radio control tanks are fun and all, but sometimes you’ve just got to build your own. [Let’s Print] did just that, whipping up a tank on his 3D printer before taking it out in the snow.

The tank is a fairly straightforward build, relying on a pair of brushed motors for propulsion, controlled by twin speed controllers hooked up to standard radio control hardware. Everything else is bespoke, however, from the 3D printed gearboxes, to the chassis and the rather aggressive-looking tracks. The pointed teeth of the latter leave deep indentations when the tank cruises around on mud, though weren’t quite enough to stop the little tank from getting high-centered in deep snow.

The build isn’t for the impatient, however. [Let’s Print] notes that the tracks alone took over 80 hours to run off in PETG, let alone the rest of the frame and gearboxes. However, we’re sure it was a great learning experience, and great fun to drive outside. Now the next step is surely to go bigger. Video after the break.

Continue reading “3D Printed Tank Takes On The Elements”