Chip Shortage Engineering: Misusing DIP Packages

After years of seeing people showing off and trading their badge Simple Add-Ons (SAOs) at Supercon, this year I finally decided to make one myself. Now for a first attempt, it would have been enough to come up with some cool PCB art and stick a few LEDs on it. But naturally I started with a concept that was far more ambitious than necessary, and before long, had convinced myself that the only way to do the thing justice was to have an onboard microcontroller.

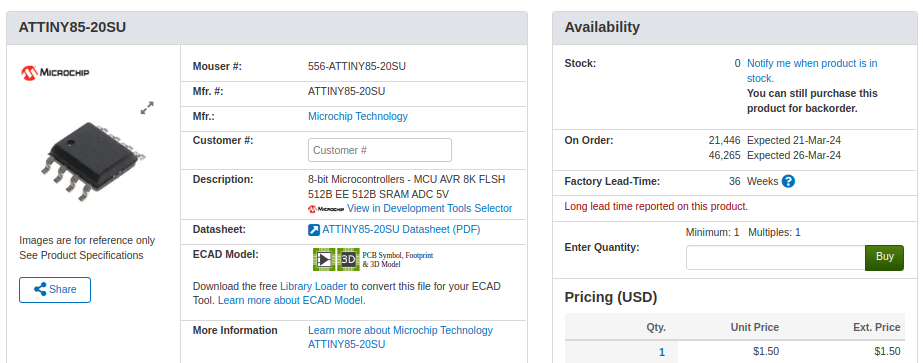
My first thought was to go with the venerable ATtiny85, and since I already had a considerable stock of the classic eight-pin DIP MCUs on hand, that’s what I started prototyping with. After I had something working on the breadboard, the plan was to switch over to the SOIC-8 version of the chip which would be far more appropriate for something as small as an SAO.

Unfortunately, that’s where things got tricky. I quickly found that none of the major players actually had the SMD version of the chip in stock. Both DigiKey and Mouser said they didn’t expect to get more in until early 2024, and while Arrow briefly showed around 3,000 on hand, they were all gone by the time I checked back. But that was only half the problem — even if they had them, $1.50 a piece seems a hell of a lot of money for an 8-bit MCU with 8K of flash in 2023.

The whole thing was made all the more frustrating by the pile of DIP8 ATtiny85s sitting on the bench, mocking me. Under normal circumstances, using them in an SAO wouldn’t really be a problem, but eight hand-soldered leads popping through the front artwork would screw up the look I had in mind.

While brooding over the situation my eyes happened to fall on one of the chips I had been fiddling with, it’s legs badly bent from repeated trips through the programmer. Suddenly it occurred to me that maybe there was a way to use the parts I already had…

Continue reading “Chip Shortage Engineering: Misusing DIP Packages”

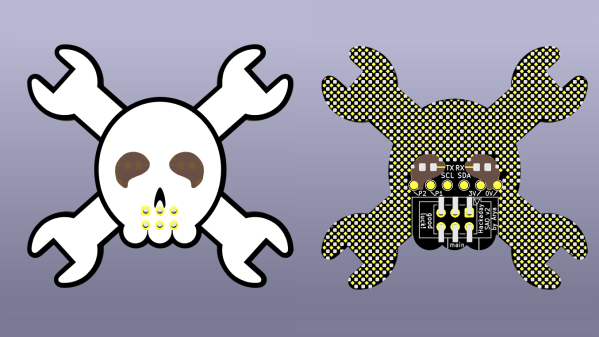
front and back of the Jolly Wrencher SAO

Jolly Wrencher SAO, And How KiCad 6 Made It Easy

If you plan to attend Supercon or some other hacker conference, know that you’re going to get a badge with a SAO (Simple Add-On) connector, a 4-pin or 6-pin connector that you can plug an addon board onto. There’s myriads of SAOs to choose from, and if you ever felt like your choice paralysis wasn’t intense enough, now you have the option of getting a Jolly Wrencher SAO board!

This board gives you an SMD prototyping space, with 1.27mm (0.05″ pitch) pads, suitable for many passive components, ICs and even modules like the ESP32 WROOM. Those pads are diagonally interspersed with ground-fill-connected pads – if you want to bodge something on the spot, you don’t need to pull separate GND wires. Given the Supercon badge specifics, the SAO-standard SDA and SCL pins have RX and TX labels as well. For bonus points, the eyes are transparent, with LED footprints behind them – it’s my first time designing a PCB where the LED shines through the FR4, and I hope that the aesthetics work out!

This design is open with gerber files available for download, so if you thought of making a quick PCB order, I’m giving you one more .zip file to add to it. Otherwise, it’s possible that you will find a Wrencher board lying around at Supercon! Now, I’d like to tell you how KiCad 6 made it super easy to design this PCB – after all, there’s never enough SAOs, and it’s quite likely you’ll want to design your own special SAO, too.

Continue reading “Jolly Wrencher SAO, And How KiCad 6 Made It Easy”

Hands-On: Internet Of Batteries Quantum Badge Brings Badgelife Add-Ons The Power And Internet They Crave

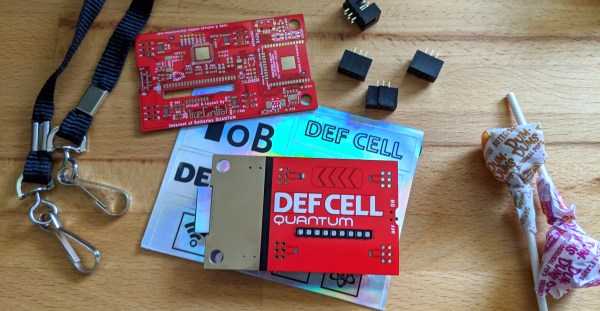
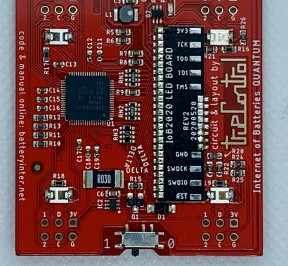
Our friends in the Whiskey Pirates crew sent me the unofficial DEF CON badge they built this year. The Internet of Batteries QUANTUM provides power and connectivity to the all-important add-on badges of DC28. The front of the badge is absolutely gorgeous to the point I don’t really want to solder on my add-on headers and disrupt that aesthetic.

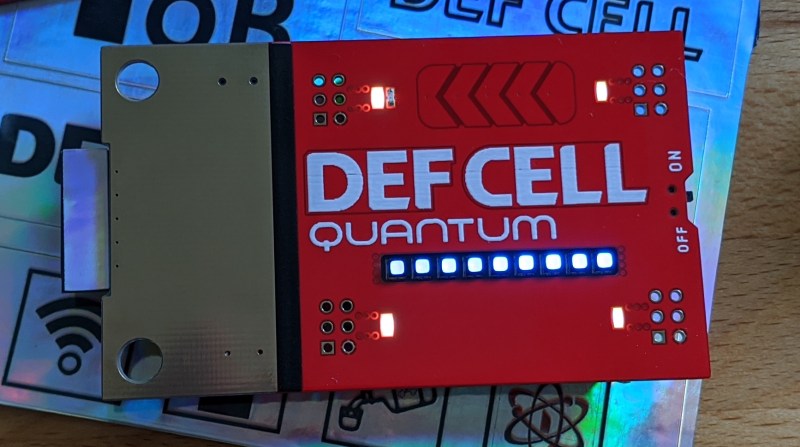
The gold-plated copper makes for a uniformed and reflective contrast to the red solder mask which occupies the majority of the front. Here we see the great attention to detail that [TrueControl] includes in his badges. The white stripe of silk screen separating the two colors is covered by some black detailing tape that looks much better than the white.

The antenna of the ESP32 module poking out the underside of the gold cover end of the badge gets its own rectangle of the holographic sticker material, the same as the sheet of stickers that was included in the box. Both decals are small details that make a huge difference to your eye.

The line of nine RGB LEDs have black bezels which goes along with the black stripe motif and underscores the typography of the badge name. These lights are hosted on a daughter board soldered to the underside of the badge with a slot for the LEDs to pass through. They are addressed in a 2×15 matrix that is scanned on the low side by the PSoC5 that drives the badge. This low-res image shows that daughter board before the lithium cell is placed.

Continue reading “Hands-On: Internet Of Batteries Quantum Badge Brings Badgelife Add-Ons The Power And Internet They Crave”

Tiny SAO, Tough CTF Challenge!

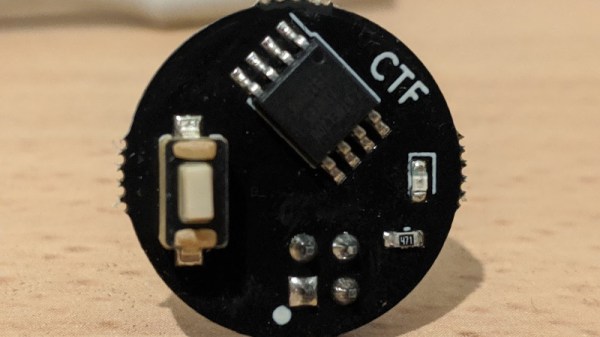
Over the year or two since the SAO connector specification was published, otherwise known as the Shitty Addon, we’ve seen a huge variety of these daughter boards for our favourite electronic badges. Many of them are works of art, but there’s another subset that’s far less about show and more about clever functionality. [Uri Shaked]’s little SAO is rather unprepossessing to look at, being a small round PCB with only an ATtiny microcontroller, reset button, and solitary LED, but its interest lies not in its looks but its software. It contains a series of CTF puzzles within, and despite its apparent simplicity should contain enough to detain even the hardiest puzzle-solving hackers.

It’s a puzzle of three parts, at the simplest level merely flashing the LED is enough, while the next level involves retrieving a buried string from the firmware and the last requires replacing the string with one of your own. You are only allowed to do so through the SAO connector, but fortunately you do have the benefit of access to the source code to trawl for vulnerabilities. There is a hefty hint that the data sheet for the microcontroller might also be useful.

[Uri] has appeared many times on these pages, most recently when he added a microscope to his 3D printer.

Saintcon Badge Is An Enigma No More

Through the weekend Twitter has been a-titter with news coming out of Saintcon, the annual security conference in Provo, Utah. Now that the weekend is over we can finally get our hands on full hardware and software sources for the curvy, LED-covered badge we’ve been salivating over and a write up by its creators [compukidmike] and [bashNinja]. Let’s dive in and see what’s waiting!

Design

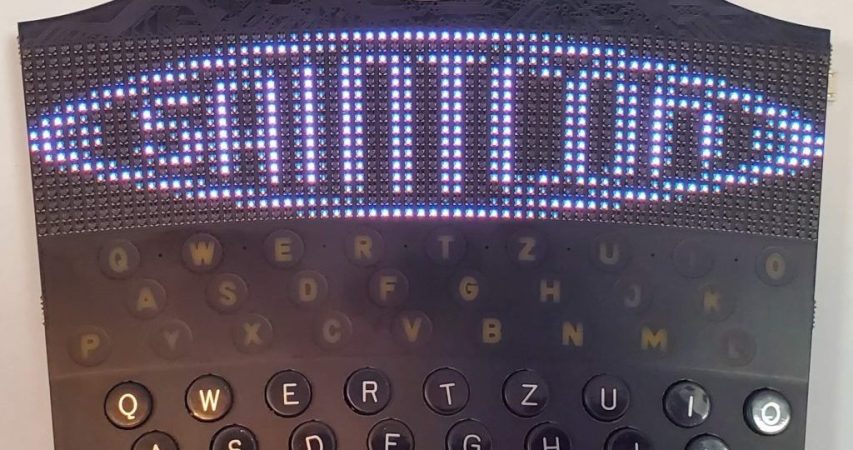
This year’s badge is designed to represent a single tooth on a single rotor of an Enigma machine. The full function of an Enigma machine is quite complex, but an individual device has three rotors with 26 teeth each (one for each letter) as well as a keypad for input and a character display to show each enciphered letter. For reference, the back of the badge has a handy diagram of a badge’s place in the Enigma system.

Reminiscent of the WWII device which the badge design recalls, each unit includes a full QWERTZ keyboard (with labeled keys!) and RGB “lampboard” for individual character output, but unlike the original there’s also a curved 16 x 64 RGB LED display made from those beguiling little ~1mm x 1mm LEDs. All in, the device includes 1051 LEDs! Combined with the unusually non-rectilinear shape of the badge and the Enigma-style Saintcon logo it makes for an attractive, cohesive look.

Continue reading “Saintcon Badge Is An Enigma No More”

Stack Those Boards For An Extra-Special Backlit LED Effect

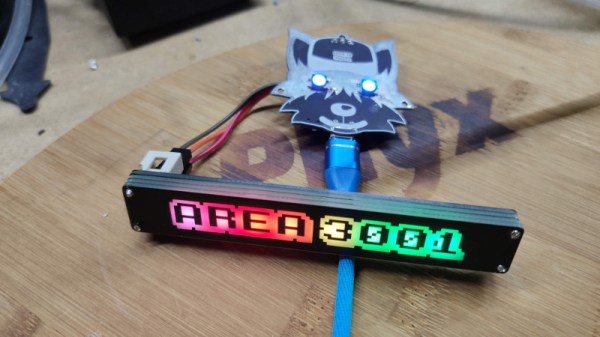
By now most of us should be used to backlit LEDs, in which a bare board with no copper or soldermask as an LED mounted on its reverse side to shine through as if with a diffuser. [Wim Van Gool] has created such an LED display with a twist, instead of reverse mounted LEDs his Shitty Add-On for Area3001 hackerspace in Leuven, Belgium has a set of WS2812 addressable LEDs shining upwards through a void in a stack of PCBs to the diffuser. The effect is of something that looks about the size and shape of a Kit-Kat finger with a glowing hackerspace logo on the front, and it breaks away from the SAO norm.

Full details are on the GitHub repository for the project, in which we find both large and small takes on the same idea. It appears that there is no onboard processor and that the WS2812s are driven from the host badge, but that doesn’t take away from the ingenuity of the design.

The through-PCB diffuser seems to be the badge must-have of the moment, we’ve seen quite a few such as the recent Numberwang badge. That’s the exciting thing about badge design though, one always knows that there will be a new twist along in the next crop of badges, to keep everything fresh.

Hackaday Links Column Banner

Hackaday Links: October 7, 2018

Ah, crap. We lost a good one, people. [Samm Sheperd] passed away last month. We’ve seen his stuff before, from a plane with a squirrel cage fan, to completely owning a bunch of engineering students by auditing a class. The obit is available as a Google Doc, and there’s a Samm Sheperd Memorial Fund for the Big Lake Youth Camp in Gladstone, Oregon.

FranLab is closing down! Fran is one of the hardware greats, and she’s being evicted. If you’ve got 2000sqft of workshop space in Philly you’d like to spare, you know who to talk to. There will, probably, be a crowdfunding thing going up shortly, and we’ll post a link when it’s up.

The Parallax Propeller is probably one of the most architecturally interesting microcontrollers out there. It’s somewhat famous for being a multi-core chip, and is commonly used in VGA generation, reading keyboards, and other tasks where you need to do multiple real-time operations simultaneously. The Parallax Propeller 2, the next version of this chip, is in the works, and now there’s real silicon. Everything is working as expected, and we might see this out in the wild real soon.

Thought artistic PCBs were just a con thing? Not anymore, I guess. There has been a lot of activity on Tindie with the Shitty Add-Ons with [TwinkleTwinkie] and [Potato Nightmare] releasing a host of very cool badges for your badges. Most of these are Shitty Add-Ons, and there will be an update to the Shitty Add-On spec shortly. It’s going to be backwards-comparable, so don’t worry.

Unnecessary drama!?! In my 3D printing community?!? Yes, it’s true, there was a small tiff over the Midwest RepRap Festival this week. Here’s what went down. You got three guys. John, Sonny, and Steve. Steve owns SeeMeCNC, based in Goshen, Indiana. John worked for SeeMeCNC until this year, and has been the ‘community manager’ for MRRF along with Sonny. Seeing as how the RepRap Festival is the only thing that ever happens in Goshen, Steve wanted to get the ball rolling for next year’s MRRF, so he sent out an email, sending the community into chaos. No, there’s not some gigantic fracture in the 3D printing community, John and Sonny, ‘were just slacking’ (it’s five months out, dudes. plenty of time.), and Steve wanted to get everything rolling. No problem here, just a bunch of unnecessary drama in the 3D printing community. As usual.