Visualizing Ionizing Radiation With DIY Plastic Scintillators

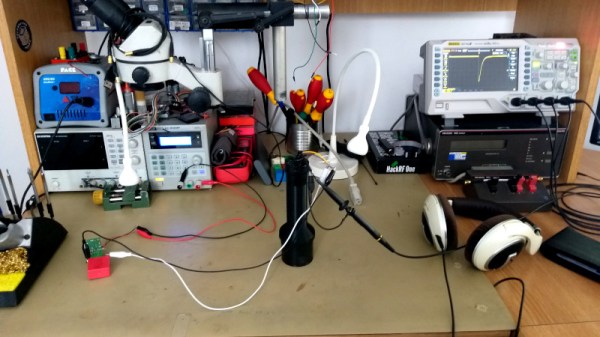
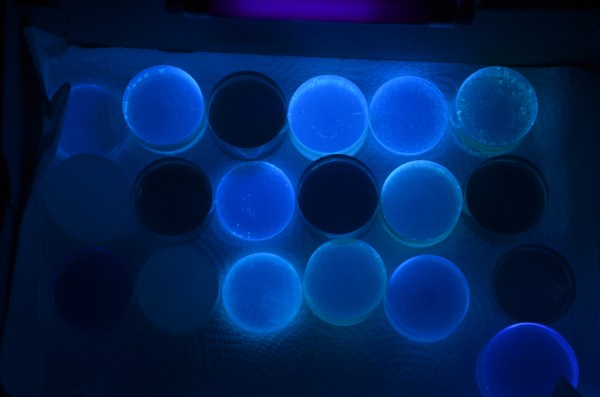
Although most types of radiation are invisible, except for the visible part of the EM spectrum, there are many ways that we can make various types of radiation visible. One of these methods is called ‘scintillation’, which can be used to make ionizing radiation visible. Recently [Lukas Springer] demonstrated how to make scintillators out of what is essentially plastic: bisphenol-A (E45, ‘epoxy’) resin with hardener and other additives.

The essential principle of operation behind a scintillator is its sensitivity to ionizing radiation, along with the tendency to absorb the energy and re-emit it in the form of light, i.e. luminescence. This is akin to the luminescence of LEDs, except that in their case the underlying principle is that of electro-luminescence. In the case of a plastic scintillator, the scintillating material is suspended in the solid polymer matrix base.

As [Lukas] points out, plastic scintillators are hardly ideal when it comes to their sensitivity to ionizing radiation, but they compensate for this by being easy to shape and produce, while being very durable. For this experiment, he used regular epoxy as the scintillator matrix, p-Terphenyl as primary scintillator and Coumarin 102 as the wavelength shifter. These three compounds act as a reaction chain, with the matrix absorbing the radiation and transferring it to the primary scintillator, which in turns emits the energy as light.

As the primary scintillator tends to radiate in the deep UV part of the EM spectrum, a wavelength shifter (i.e. secondary scintillator) which ‘shifts’ the emitted UV radiation into the visible part of the spectrum.

After producing a batch of plastic scintillators following the above recipe, [Lukas] irradiated them with gamma radiation, and found them to perform worse than some already not remarkable Russian PS-based scintillators. [Lukas’s] guess is that the matrix may be absorbing the primary scintillator’s output, or a mismatch between the primary and second scintillator.

While tricky to get right, it does seem like a fun hobby if one has some interesting in chemistry. [Lukas] (@GigaBecquerel on Twitter) provides a basic recipe as well as many other compounds to use for the primary and secondary scintillator, as well as the matrix compound. Enough to get started with.

Towards A 3D-Printed Neutrino Detector

Additive manufacturing techniques like fused deposition modeling, aka 3D printing, are often used for rapid prototyping. Another advantage is that it can create shapes that are too complex to be made with traditional manufacturing like CNC milling. Now, 3D printing has even found its way into particle physics as an international collaboration led by a group from CERN is developing a new plastic scintillator production technique that involves additive manufacturing.

A scintillator is a fluorescent material that can be used for particle detection through the flashes of light created by ionizing radiation. Plastic scintillators can be made by adding luminophores to a transparent polymer such as polystyrene and are usually produced by conventional techniques like injection molding.

Continue reading “Towards A 3D-Printed Neutrino Detector”

Hackaday Podcast 035: LED Cubes Taking Over, Ada Vanquishes C Bugs, Rad Monitoring Is Hot, And 3D Printing Goes Full 3D

Hackaday Editors Mike Szczys and Elliot Williams get caught up on the most interesting hacks of the past week. On this episode we take a deep dive into radiation-monitor projects, both Geiger tube and scintillator based, as well as LED cube projects that pack pixels onto six PCBs with parts counts reaching into the tens of thousands. In the 3D printing world we want non-planar printing to be the next big thing. Padauk microcontrollers are small, cheap, and do things in really interesting ways if you don’t mind embracing the ecosystem. And what’s the best way to read a water meter with a microcontroller?

Take a look at the links below if you want to follow along, and as always tell us what you think about this episode in the comments!

Take a look at the links below if you want to follow along, and as always, tell us what you think about this episode in the comments!

Direct download (60 MB or so.)

Continue reading “Hackaday Podcast 035: LED Cubes Taking Over, Ada Vanquishes C Bugs, Rad Monitoring Is Hot, And 3D Printing Goes Full 3D”

DIY Scintillation Detector Is Mighty Sensitive

Geiger counters are a popular hacker project, and may yet prove useful if and when the nuclear apocalypse comes to pass. They’re not the only technology out there for detecting radiation however. Scintillation detectors are an alternative method of getting the job done, and [Alex Lungu] has built one of his own.

Scintillation detectors have several benefits over the more common Geiger-Muller counter. They work by employing crystals which emit light, or scintillate, in the presence of ionizing radiation. This light is then passed to a photomultiplier tube, which emits a cascade of electrons in response. This signal represents the level of radioactivity detected. They can be much more sensitive to small amounts of radiation, and are more sensitive to gamma radiation than Geiger-Muller tubes. However, they’re typically considered harder to use and more expensive to build.

[Alex]’s build uses a 2-inch sodium iodide scintillator, in combination with a cheap photomultiplier tube he scored at a flea market for a song. [Jim Williams]’s High Voltage, Low Noise power supply is used to run the tube, and it’s all wrapped up in a tidy 3D printed enclosure. Output is via BNC connectors on the rear of the device.

Testing shows that the design works, and is significantly more sensitive than [Alex]’s Geiger-Muller counter, as expected. If you’re interested in measuring small amounts of radiation accurately, this could be the build for you. We’ve seen this technology used to do gamma ray spectroscopy too.

Cheap Muon Detectors Go Aloft On High-Altitude Balloon Mission

There’s something compelling about high-altitude ballooning. For not very much money, you can release a helium-filled bag and let it carry a small payload aloft, and with any luck graze the edge of space. But once you retrieve your payload package – if you ever do – and look at the pretty pictures, you’ll probably be looking for the next challenge. In that case, adding a little science with this high-altitude muon detector might be a good mission for your next flight.

[Jeremy and Jason Cope] took their inspiration for their HAB mission from our coverage of a cheap muon detector intended exactly for this kind of citizen science. Muons constantly rain down upon the Earth from space with the atmosphere absorbing some of them, so the detection rate should increase with altitude. [The Cope brothers] flew two of the detectors, to do coincidence counting to distinguish muons from background radiation, along with the usual suite of gear, like a GPS tracker and their 2016 Hackaday prize entry flight data recorder for HABs.

The payload went upstairs on a leaky balloon starting from upstate New York and covered 364 miles (586 km) while managing to get to 62,000 feet (19,000 meters) over a five-hour trip. The [Copes] recovered their package in Maine with the help of a professional tree-climber, and their data showed the expected increase in muon flux with altitude. The GoPro died early in the flight, but the surviving footage makes a nice video of the trip.

Continue reading “Cheap Muon Detectors Go Aloft On High-Altitude Balloon Mission”

CosmicWatch muon detector

Make A Cheap Muon Detector Using Cosmicwatch

A little over a year ago we’d written about a sub $100 muon detector that MIT doctoral candidate [Spencer Axani] and a few others had put together. At the time there was little more than a paper on arxiv.org about it. Now, a few versions later they’ve refined it to the level of a kit with full instructions for making your own under the banner, CosmicWatch including PCB Gerber files for the two surface mount boards you’ll need to assemble.

What’s a muon? The Earth is under constant bombardment from cosmic rays, most of them being nuclei expelled from supernova explosions. As they collide with nuclei in our atmosphere, pions and kaons are produced, and the pions then decay into muons.  These muons are similar to electrons, having a +1 or -1 charge, but with 200 times the mass.

This pion-to-muon decay happens higher than 10 km above the Earth’s surface. But the muons have a lifetime at rest of 2.2 μs. This means that the number of muons peak at around 10 km and decrease as you go down. A jetliner at 30,000 feet will encounter far more muons than will someone at the Earth’s surface where there’s one per cm2 per minute, and the deeper underground you go the fewer still. This makes them useful for inferring altitude and depth.

How does CosmicWatch detect these muons? The working components of the detector consist of a plastic scintillator, a silicon photomultiplier (SiPM), a main circuit board which does signal amplification and peak detection among other things, and an Arduino nano.

As a muon passes through the scintillating material, some of its energy is absorbed and re-emitted as photons. Those photons are detected by the silicon photomultiplier (SiPM) which then outputs an electrical signal that is approximately 0.5 μs wide and 10-100 mV. That’s then amplified by a factor of 6. However, the amplified pulse is too brief for the Arduino nano and so it’s stretched out by the peak detector to roughly 100 μs. The Arduino samples the peak detector’s output and calculates the original pulse’s amplitude.

Their webpage has copious details on where to get the parts, the software and how to make it. However, they do assume you can either find a cheap photomultiplier somewhere or buy it in quantities of over 100 brand new, presumably as part of a school program. That bulk purchase makes the difference between a $50 part and one just over $100. But being skilled hackers we’re sure you can find other ways to save costs, and $150 for a muon detector still isn’t too unreasonable.

Detecting muons seems to have become a thing lately. Not too long ago we reported on a Hackaday prize entry for a detector that uses Russian Geiger–Müller Tubes.

Dirt Cheap Muon Detector Puts Particle Physics Within DIY Reach

Subatomic physics is pretty neat stuff, but not generally considered within the reach of the home-gamer. With cavernous labs filled with racks of expensive gears and miles-wide accelerators, playing with the subatomic menagerie has been firmly in the hands of the pros for pretty much as long as the field has been in existence. But that could change with this sub-$100 DIY muon detector.

[Spencer Axani] has been fiddling with the idea of a tiny muon detector since his undergrad days. Now as an MIT doctoral candidate, he’s making that dream a reality. Muons are particles that are similar to electrons but more massive and less likely to be affected by electromagnetic fields. Muons rain down on the Earth’s surface at the rate of 10,000 per square meter every minute after being created by cosmic rays interacting with the atmosphere and are capable of penetrating deep into the planet. [Spencer]’s detector is purposely kept as low-budget as possible, using cheap plastic scintillators and solid-state photomultipliers hooked up to an Arduino. The whole project is as much STEM outreach as it is a serious scientific effort; the online paper (PDF link) stresses the mechanical and electronics skills needed to complete the build. At the $100 price point, this build is well within the means of most high school STEM programs and allows for a large, distributed array of muon detectors that has the potential for some exciting science.

We’ve covered quite a few subatomic detection projects before, from the aforementioned large-scale builds to more modest efforts. But we like this project because it has the potential to inspire a lot of citizen scientists.

Thanks for the tip, [deralchemist]