Windows Utility Helps ID Serial Ports

The humble serial interface has been around for a very long time, and will stay with us in one form or other for the foreseeable future. It was easy enough to keep track of back in the days when a computer only had one, or perhaps two COM ports. However, in this day and age of USB-programmable microcontrollers, it’s likely you’ve got COMs coming out the wazoo. Thankfully, [Amr Bekhit] has put together a utility to help solve this problem.

[Amr’s] utility is called Serial Port Monitor, and it does what it says on the tin. When new serial ports are enumerated in Device Manager, a system tray notification pops up noting the number of the newly attached COM port. Additionally, it maintains a list of ports sorted in order of the newest first, and also features a right-click menu that allows the launching of various terminal programs.

It’s a useful tool to keep in your back pocket that can prove particularly so when programming many devboards at once, or any other time when you find yourself dealing with a mess of serial devices.

Incidentally, if you find yourself having continual headaches with USB-to-Serial adapters on Windows, this might just be your problem. Happy hacking.

Footnote: In light of this article, the author would like to formally apologise to [Cosmos2000] for permanently disabling COM1 on his main programming rig. Sorry, friend.

Vintage Terminal Converted For Galactic Use In Time For May The Fourth

“Not as clumsy or random as Windows. An elegant terminal, for a more civilized age.” [Ben Kenobi] might well have said that about the Hewlett-Packard 264x-series of serial terminals, in use starting at just about the time the original installment of the Star Wars franchise was released.  With their wide-screen CRTs and toaster-oven aesthetic, they were oddballs in the terminal market, and [CuriousMarc] has gone and made one even odder by converting an H-P 2645A to display the Aurebesh character set from the movies.

A look under the hood of this lovely bit of retrocomputing history makes one think the designers almost foresaw the need to add support for a made-up language nearly half a century later. The terminal has a backplane and bus for pluggable cards, one of which carries the ROMs that [Marc] extracted and reprogrammed with the Aurebesh characters. He had a little trouble at first, needing to bodge the chip select and forgetting that he had made other “special modifications” to the terminal. The video below shows the results, along with some fatherly mortification of his daughters and a suitable tribute to the lately late [Peter Mayhew], he who donned the Wookiee suit and made a seven-foot space Sasquatch lovable.

Need more for you “May the Fourth” fix? How about a clumsy and random blaster, a cosplay speeder bike, or a fleet of droids?

Continue reading “Vintage Terminal Converted For Galactic Use In Time For May The Fourth”

New Part Day: Lynxmotion Smart Servos

Anyone who shops for robotics kits would have come across a few designed by Lynxmotion. They’ve been helping people build robots since 1995, from robot arm kits to hexapod chassis and everything in between. We would expect these people know their motors, so when they launched their own line of servo motors called Lynxmotion Smart Servos (LSS), it is worth spending a bit of time to look over what they offer.

While these new devices have a PWM mode compatible with classic remote control servos, unleashing their full power requires bidirectional communication over a serial bus. We’ve previously given an overview of three serial bus servos already on the market for comparison. A quick look at the $68-$100 price tags listed on Lynxmotion’s parent company RobotShop made it clear they do not intend to compete on price, so what interesting features do these new kids on the block have?

Digging into product documentation found some great details. Acceleration and deceleration rates are adjustable, which can help with smoother robot movement. There’s also an adjustable level of “stiffness” that adds some “give” (compliance) so a robot won’t have to be as stiff as… well, a robot!

Mechanically, the most interesting internal component is the magnetic position sensor. They are far more precise than potentiometers, but more importantly, they allow positioning anywhere within full 360 degrees. Many other serial bus servos are constrained to positions within an arc less than 360 degrees leaving a blind spot.

An interesting quirk of the LSS offerings is that the serial communication protocol uses human-readable text characters, so sending a number 255 means transmitting a three byte string ‘2’, ‘5’, and ‘5’ instead of single byte 0xFF. This would make debugging our custom robot code far easier, at the cost of reduced bandwidth efficiency and loss of checksum for detecting communication errors. It’s a trade-off that some robot builders would be happy to make, but others might not.

Externally, these servos have bountiful mounting options including some we didn’t know to ask for. Historically Lynxmotion kits have used a wide variety of servo mounting brackets, so they are motivated to make mechanical integration easy. The most novel offering is the ability to bolt external gears to the servo body. A set of 1:3 gears allow for gearing the servo up or down, or you can use a set of 1:1 gears for a compact gripper.

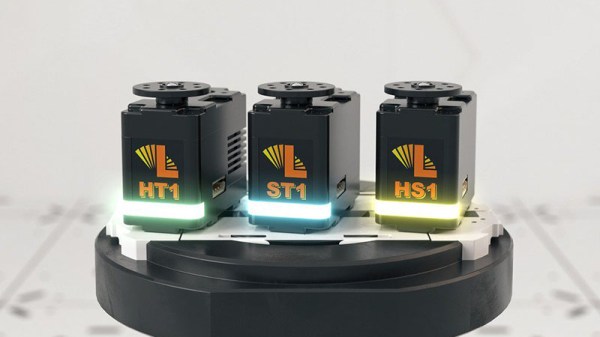
As you’d expect of servos in this price range, they all have metal gears, but they also have the ability to power the motor directly from a battery pack (a 3 cell lithium polymer is recommended). There are additional features, like an RGB LED for visual feedback, which we didn’t cover here so dig into the documentation for more. We look forward to seeing how these interesting little actuators perform in future robotics projects.

All You Need To Know About I2S

Last month we marked the 40th birthday of the CD, and it was as much an obituary as a celebration because those polycarbonate discs are fast becoming a rarity. There is one piece of technology from the CD age that is very much still with us though, and it lives on in the standard for sending serial digital audio between chips. The protocol is called I2S and comes as a hardware peripheral on many microcontrollers. It’s a surprisingly simple interface that’s quite easy to work with and thus quite hackable, so it’s worth a bit of further investigation.

It’s A Simple Enough Interface

Don’t confuse this with the other Philips Semiconductor protocol: I2C. Inter-Integrated Circuit protocol has the initials IIC, and the double letter was shortened to come up with the “eye-squared-see” nomenclature we’ve come to love from I2C. Brought to life in 1982, this predated I2S by four years which explains the somewhat strange abbreviation for “Inter-Integrated Circuit Sound”.

The protocol has stuck around because it’s very handy for dealing with the firehose of serial data associated with high-quality digital audio. It’s so handy that you’ve likely heard of it being used for other purposes than audio, which I’ll get to in a little bit. But first, what does I2S actually do?

Continue reading “All You Need To Know About I2S”

Luxmeter Meets Linux

Over the past 30 years the price of hardware has slowly but surely come down, and it’s now possible to buy all manner of widgets and gizmos online for less than the price of a fancy Italian dinner. By and large this is a good thing, but it’s not uncommon to find that your new tools are let down by the software side of things. Of course, you can always develop your own solution – and in [ThePhil]’s case, that’s exactly what he did.

The hardware in question was a PCE-174 luxmeter, which came with an uncooperative Windows application as standard. This simply wouldn’t do, so [ThePhil] set about developing a Linux version in Python. This was achieved through the aid of documentation, not of the PCE-174, but its sibling from another corporation – the Extech HD450. The two meters were similar enough that the Extech’s better documentation was able to fill in the gaps of [ThePhil]’s understanding.

[ThePhil] has diligently implemented the full feature set of the PCE-174, and has documented the project well. There are even notes on the version numbers of various dependencies, which will surely be a great help if someone’s trying to run the code five years down the track.

It’s a great lesson that one need not be at the mercy of the software one is given. For a great many cases, it’s possible to roll your own solutions that are robust and get the job done. This approach can be taken to great lengths – you can go so far as replacing an entire camera firmware, if you so wish.


Reverse Engineering A Modern IP Camera

Security cameras used to be analog devices feeding back into a room full of tiny screens and commercial grade VCRs. As technology moved forward, IP cameras began to proliferate. Early models simply presented a video stream and configuration page to the local network. Modern models aimed at the home market differ however. More often than not, configuration is through a strange smartphone app, and video is accessed through third-party servers. It’s all a bit oblique, and so [Alex] decided to take a look under the hood. 

The exploration begins externally, with [Alex] capturing data sent to and from the camera with Wireshark. Straight away, red flags are raised. For as yet unknown reasons, the camera attempts to resolve Google, Facebook and Alibaba servers over DNS. Disassembly then follows, revealing that a serial terminal with root access is available. [Alex] uses this to probe around, uncovering the firmware update script and a way to decrypt said updates.

The work thus is a great example of how to approach hacking a given device from first principles. The overall goal is to find a way to gain complete control over the camera, reprogramming it to serve up video as [Alex] wishes, rather than to a distant third party server. It’s not the first time we’ve seen an IP camera hacked, and we doubt it will be the last. If you’ve got one cracked, be sure to let us know.

Arduino Converts Serial To Parallel: The Paralleloslam

After a youth spent playing with Amigas and getting into all sorts of trouble on the school computer network, I’ve always had a soft spot in my heart for hardware from the 80s and 90s. This extends beyond computers themselves, and goes so far as to include modems, photocopiers, and even the much-maligned dot matrix printer.

My partner in hacking [Cosmos2000] recently found himself with a wonderful Commodore MPS 1230 printer. Its parallel interface was very appropriate in its day, however parallel ports are as scarce as SID chips. Thankfully, these two interfaces are easy to work with and simple in function. Work on a device to marry these two disparate worlds began.

Enter: The Paralleloslam

While I was gallivanting around the Eastern coast of Australia, [Cosmos2000] was hard at work. After some research, it was determined that it would be relatively simple to have an Arduino convert incoming serial data into a parallel output to the printer. After some testing was performed on an Arduino Uno, a bespoke device was built – in a gloriously plastic project box, no less.

An ATMEGA328 acts as the brains of the operation, with a MAX232 attached for level conversion from TTL to RS232 voltage levels. Serial data are received on the hardware TX/RX lines. Eight digital outputs act as the parallel interface. When a byte is received over serial, the individual bits are set on the individual digital lines connected to the printer’s parallel port. At this point, the strobe line is pulled low, indicating to the attached device that it may read the port. After two microseconds, it returns high, ready for the next byte to be set on the output lines. This is how parallel interfaces operate without a clock signal, using the strobe to indicate when data may be read.

At this point, [Cosmos2000] reached out – asking if I had a name for the new build.

“Hm. Paralleloslam?”

“Done. Cheers!”

Continue reading “Arduino Converts Serial To Parallel: The Paralleloslam”