Seven Segments, But Not As We Know Them

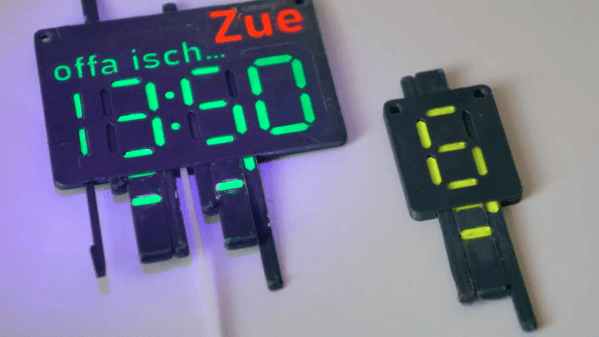
We’ve seen a lot of clever re-imagining of the classic 7-segment display, and proving there is still room for something new is [Jack]’s 7-segment “DigiTag” display.
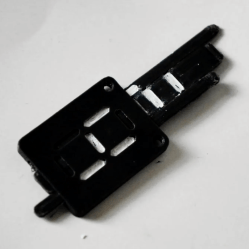
This 3D printable device has a frame into which is slotted three sliders. These sliders can be adjusted individually, mixing and matching the visibility of colored and uncolored areas, to create digits 0-9. We’ve seen some unusual 7-segment-inspired displays before, using from one motor for the whole digit to ones that need one motor per segment, but nothing quite like this approach.

While this particular design relies on the user to manually “dial in” each digit, the resulting key-like assembly (and unique shape for each digit) seems like it could have some interesting applications — a puzzle box design comes to mind.

If you have any ideas of your own on how this could be used, don’t keep them to yourself! Let us know in the comments, below.

Charliplexed 7-Segment Display Takes Advantage Of PCB Manufacturers

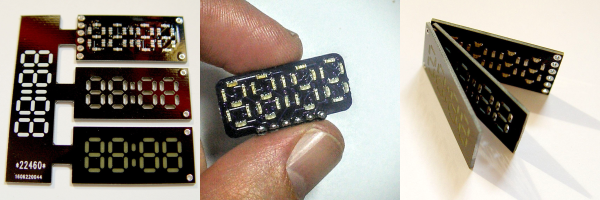
Cutting out precise shapes requires a steady hand, a laser cutter, or a CNC mill, right? Nope! All you need is PCB design software and a fabrication facility that’ll do the milling for you. That’s the secret sauce in [bobricius]’s very pleasing seven-segment display design.

His Hackaday.io entry doesn’t have much detail beyond the pictures and the board files, but we’re not sure we need that many either. The lowest board in the three-board stack has Charlieplexed LEDs broken out to six control pins. Next up is a custom-routed spacer board — custom routed by the PCB house, that is. And the top board in the stack is another PCB, this one left clear of copper where the light shines out.

We want to see this thing lit up! We’ve played around with using PCB epoxy material as a LED diffuser before ourselves, and it can look really good. The spacers should help even out the illumination within segments, while preventing bleed across them. Next step? A matrix of WS2812s with custom-routed spacers and diffusers. How awesome would that be?

neopixals

Seven Segment Clock Made From Scratch

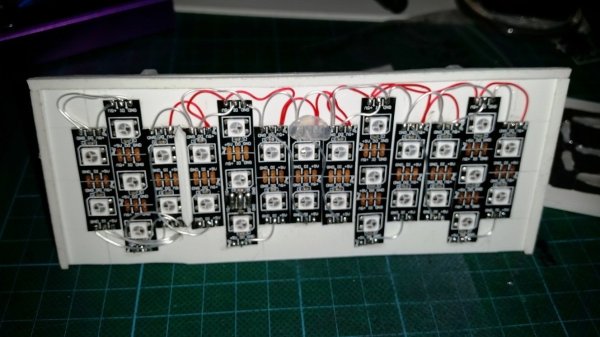
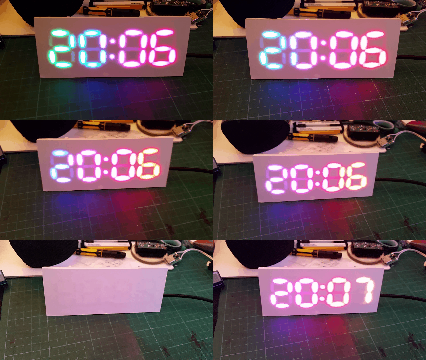
[David Hopkins] built a seven segment clock, but not in a way you would think.  Typically, if one wants to make something like this, one would start off with some seven segment LEDs. [David] wanted to kick it up a notch and use RGB LEDs to get access to the wide array of different colors, but found off the shelf assemblies cost prohibitive. So, he did what any good hacker would do. He made his own.

clockThe easy part consists of Neopixels, an Arduino Nano and a DS3231 Real Time Clock. The hard part consists of Plasticard and a polymorph diffuser. Plasticard also goes by the name of Polystyrene and comes in sheets. [David] describes Polymorph as a type of moldable nylon that softens with heat, with a working temperature low enough that boiling water will suffice.
He was able to cut out the individual segments to make an impressive looking desk clock.

Seven Segment Countdown Timer

Cute Countdown Timer Reminds You Of Impending Doom

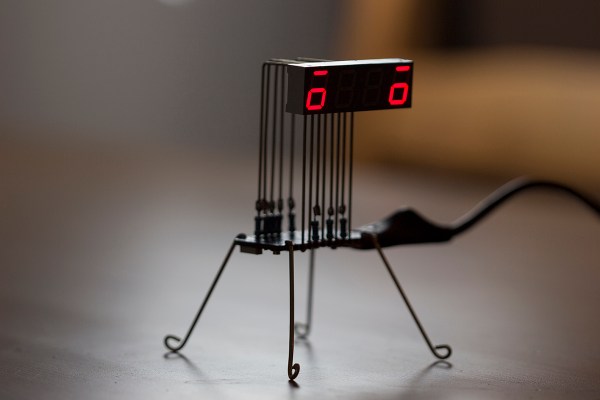
As things get busy, whether it be an upcoming product launch, a pregnancy, or even the release of your favorite game (or movie!) sometimes it’s nice to have a little countdown timer. Not an app on your phone, but a tangible, physical timer to set on your desk. Which is why SevenSeg is such a cute idea.

[Mohit] wanted to design something that was simple, but aesthetically pleasing — he’d seen free-form electronic projects before and wanted to give it a shot. What he came up with is pretty elegant! A seven segment display is connected via 1/32″ brass rods to the controller, a Particle Photon — which is kind of like a Teensy with WiFi for the internet of things. After putting a few resistors in line with the display, and a bit of frustrating bending of wire later, and SevenSeg was complete.

Continue reading “Cute Countdown Timer Reminds You Of Impending Doom”

The Ultimate Tiny Altimeter

altimeter

While traditionally a project geared more toward the model rocket crowd, a lot of people are flying quadcopters these days, and knowing the altitude your RC aircraft reached is a nice thing to know. [Will] came up with a very nice, very small, and very lightweight altimeter that’s perfect for strapping to microquads, their bigger brothers, and of course model rockets. As a nice bonus, it also looks really cool with an exceedingly retro HP bubble display.

The components used in this tiny altimeter include a MEMS altitude and pressure sensor, HP bubble display featuring four seven-segment LEDs, an Arduino Pro Mini, and a tiny 40 mAh LiPo capable of powering the whole contraption for hours.

In the video below, [Will] shows off the functions of his altimeter, sending it aloft on a quadcopter to about 100 ft. There are settings for displaying the minimum, maximum, and delta altitudes, all accessed with a single button.

While it’s not the most feature packed altimeter out there, it’s still much better than commercial offerings available for the model rocket crowd.

Continue reading “The Ultimate Tiny Altimeter”