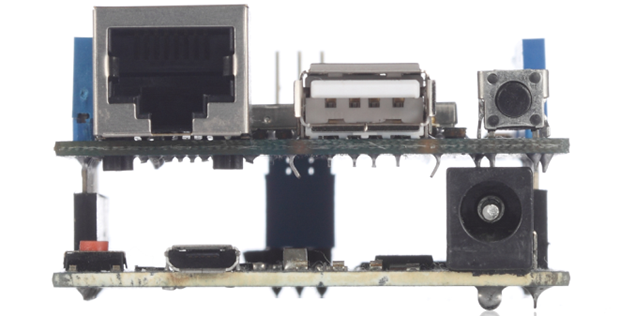
The Arduino Yun Shield

YUN

A few years ago, the most common method to put an Arduino project on the web was to add a small router loaded up with OpenWrt, wire up a serial connection, and use this router as a bridge to the Internet. This odd arrangement was possibly because the existing Arduino Ethernet and WiFi shields were too expensive or not capable enough, but either way the Arduino crew took notice and released the Arduino Yun: an Arduino with an SoC running Linux with an Ethernet port. It’s pretty much the same thing as an Arduino wired up to a router, with the added bonus of having tons of libraries available.

Since the Yun is basically a SoC grafted onto an Arduino, we’re surprised we haven’t seen something like this before. It’s an Arduino shield that adds a Linux SoC, WiFi, Ethernet, and USB Host to any Arduino board from the Uno, to the Duemilanove and Mega. It is basically identical to the Arduino Yun, and like the Yun it’s completely open for anyone to remix, share, and reuse.

The Yun shield found on the Dragino website features a small SoC running OpenWrt, separated from the rest of the Arduino board with a serial connection. The Linux side of the stack features a 400MHz AR9331 (the same processor as the Yun), 16 MB of Flash, and 64 MB of RAM for running a built-in web server and sending all the sensor data an Arduino can gather up to the cloud (Yun, by the way, means cloud).

All the hardware files are available on the Yun shield repo, with the Dragino HE module being the most difficult part to source.

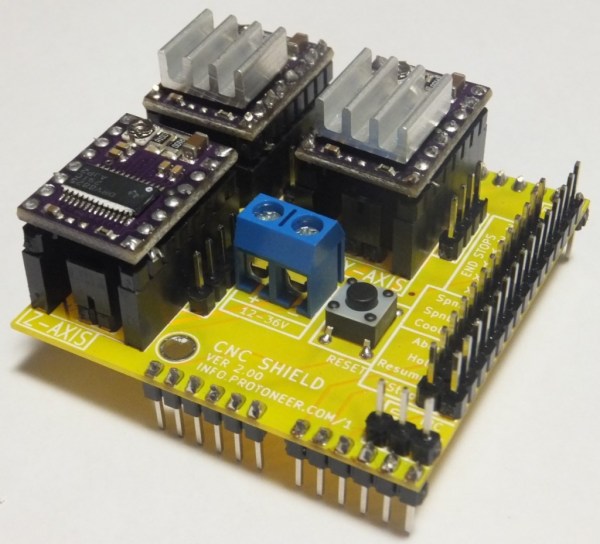
GRBL Compatible Arduino CNC Shield

By the time you get to the point in a home CNC build where you’re adding control electronics you may be ready for the simplest means to an end possible. In that case, grab your Arduino and heat up that etching solution to make your own GRBL compatible shield.

This familiar footprint manages to contain everything you need for a three-axis machine. The purple boards slotted into the pairs of SIL headers are Pololu Stepper motor drivers. Going this route makes replacing a burnt out chip as easy as plugging in a new module. The terminal block in the center feeds the higher voltage rail necessary for driving the motors. The DIL header on the right breaks out all of the connections to the limiting switches (two for each axis), spindle and coolant control, as well as three buttons for pause, resume, and abort. There’s even a header for SPI making it easier to add  custom hardware if necessary.

This is a dual-layer board which may not be ideal for your own fabrication process. [Bert Kruger] posted his Gerber files for download if you want to put in a small run with OSH Park or a similar service.


Arduino Cellphone

OLYMPUS DIGITAL CAMERA

The fact that you can build a cellphone around an Arduino is pretty neat. But we’re drawn to this project more as a testament to the advancement of hobby electronics. An [Average Joe] can build this thing with a minimum or background knowledge and without breaking the bank. Wow.

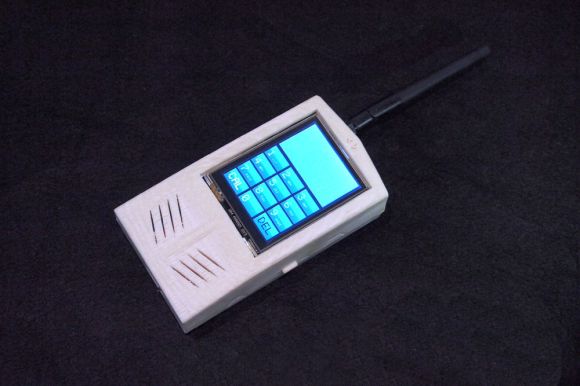
Of course this isn’t the first DIY cellphone we’ve come across. One of our favorites is this one which resides on a home etched PCB. There was even another Arduino offering with similar components back in September. But the one seen above really pulls it all together into a package that is usable for everyday life. The components include and Arduino Uno, GPRS shield from Seeed Studios, a TFT touch screen, Lithium battery and charging circuit, and a few other bobbles. All of it is mounted inside of a 3D printed case.

A simple phone calls for a simple UI and that’s included as well. The main menu has two buttons, one for placing a call, the other for sending a text. From there you get the virtual keypad seen above for typing out the phone number or composing a message.

[Thanks Victorzie]

A Different Type Of Arduino Internet Shield

different-arduino-internet-shield

The cost of an Ethernet shield for an Arduino isn’t horrible; generally between $17 and $32 depending on which one you buy. But have you seen the cost of a WiFi shield? Those are running North of $70! [Martin Melchior] has a solution that provides your choice of Ethernet or WiFi at a low-cost and it’ll work for most applications. He’s using a WiFi router as an Arduino Internet shield.

This is the TP-Link WR703N which has been very popular with hackers because of its combination of low price (easy to find at $25 or less) and many features: the USB is super hand and, well, it’s a WiFi router! The Arduino Pro Mini shown dead-bug style is talking to the router using its serial port. [Martin] wires a pin socket to the router, which makes the rest of assembly as easy as plugging the two together. The rest of his post deals with handling bi-directional communications with Arduino code.

If you really just need that direct Ethernet pipe consider building an ENC28J60 chip into your designs.

Turning A Router Into An Arduino Shield

[Dirk] had a problem: while he already had an Arduino with an Ethernet shield, he needed WiFi for an upcoming project. Running a Cat5 cable was out of the question, and a true Arduino WiFi shield is outrageously expensive. He did, however, have a WiFi router lying around, and decided it would make a perfect WiFi shield with just a little bit of cutting.

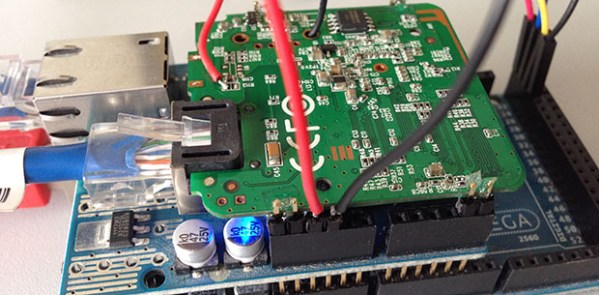
The router [Dirk] used was a TL-WR702N, a common router found in the parts bins of makers the world over. Inspiringly, the size of the router’s PCB was just larger than the space between the Arduino’s pin headers. Turning the router into a shield is simply a matter of scoring the edge of the board and gluing on a few pins for mechanical strength.

Power and ground lines were soldered between the pin headers and the router, while data is passed to the Arduino and Ethernet shield through a short cable. It may not look pretty, but if it works in a pinch we can’t complain.

Reading Sensors With Scratch

Scratch, a graphical programming language developed by MIT’s Media Lab, is an excellent tool for teaching programming. [Daniel] created an Arduino Sensor Shield to interface with Scratch, allowing for real-world input to the language.

This board is a derivative of the Picoboard, which is designed for use with Scratch. Fortunately, the communication protocol was well documented, and [Daniel] used the same protocol to talk to the graphical programming environment. The shield includes resistance sensing, a light sensor, a sound sensor, and a sliding potentiometer.

The main goal was to create a board that could easily be built by DIY etching. This meant a one sided board with as few jumpers as possible. The final design, which can be downloaded and etched at home, is single sided and uses only one jumper. Detailed steps on testing the board are provided, which is very helpful for anyone trying to build their own.

This board is perfect for educational purposes, and thanks to [Daniel]’s optimizations, it can be built and tested at at home.

Stellaris Launchpad Shield Shows Good Fabrication Technique

launchpad-shield-with-great-fabrication

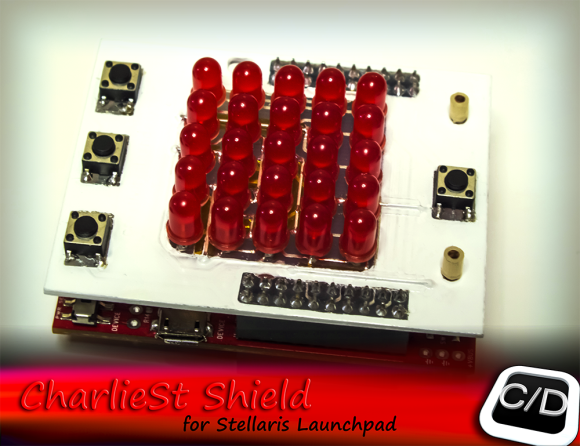
Here’s an LED and Button shield for the Stellaris Launchpad (translated) which you can fabricate at home. It gives you access to a 5×5 matrix of LEDs, and adds four more buttons. In order to cut down on the number of I/O pins required to operate the lights [Cosimo] is using the concept of Charlieplexing. This lets him get away with just six driver pins and four button pins.

It’s not just the finished product that interests us here. The fabrication itself is worth clicking through to his project post. What initially caught our eye is the use of Kapton tape as an insulator so that clipped off LEDs could be used as jumpers flat against the top side of the board before populating the LEDs themselves. After those are soldered in place he masks them off, as well as the button footprints, and uses spray paint to protect the top side of the board. The final look is more polished than most at-home project boards.