Building A Googie-Style Sign With The Help Of CNC

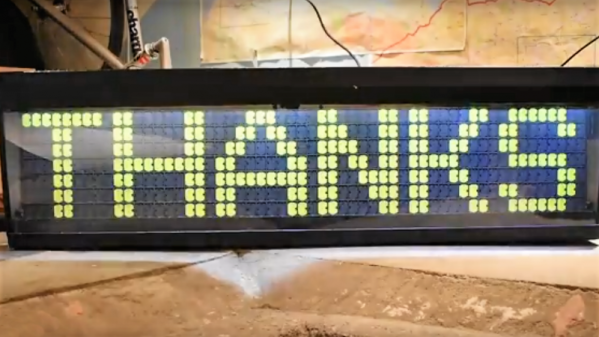
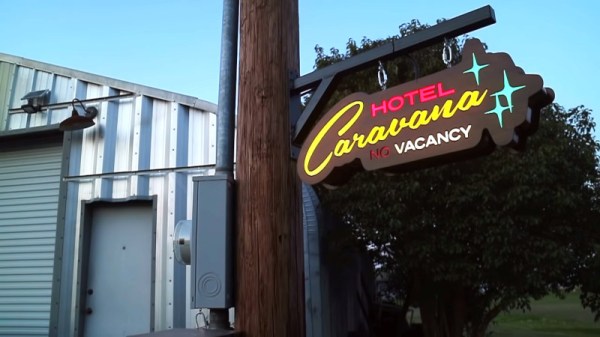
The Googie style was a major architectural trend of the post-war period in the United States. It remains popular to throwback to this style, and [Wesley Treat] got the job to create a sign in this vein for a local trailer motel (Youtube link, embedded below).

CNC tools make just about any job easier, and this one is no exception. The smooth curves of the sign were carved out of several sections of PVC sheet, and stacked up to form the body of the sign. These were then sanded, coated in putty, and given a lick of  paint. Steps like these could likely be skipped in the interest of saving time, especially given that few will see those parts once the sign is installed. However, [Wesley] takes pride in his work, and the final piece is all the better for it. It’s also important for the piece to impress the client, not just the public.

The front of the sign is also produced in PVC sheet, and given a coat of paint with brush techniques used to create a faux-wood finish. Vinyl is then applied to the textual and graphical elements in order to create a colored backlit effect. The sign is lit with off-the-shelf LED strips, and the whole assembly is weather sealed to protect it from the elements.

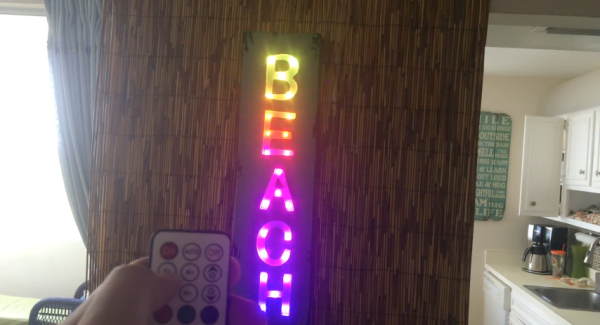
The final product is a beautiful piece, harking back to the classic Googie aesthetic and serving as a testament to [Wesley]’s skills. It’s a great example of how easy it is to create great work with the right tools and the proper attention to detail. It also goes to show how great LEDs are for signage, whether you’re at the beach or the lab. Video after the break.

Continue reading “Building A Googie-Style Sign With The Help Of CNC”

Flip-Dot Display Brought Out Of Retirement By New Drivers

LED matrix displays and flat-screen monitors have largely supplanted old-school electromechanical models for public signage. We think that’s a shame, but it’s also a boon for the tinkerer, as old displays can be had for a song these days in the online markets.

Such was the case for [John Whittington] and his flip-dot display salvaged from an old bus. He wanted to put the old sign back to work, but without a decent driver, he did what one does in these situations — he tore it down and reverse engineered the thing. Like most such displays, his Hannover Display 7 x 56-pixel flip-dot sign is electromechanically interesting; each pixel is a card straddling the poles of a small electromagnet. Pulse the magnet and the card flips over, changing the pixel from black to fluorescent green. [John] used an existing driver for the sign and a logic analyzer to determine the protocol used by the internal electronics to drive the pixels, and came up with a much-improved method of sending characters and graphics. With a Raspberry Pi and power supply now resident inside the case, a web-based GUI lets him display messages easily. The video below has lots of details, and the code is freely available.

You may recall [John] from a recent edge-lit Nixie-like display. Looks like he’s got a thing for eye-catching displays, and we’re fine with that.

Continue reading “Flip-Dot Display Brought Out Of Retirement By New Drivers”

We Are Now At DEFCON 2

If you had a working DEFCON meter that reported on real data, would it be cool or distressing?

Before we get ahead of ourselves: no, not that DEF CON. Instructables user [ArthurGuy] is a fan of the 1983 movie  War Games, and following a recent viewing –hacker senses a-tingling — he set to work building his own real-time display.

Making use of some spare wood, [ArthurGuy] glued and nailed together a 10x10x50cm box for the sign. Having been painted white already at some point, the paint brilliantly acted as a reflector for the lights inside each section. The five DEF CON level panels were cut from 3mm pieces of coloured acrylic with the numbers slapped on after a bit of work from a vinyl cutter.

Deviating from a proper, screen-accurate replica, [ArthurGuy] cheated a little and used WS2812 NeoPixel LED strips — 12 per level — and used a Particle Photon to control them. A quick bit of code polls the MI5 terrorism RSS feed and displays its current level — sadly, it’s currently at DEFCON 2.

Continue reading “We Are Now At DEFCON 2”

Animated Bathroom Sign

Once upon a time, pants were created. After a while, women were allowed to wear them too. This has made a lot of people happy and been widely regarded as a good thing. There is a problem, however – bathroom signage is largely predicated on the idea that there are two rigid genders which all humans must be sorted into, and they’re defined by whether you’re wearing pants or a dress. [Robb Godshaw], among others, disagrees with this, and set about building a gender fluid bathroom sign.

The sign assembled on the motor.

The project seeks to exploit the traditional symbols of “male” and “female” – the human figures wearing pants or a dress – by creating a sign that switches between the two every 15 seconds. This is likely to initially confuse – one might imagine the bathroom is actually changing its gender designation rapidly, forcing users to complete their business in an incredibly short timeframe. However, the message behind the project is to highlight the absurdity of defining gender by pants, colours, or indeed in a binary nature at all. [Robb] also helpfully points out that all humans have to pass waste, regardless of gender.

The sign is built with 3D-printed components, using a crank mechanism to actuate the moving parts. The mechanism is designed to give equal time to the pants and dress configurations. [Robb] shares the important details necessary to replicate the build, such as how to assemble the metal crank pin insert with a paperclip and a lighter. It’s particularly tidy the way the mechanism is integrated into the parts themselves. In true hacker style, the motor is a standard microwave oven turntable motor, which can be harvested easily from a junk appliance and can be plugged straight into mains power to operate, if you know what you’re doing. If you don’t, check out our primer on the topic.

Overall, the project is a great use of hacker techniques, like 3D printing and harvesting parts, to make a statement and start a conversation, while being fun, to boot. We’ve also seen some of [Robb]’s work before, like this giant hamster wheel for people. Video after the break.

Continue reading “Animated Bathroom Sign”

Live Counter Revives Old Nokia Phone’s Utility

Old hardware you may have on hand cannot only inspire projects in their own right, but can facilitate the realization of any ideas you have been planning. Using a Nokia N900, [MakerMan] concocted a light-up sign with a live subscriber and view count of his videos.

[MakerMan] milled out the logo used on the sign with his DIY CNC machine — built from rotary bearings and recycled stepper motors off industrial Xerox printers. The meticulous application of a jigsaw, rotary tool, and grinder resulted in a sturdy frame for the sign while a few strips of RGB LEDs imbue it with an inspiring glow. All that was left was to mount the phone in place and tape it for good measure.

Continue reading “Live Counter Revives Old Nokia Phone’s Utility”

Beach Sign

LED Sign Brightens Up The Beach After Dark

[Warrior_Rocker’s] family bought a fancy new sign for their beach house. The sign has the word “BEACH” spelled vertically. It originally came with blue LEDs to light up each letter. The problem was that the LEDs had a narrow beam that would blind people on the other side of the room. Also, there was no way to change the color of the LEDs, which would increase the fun factor. That’s why [Warrior] decided to upgrade the sign with multi-colored LEDs.

After removing the cardboard backing of the sign, [Warrior] removed the original LEDs by gently tapping on a stick with a hammer. He decided to use WS2811 LED pixels to replace the original LEDs. These pixel modules support multiple colors and are individually addressable. This would allow for a wide variety of colors and animations. The pixels came covered in a weatherproof resin material. [Warrior] baked the resin with a heat gun until it became brittle. He was then able to remove it entirely using some pliers and a utility knife. Finally, the pixels were held in place with some hot glue.

Rather then build a remote control from scratch, [Warrior] found a compatible RF remote under ten dollars. The LED controller was removed from its housing and soldered to the string of LEDs. It was then hot glued to a piece of cardboard and placed into the sign’s original battery compartment. Check out the video below for a demonstration. Continue reading “LED Sign Brightens Up The Beach After Dark”

LED necklace

IBling Is An LED Display Necklace

Are you tired of being ignored? Do you want a fashion accessory that says, “Pay attention to me!” If so, you should check out [Al’s] recent instructable. He’s built himself a necklace that includes a display made up of 512 individual LEDs.

This project was built from mostly off-the-shelf components, making it an easy beginner project. The LED display is actually a product that you can purchase for just $25. It includes 512 LEDs aligned in a 16 x 32 grid. The module is easily controlled with a Pixel maker’s kit. This board comes with built-in functionality to control one of these LED modules and can accept input from a variety of sources including Android or PC. The unit is powered from a 2000 mAH LiPo battery.

[Al] had to re-flash the firmware of the Pixel to set it to a low power mode. This mode allows him to get about seven hours of battery life with the 2000 mAH battery. Once the hardware was tested and confirmed to work correctly, [Al] had to pretty things up a bit. Some metallic gold spray paint and rhinestones transformed the project’s cyberpunk look into something you might see in a hip hop video, or at least maybe a Weird Al hip hop video.

The Pixel comes with several Android apps to control the display via Bluetooth. [Al] can choose one of several modes. The first mode allows for pushing animated gif’s to the display. Another will allow the user to specify text to scroll on the display. The user can even specify the text using voice recognition. The final mode allows the user to specify a twitter search string. The phone will push any new tweets matching the terms to the display as scrolling text.