Casting Silicone Parts With 3D-Printed Inserts For Stiffness

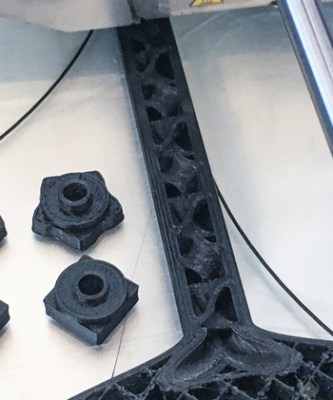
Prolific maker [Jan Mrázek] shared his process for casting soft silicone parts that nevertheless have some added stiffness, which he accomplished by embedding porous, 3D-printed “ribs” into the pieces during the casting process. The 3D-printed inserts act as a sort of skeleton, and as a result, the parts have a soft silicone surface but gain structure and rigidity that simply wouldn’t be obtained if the part were cast entirely in silicone. The nice thing is that no new materials or tools were needed; [Jan] 3D printed both the molds for the parts as well as the structural inserts. It’s always nice when one can use the same tool and materials to accomplish different functions.
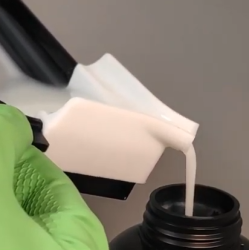
The parts [Jan] is making are interesting, as well. He observed that the process of swapping resin in his printer’s build tank was an unpleasant experience for a number of reasons, chief among them being that resin is sticky and messy, and the shape of the build tank doesn’t make pouring resin from it a clean job.

His solution was to design a pour spout that could be pressed onto the build tank, and some specially-designed squeegees to allow scraping the tank clean with ease. Silicone is the ideal material for the parts because it turns out that sticky resin beads nicely on silicone’s surface. Anywhere else, resin tends to spread out and form a sticky mess, but on silicone resin it forms tidy drops and is much easier to clean up.

It’s a technique worth keeping in mind, because one never knows when it could come in handy. Fabricating soft robots for example tends to involve silicone casting and clever techniques. See [Jan]’s parts in action in the video, embedded below.

Continue reading “Casting Silicone Parts With 3D-Printed Inserts For Stiffness”

Mold-Making Masterclass In Minutes

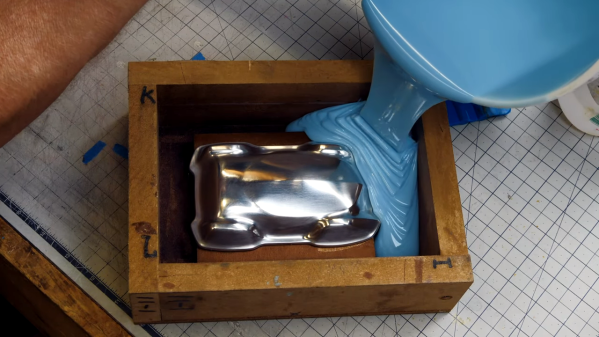
Making silicone molds seems easy, but there are a lot of missteps to be made along the way that can mean the difference between a great, reusable mold, and one that’s a sad waste of silicone. If you’re helpless to know the difference, then check out [Eric Strebel]’s 9-minute masterclass teaser video on making a two-part mold for resin casting, which is also embedded below.

Even if you already know how to do this, there’s probably a good tip in here somewhere. One of them being that you should always pour your silicone from one place and let it coat the piece being copied. Otherwise, there might be lines on the mold. Another tip is for DIY mold release made from petroleum jelly thinned with naphtha.

Our favorite tip has to do with the way [Eric] makes this a reusable two-part mold, which is more akin to injection molding. To pour silicone for the second part and get it to separately nicely, [Eric] uses sprues made out of resin rods that were cast inside of drinking straw molds. These he chamfers against a belt sander to minimize the contact with the cast part, which makes them a snap to break off. [Eric] says this is just the beginning, and there are more videos to come that will break down the steps.

There’s more than one way to make a mold, especially for casting in metal. We’ve seen everything from 3D-printed molds to kinetic sand.

Continue reading “Mold-Making Masterclass In Minutes”

Peep These Ultra-Real 3D-Printed Eyeballs

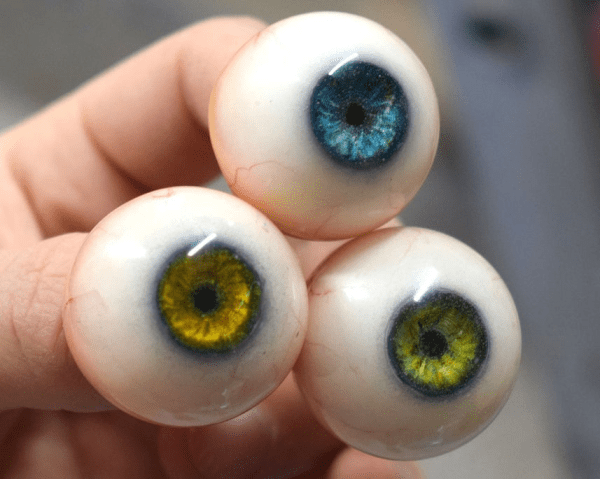
For humans, life is in the eyes. Same deal with automatons. The more realistic the eyes, the more lifelike (and potentially disturbing) the automaton is. [lkkalebob] knows this. [lkkalebob] is so dedicated to ocular realism in his ultra-real eyeballs that he’s perfected a way to make the minuscule veins from a whisper of cotton thread.

First he prints an eyeball blank out of ABS. Why ABS, you ask? It has a semi-translucence that makes it look that much more real. Also, it’s easier to sand than PLA. After vigorous sanding, it’s time to paint the iris and the apply the veins. [lkkalebob] shaves strands of lint from red cotton thread and applies it with tweezers to smears of super glue.

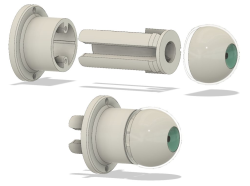
Here comes our favorite part. To make the whole process easier, [lkkalebob] designed a jig system that takes the eyeballs all the way through the stages of fabrication and into the sockets of the automaton. The hollow eye cups pressure fit on to prongs that hold it in place. This also gives the eyeball a shaft that can be chucked into a drill for easy airbrushing. In the build video after the break, he uses the eye-jig to cast a silicone mold, which he then uses to seal the eyes in resin.

Don’t have a printer or any desire to make human automata? It doesn’t take much to make mesmerizing mechanisms.

Continue reading “Peep These Ultra-Real 3D-Printed Eyeballs”

Soft Robotic Jellyfish Get Pumped In The Atlantic

In a recent paper in Bioinspiration & Biomimetics, researchers at Florida Atlantic University describe the process of building and testing five free-swimming soft robotic jellyfish. The paper contains build details and data on how three different variables – tentacle stiffness, stroke frequency, and stroke amplitude – affect the swimming characteristics of each bot. For a more in-depth build log, we found the original masters thesis by Jennifer Frame to be very thorough, including processes, schematics, parts lists, and even some Arduino code.

Though a landlubber may say the robots look more like a stumpy octopus than a jellyfish, according to the paper the shape is actually most similar to a juvenile “ephyra stage” moon jellyfish, with 8 short tentacles radiating from a central body. The flexible tentacles are made of a silicon rubber material from Smooth-On, and were cast in 3D printed molds. Inside the waterproof main body is a Teensy 3.2 microcontroller, some flash memory, a nine-axis IMU, a temperature sensor, and a 9 V battery.

There are two flexible resistors embedded in the body to measure tentacle flex, and the actual flexing is done by pumping seawater through open circuit hydraulic channels cast into the tentacles. Two 3 V mini pumps are sufficient for pumping, and the open circuit means that when the pumps turn off, the tentacles bleed off any remaining pressure and quickly snap back to their “neutral” position without the use of complicated valves.

Another simple feature is two hall effect sensors that were mounted in the body to enable waterproof “wireless communication” with the microcontroller. The wireless protocol of choice: manually waving magnets over the sensors to switch the robot between a few predefined operating modes.

There’s a soothing, atmospheric video after the break, where you can see the robots in action off the coast of Florida.

Continue reading “Soft Robotic Jellyfish Get Pumped In The Atlantic”

3D printed syringe static mixer

This 3D Printed Syringe Static Mixer Does It All

One trick for getting the bubbles out of freshly mixed 2-part epoxy, aka degassing, is to go over it gently with the flame from a propane torch. But both the mixing and degassing take time. [Gianteye] came up with a 3D printed dual-syringe static mixing system which speeds up the process. He used it with silicone to get the difficult steps out of the way quickly for his hands-on soft robotics class, allowing the students to focus more on the matter at hand. But we figure most readers might use it for epoxy.

Mixing tube interior

If you’ve bought those 2-part epoxy syringes available in stores before then you’ll know that they usually come with two syringes, each filled with one of the two parts to be mixed. Depressing the syringes causes each part to come out of its own tube. It’s then your job to mix them together and degas the result.

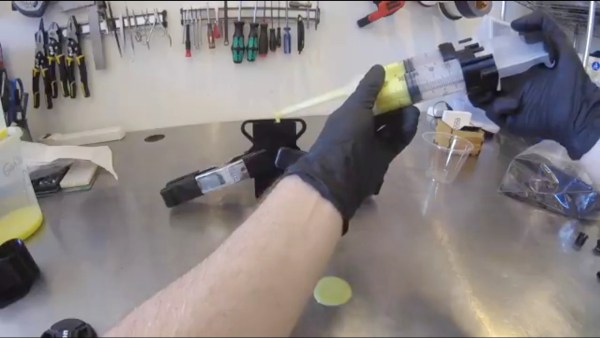
[Gianteye’s] system consists of 3D printed parts and two syringes.  Models for the 3D printing are available on his Thingiverse page and the syringes can be found online. Some of the 3D printed parts help you first fill and degas the syringes. You then attach a 3D printed mixing tube to the ends of the syringes. This tube serves two purposes. When the syringe’s plungers are depressed, both parts of the material are forced through the tube and extruded out. But on their way through, both parts pass through eight helices which form 180° turns and mix the parts together. Out comes the portioned, mixed and degassed material which can go straight into a mold or to wherever you need it.

The mixing tube was designed for one-time use but [Gianteye] discovered during an evaluation that it can be reused if you pull out any cured material and purge it. The evaluation involved silicone though. With hardened epoxy, you’ll probably have to use a new tube each time.

Check out the full details of his system in the video below, including both assembly and usage.

If you’re looking for a metallic look for something without wanting to cast metal than have a look at our own [Gerrit Coetzee’s] article about cold casting wherein he makes some very nice looking parts.

Continue reading “This 3D Printed Syringe Static Mixer Does It All”

Building Pneumatic Actuators With 3D Printed Molds

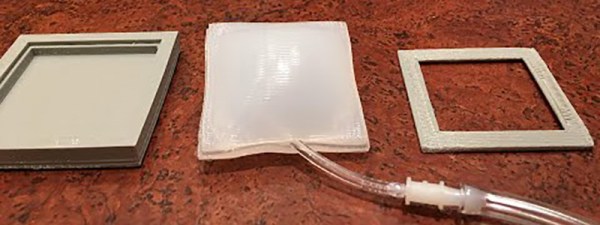
Pneumatic actuators offer interesting perspectives in applications like soft robotics and interaction design. [Aidan Leitch] makes his own pneumatic actuators from silicone rubber. His actuators contain embedded air channels that can be filled with pressurized air and completely collapse to a flat sheet when no pressure is applied. Continue reading “Building Pneumatic Actuators With 3D Printed Molds”

3D Printed Eyeglasses, VR Lenses

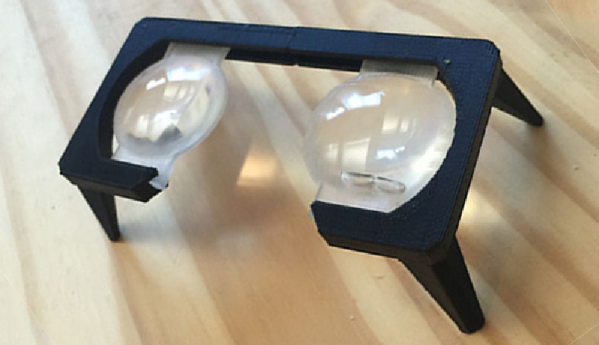
[Florian] is hyped for Google Cardboard, Oculus Rifts, and other head mounted displays, and with that comes an interest in lenses. [Floian] wanted to know if it was possible to create these lenses with a 3D printer. Why would anyone want to do this when these lenses can be had from dozens of online retailers for a few dollars? The phrase, ‘because I can’ comes to mind.

The starting point for the lens was a CAD model, a 3D printer, and silicone mold material. Clear casting resin fills the mold, cures, and turns into a translucent lens-shaped blob. This is the process of creating all lenses, and by finely sanding, polishing, and buffing this lens with grits ranging from 200 to 7000, this bit of resin slowly takes on an optically clear shine.

Do these lenses work? Yes, and [Florian] managed to build a head mounted display that can hold an iPhone up to his face for viewing 3D images and movies. The next goal is printing prescription glasses, and [Florian] seems very close to achieving that dream.

The last time we saw home lens making was more than a year ago. Is anyone else dabbling in this dark art? Let us know in the comments below and send in a tip if you have a favorite lens hack in mind.