SMD Challenge Extreme Edition Gets Our Flux Flowing

Skills challenges have become a fun way to facilitate friendly competition amongst anyone who appreciates a fine solder joint. If you’ve seen any Supercon / Remoticon coverage there’s surely been a mention of the infamous soldering skills challenge, where competitors test their mettle against surface mount components sized to be challenging but fair. What if there was a less friendly SMD challenge designed to make you hold your breath lest you blow the components away? Well now there is, the SMD Challenge Extreme Edition by friend-of-the-Hackaday and winner of the 2019 Supercon soldering challenge [Freddie].

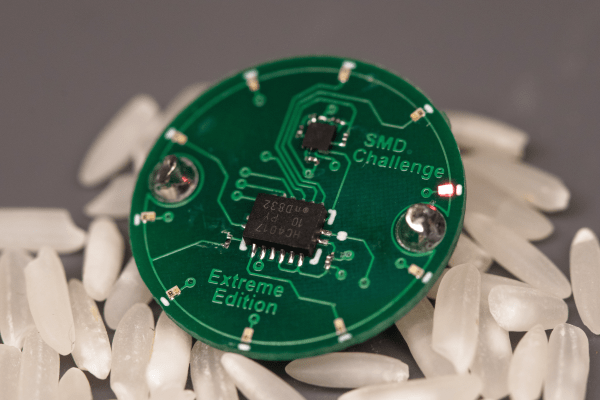
When assembled the SMD Extreme Edition uses a 555 timer and a 74HC4017 decade counter to light a ring of 10 LEDs lights around its perimeter, powered by a coin cell. However the  Extreme Edition deviates from the typical SMD Challenge format. Instead of ramping up in difficulty with ever-shrinking components, the Extreme Edition only has one size: torturous. See those gray blobs in the title image? Those are grains of rice.

The Extreme Edition’s 0201-sized LEDs aren’t the absolute smallest components around, but to minimize enjoyment all passives are 01005. (Check out the SMD Challange Misery Edition for even 01005 LED action.)

The Extreme Edition has other tricks up its sleeve, too. That 555 may be venerable in age, but this version is in an iron-frustrating 1.41 x 1.43 mm BGA package, which pairs nicely with that decade counter in 2.5 mm x 3.5 mm QFN.

Despite the wordwide pandemic locking down travel and conferences, a few brave challengers have already taken up their iron and succeeded at Extreme SMD. Want to see it in action? Check out the original Tweets after the break.

Continue reading “SMD Challenge Extreme Edition Gets Our Flux Flowing”

Angela Sheehan Is Developing Wearable Tech With Whimsy

As a concept, wearable technology excites many of us, but in practice, it’s been hard to nail down. Up to this point, the most high-tech thing the average person might reasonably wear has been a wrist watch. Devices like Google Glass tried to push the state-of-the-art, but it arguably raised more questions than it answered. It demonstrated in a very public way that developing wearable technology that’s simultaneously visually appealing, useful, and robust enough to handle daily life is exceptionally difficult. If Google couldn’t pull it off, what hope do we lowly hackers have?

But maybe we’ve been going about things the wrong way. Compelling as the end result may seem, the move from wrist watches to head-mounted computers is simply too large of a technical and psychological leap to make. To help develop the skills and techniques necessary to build practical wearable electronics, it might help to take a slightly more fanciful approach.

It seems to be working pretty well for Angela Sheehan, at least. In her talk “Building Whimsical Wearables: Leveling Up Through Playful Prototyping” at the 2019 Hackaday Superconference, she went over some of the things she’s learned while developing her Color Stealing Fairy costume. The product of several years of iterative design, the costume is able to mimic colors seen in the environment through the use of a wireless sensor wand, and features a number of design elements that are critical to any successful wearable project.

Even if a custom RGB Fairy costume isn’t on your short list of projects, there’s information in this talk that will surely be of interest to anyone who’s even contemplated a wearable project. From technical aspects like battery placement to logistical considerations such as making adjustments for multiple wearers, Angela’s make-believe creation has become a testbed for real-world considerations.

Continue reading “Angela Sheehan Is Developing Wearable Tech With Whimsy”

A Newbie Takes The SMD Challenge At Supercon

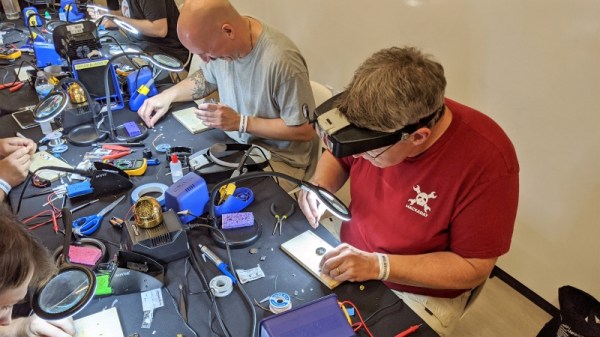
First-time visitors to Disneyworld often naively think they’re going to “do” the park in three days: one day for the Magic Kingdom, one day for Epcot, and one day for everything else. It’s easy to spot such people, collapsed on a bench or dragging exhausted kids around while trying to make their way to the next must-see attraction. Supercon is something like that — a Disney-esque theme park for hackers that will exhaust you if you don’t have a plan, and if you don’t set reasonable expectations. Which is why I was glad that I set only one real goal for my first Supercon: take the SMD Soldering Challenge.

Now, while I’m pretty handy with a soldering iron, I was under no illusion that I would be at all competitive. All my soldering experience has been with through-hole components, and while I also used to doing some production soldering on fine-pitch connectors, the whole surface-mount thing is new to me. I entered mainly because I wanted to see what was possible coming in raw. At best I’d learn what my limits are, and at worst I’d fail spectacularly and provide grist for a “Fail of the Supercon” post. It’s a win either way.

Continue reading “A Newbie Takes The SMD Challenge At Supercon”

Grind Your Welds With Pride, If That’s The Way You Do It

To grind or not to grind? What a question! It all depends on what you’re really trying to show, and in the case of welded joints, I often want to prove the integrity of the weld.

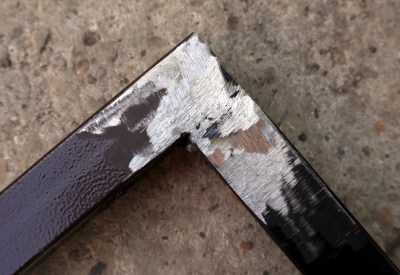
My ground-back piece of welded tube. Eagle-eyed readers will spot that the grinding reveals a weld that isn't perfect.
My ground-back piece of welded tube. Eagle-eyed readers will spot that the grinding reveals a weld that isn’t perfect.

Recently, I wrote a piece in which I talked about my cheap inverter welder and others like it. As part of it I did a lower-current weld on a piece of thin tube and before snapping a picture of the weld I ground it back flat. It turns out that some people prefer to see a picture of the weld bead instead — the neatness of the external appearance of the weld — to allow judgment on its quality. Oddly I believe the exact opposite, that the quality of my weld can only be judged by a closer look inside it, and it’s this point I’d like to explore.

Continue reading “Grind Your Welds With Pride, If That’s The Way You Do It”

Ask Hackaday: What Skills Would You Give A Twelve Year Old?

In several decades of hanging around people who make things, one meets a lot of people fascinated by locks, lock picking, and locksport. It’s interesting to be sure, but it had never gripped me until an evening in MK Makerspace when a fellow member had brought in his lockpicking box with its selection of locks, padlocks, and tools. I was shown the basics of opening cheap — read easy from that padlocks, and though I wasn’t hooked for life I found it to be a fascinating experience. Discussing it the next day a friend remarked that it was an essential skill they’d taught their 12-year-old, which left me wondering, just what skills would you give to a 12-year-old? Continue reading “Ask Hackaday: What Skills Would You Give A Twelve Year Old?”

Hackaday Superconference: Estefannie’s Daft Punk Helmet

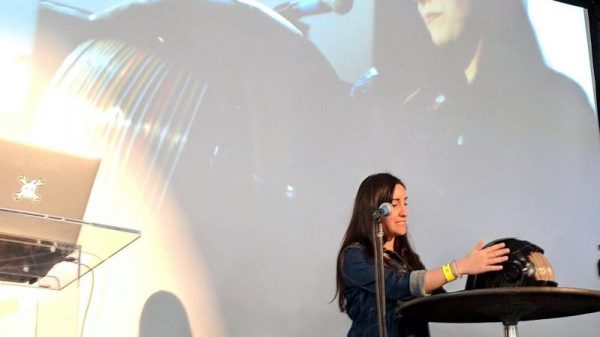
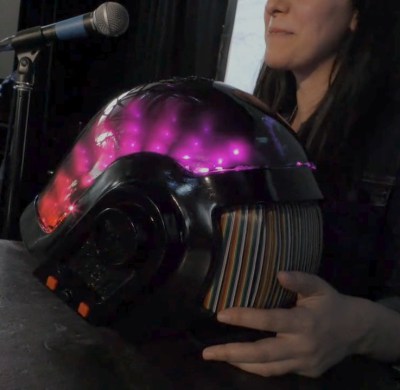
There’s no single formula for success, but if we’ve learned anything over the years of covering cons, contests, and hackathons, it’s that, just like in geology, pressure can create diamonds. Give yourself an impossible deadline with high stakes, and chances are good that something interesting will result. That’s what Estefannie from the YouTube channel “Estefannie Explains It All” did when Bay Area Maker Faire was rolling around last year, and she stopped by the 2018 Hackaday Superconference to talk about the interactive Daft Punk helmet that came out of it.

It’s a rapid-fire tour of Estefannie’s remarkably polished replica of the helmet worn by Guy-Manuel de Homem-Christo, one half of the French electronic music duo Daft Punk. Her quick talk, video of which is below, gives an overview of its features, but we miss the interesting backstory. For that, the second video serves as a kickoff to a whirlwind month of hacking that literally started from nothing.

You’ll Learn it Along the Way

Before deciding to make the helmet, Estefannie had zero experience in the usual tools of the trade. With only 28 days to complete everything, she had to: convert her living room into a workshop; learn how to 3D print; print 58 separate helmet parts, including a mold for thermoforming the visor; teach herself how to thermoform after building the tools to do so; assemble and finish all the parts; and finally, install the electronics that are the hallmark of Daft Punk’s headgear.

The three videos in her series are worth watching to see what she put herself through. Estefannie’s learning curve was considerable, and there were times when nothing seemed to work. The thermoforming was particularly troublesome — first too much heat, then not enough, then not enough vacuum (pretty common hurdles from other thermoforming projects we’ve seen). But the finished visor was nearly perfect, even if it took two attempts to tint.
We have to say that at first, some of her wounds seemed self-inflicted, especially seeing the amount of work she put into the helmet’s finish. But she wanted it to be perfect, and the extra care in filling, sanding, priming, and painting the printed parts really paid off in the end. It was down to the wire when BAMF rolled around, with last minute assembly left to the morning of the Faire in the hotel room, but that always seems to be the way with these kinds of projects.

In the end, the helmet came out great, and we’re glad the run-up to the Superconference wasn’t nearly as stressful for Estefannie — or so we assume. And now that she has all these great new skills and tools, we’re looking forward to her next build.

Continue reading “Hackaday Superconference: Estefannie’s Daft Punk Helmet”

From Shop Floor Dust To Carbon Steel

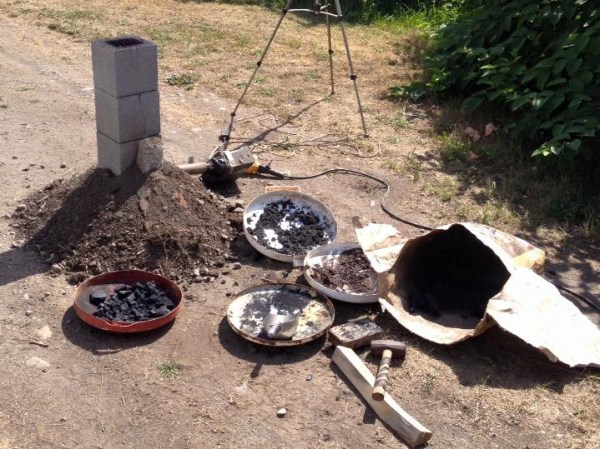
[Chandler Dickinson] did his monthly sweep of the floor in his blacksmith’s shop when it occurred to him that all that metal dust had to go somewhere, didn’t it? So he did the only reasonable thing and made a crude foundry out of cinder blocks, melted his dirt in it, and examined what came out the other end.

His first step was to “pan” for steel. He rinsed all the dirt in a bucket of water and then ran a magnet at the bottom of the bucket. The material that stuck to the magnet, was ripe for reclaimation.

Next he spent a few hours charging a cinderblock foundry with coal and his iron dust. The cinderblocks cracked from the heat, but at the end he had a few very ugly brittle rocks that stuck to a magnet.

Of course there’s a solution to this non-homogenous steel. As every culture with crappy steel eventually discovered, you can get really good steel if you just fold it over and over again.  So he spend some time hammering one of his ugly rocks and folding it a bit. He didn’t get to two hundred folds, but it was enough to show that the resulting slag was indeed usable iron.

He did a deeper examination of the steel last week, going as far as to etch it, after discovering that the metal sparked completely differently when sanded on one side versus the other. It definitely needed work, but all seemed to have worked in the end.

Continue reading “From Shop Floor Dust To Carbon Steel”