How To Retrofit A Pick And Place Machine For OpenPnP, In Detail

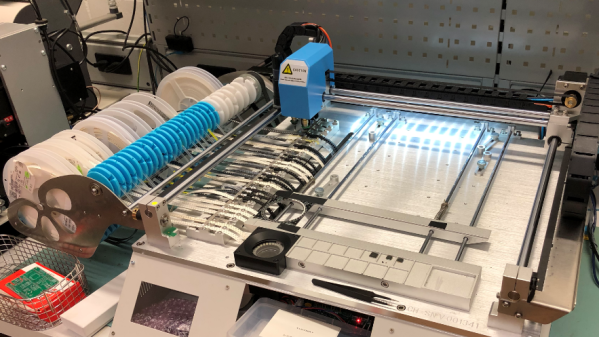
[Erich Styger] owns a Charmhigh CHM-T36VA pick and place machine, which he describes as well-built and a great value of hardware for the money. However, the software end is less impressive, with a proprietary controller that is functional but not great. The good news is that it is possible to retrofit the machine to use the OpenPnP framework, which is open-source and offers more features. Even better, [Erich] has already done and documented all the hard parts!

The CHM-T36VA has two heads, vision system, and uses drag feeders.

The conversion requires upgrading a few hardware parts such as the cameras, replacing the controller’s firmware, then installing and configuring OpenPnP (which runs on an attached PC.)

[Erich] does not recommend this conversion for anyone who is not very familiar with electronics, or has any worries about voiding warranties. Barring that, he suspects the conversion could be done in about a day or two’s worth of focused work. It took him two weeks, including time spent fine-tuning the first production job. He says the bulk of the time was spent on configuration, but he has shared his configuration on GitHub in the hopes that it will save a lot of time for anyone using the same hardware.

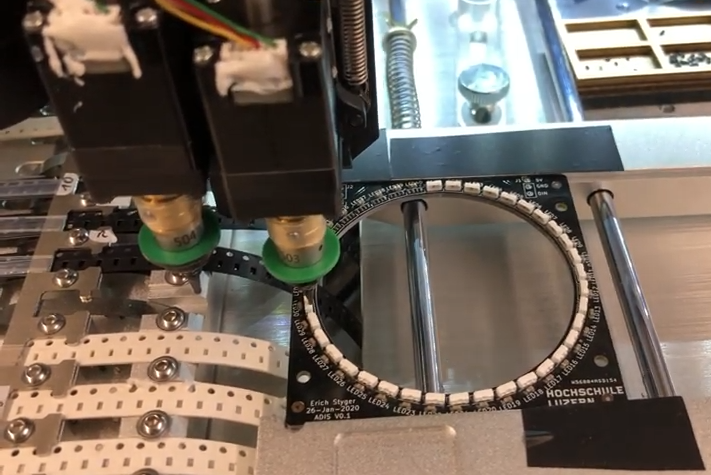
After populating some 300 boards and placing over 7000 parts, he’s very happy with the results. The machine places between 600 and 700 parts per hour, so speed might not be amazing but it’s perfectly serviceable. [Erich] finds that while the machine runs a little slower than it did with the original controller, it also runs much smoother and quieter overall. In return he gets what he truly wanted: a pick and place machine whose operation and configuration is entirely open and accessible. You can see it in action in the video, embedded below.

Continue reading “How To Retrofit A Pick And Place Machine For OpenPnP, In Detail”

Using TL Smoothers For Better 3D Prints

Some 3D printers will give you prints with surfaces resembling salmon skin – not exactly the result you want when you’re looking for a high-quality print job. On bad print jobs, you can usually notice that the surface is shaking – even on the millimeter scale, this is enough to give the print a bumpy finish and ruin the quality of the surface. TL smoothers help with evening out the signal going through stepper motors on a 3D printer, specifically the notoriously noisy DRV8825 motor drivers.

Analyzing the sine wave for the DRV8825 usually shows a stepped signal, rather than a smooth one. Newer chips such as the TMC2100, TMC2208, and TMC2130 do a much better job at providing smooth signals, as do cheaper drivers like the commonly used A4988s.

[Fugatech 3D Printing] demonstrates some prints from a D-Force Mini with an MKS Base 1.4 smoother-based control board, which is easier to use and smarter than Marlin. On the two prints using smoothers, one uses a board with four diodes, while the other was printed with a board with eight diodes. [Mega Making] compares how the different motor drivers work and experimentally shows the stuttering across the different motors before and after connecting to the smoothers.

The yellow and pink traces are the current for each phase of the motor. The blue and green traces are the voltages on each terminal of the phase with the yellow current. [via Schrodinger Z]
A common problem with DRV8825 motors is their voltage rating, which is lower than most supplies. When a 3D printer is moving slower than 100mm/min, the motor is unable to move smoothly.


[Schrodinger Z] does a bit of digging into the reason for the missing microsteps, testing out different decay modes in DRV8825s and why subharmonic oscillations occur in the signals from the motor.

The driver consequently has a “dead zone” where it is unable to produce low currents. Modifying the motor by offsetting the voltage by 1.4V (the point where no current flow) would allow the dead zone to be bridged. This also happens to be the logic behind the design for smoothers, although it is certainly possible to use different diodes to customize the power losses depending on your particular goal for the motor.

Debugging signal problems in a 3D printer can be a huge headache, but it’s also gratifying to understand why microstepping occurs from current analysis.

Continue reading “Using TL Smoothers For Better 3D Prints”

New Part Day: Smoothie For RAMPS

When it comes to 3D printer controllers, there are two main schools of thought. The first group is RAMPS or RAMBo which are respectively a 3D printer controller ‘shield’ for the Arduino Mega and a stand-alone controller board. These boards have been the standard for DIY 3D printers for a very long time, and are the brains for quite a few printers from the biggest manufacturers. The other school of thought trundles down the path of ARM, with the most popular boards running the Smoothie firmware. There are advantages to running a printer with an ARM microcontroller, and the SmoothieBoard is fantastic.

Re-ARM for RAMPS — a Kickstarter that went live this week — is the middle ground between these two schools of thought. It’s a motherboard for RAMPS, but brings the power of a 32-bit LPC1768 ARM processor for all that smooth acceleration, fine control, and expansion abilities the SmoothieBoard brings.

Continue reading “New Part Day: Smoothie For RAMPS”