Smoothing Big Fonts On Graphic LCDs

Here’s a neat little trick: take the jaggies out of scaled fonts on the fly! This technique is for use on graphic displays where you might want to scale your fonts up. Normally you’d just write a 2×2 block of pixels for every area where there would have been one pixel and boom, larger font. Problem is, that also multiplies each empty area and you end up with jagged edges in the transitions that really catch your eye.
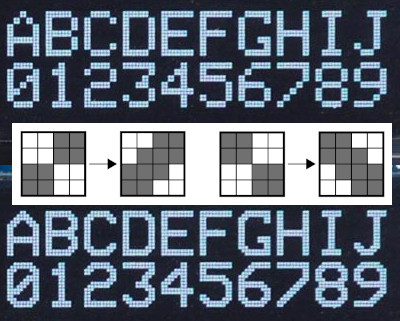
[David Johnson-Davies] entered big-brain mode and did something much cleverer than the obvious solution of using multiple font files. Turns out if you analyze the smoothing problem you’ll realize that it’s only the angled areas that are to blame, horizontal and vertical scaling are nice and smooth. [David’s] fix looks for checker patterns in what’s being drawn, adding a single pixel in the blank spots to smooth out the edge incredibly well!

The technique has been packaged up in a simple function that [David] wrote to play nicely in the Arduino ecosystem. However, the routine is straightforward and would be quick to implement no matter the language or controller. Keep this one in your back pocket!

Now if all you have on hand is an HD44780 character LCD, that one’s arguably even more fun to hack around on just because you’re so limited on going beyond the hard-coded font set. We’ve seen amazing things like using the custom character slots to play Tetris.

Smoothing PLA With Two Paints

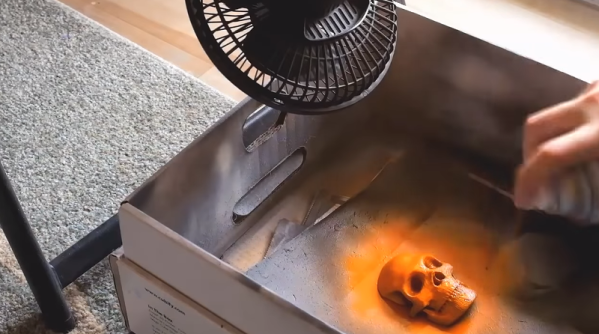
There was a time when most 3D printers used ABS plastic. It stinks, is probably bad for you, and tends to warp unless printed in a heated enclosure. So most people have gone to something else, mostly PLA. But ABS also dissolves in a readily-available solvent, acetone, and this is useful for smoothing the layer artifacts from a 3D print. [3DSage] has a technique that works for PLA or — he says — probably any filament. You can see what he’s doing in the video below.

The video starts out with a recap of things most Hackaday readers will already know. But hang in there because at about 1:20, he reveals his method.

Continue reading “Smoothing PLA With Two Paints”

Smooth PLA Through The Fire And Flames

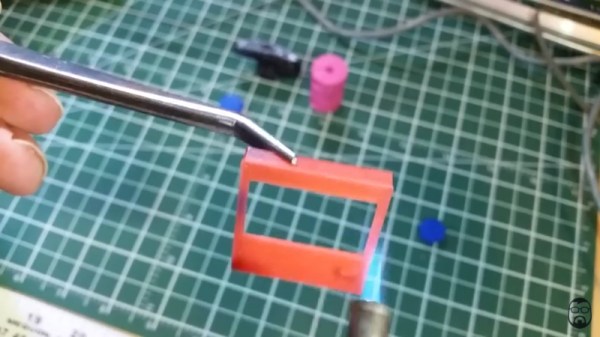
3D printing makes it easy to produce complex geometries, but the fused deposition methods generally create parts with poor surface finish, largely due to the layers being highly visible in the finished part. There are a wide variety of ways to deal with this, often involving sanding parts after production, or the use of fillers and paints. [XerotoLabs] has another solution. (YouTube, video below the break.)

To smooth the parts, a butane torch is pressed into service. The flame temperature is kept fairly low, and the torch is used almost like a brush to evenly apply heat to the surface of the part. As the PLA reaches its melting temperature, surface tension helps to smooth the part out. This is very similar to flame polishing which is commonly used in the fabrication of acrylic plastics.

It is a technique that requires some finesse – too much heat or focus on a single area, and you’re liable to end up with a molten plastic blob instead of a nice shiny finished part. Precautions must also be taken to avoid burning yourself or your workshop to the ground. But it’s a useful tool to have in your kit when you’re producing PLA parts that you want to look their best.

We’ve seen other techniques for smoothing PLA, too – the solvent method is particularly interesting. Continue reading “Smooth PLA Through The Fire And Flames”

Fail Of The Week: How NOT To Smooth A 3D Print

Many of the Fail Of The Week stories we feature here are pretty minor in the grand scheme of things. At worse, gears are ground, bits are broken, or the Magic Blue Smoke is released. This attempt to smooth a 3D print released far more than a puff of blue smoke, and was nearly a disaster of insurance adjuster or medical examiner proportions.

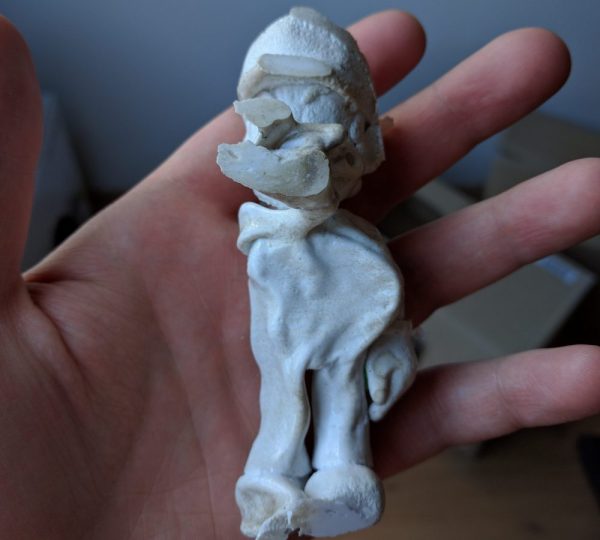
Luckily, [Maxloader] and his wife escaped serious injury, and their house came out mostly unscathed. The misadventure started with a 3D printed Mario statue. [Maxloader] had read acetone vapor can smooth a 3D print, and that warming the acetone speeds the process. Fortunately, his wife saw the looming danger and wisely suggested keeping a fire blanket handy, because [Max] decided to speed the process even more by putting a lid on the pot. It’s not clear exactly what happened in the pot – did the trapped acetone vapors burp the lid off and find a path to the cooktop burner? Whatever it was, the results were pretty spectacular and were captured on a security camera. The action starts at 1:13 in the video below. The fire blanket came in handy, buying [Max] a few seconds to open the window and send the whole flaming mess outside. Crisis averted, except for nearly setting the yard on fire.

What are we to learn from [Maxloader]’s nearly epic fail? First, acetone and open flame do not mix. If you want to heat acetone, do it outside and use an electric heat source. Second, a fire extinguisher is standard household equipment. Every house needs at least one, and doubly so when there’s a 3D printer present. And third, it’s best to know your filaments – the dearly departed Mario print was in PLA, which is best smoothed with tetrahydrofuran, not acetone.

Anything else? Feel free to flame away in the comments.

Continue reading “Fail Of The Week: How NOT To Smooth A 3D Print”

3D Printed Quadcopter Props

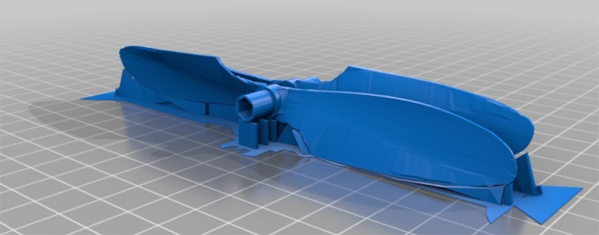
Here’s something that isn’t quite a hack; he’s just using a 3D printer as a 3D printer. It is extremely interesting, though. Over on Hackaday.io [Anton] is creating 3D printable propellers for quadcopters and RC planes. Conventional wisdom says that propellers require exceedingly exacting tolerances, but [Anton] is making it work with the right 3D file and some creative post-processing treatment of his prints.

These 3D printed props are a remix of an earlier project on Thingiverse. In [Anton]’s testing, he didn’t get the expected lift from these original props, so a few small modifications were required. The props fit on his 3D printer bed along their long edge allowing for ease of slicing and removal of support material. For post-processing, [Anton] is using acetone vapor smoothing on his ABS printed design. They come out with a nice glossy sheen, and should be reasonably more aerodynamic than a prop with visible layer lines.

Although [Anton]’s prop is basically a replica of a normal, off-the-shelf quadcopter prop, 3D printing unique, custom props does open up a lot of room for innovation. The most efficient propeller you’ll ever find is actually a single-bladed propeller, and with a lot of experimentation, it’s possible anyone with a well-designed 3D printer could make turn out their own single-blade prop.

Continue reading “3D Printed Quadcopter Props”

Ultrasonic Misting Vapor Polisher For 3D Printed Parts

If you’ve ever seen 3D printed parts form an extrusion type printer, one of the first things you’ll notice is the texture. It’s caused by the printer laying down its plastic layer after layer. This surface texture isn’t always desirable, so people have found a few ways to smooth the 3D printed part out. For example if you are using ABS, you can rinse or “paint” the part with acetone. Another method of smoothing is heat up some acetone in a container, and let the acetone vapors do work to smooth the finished part.

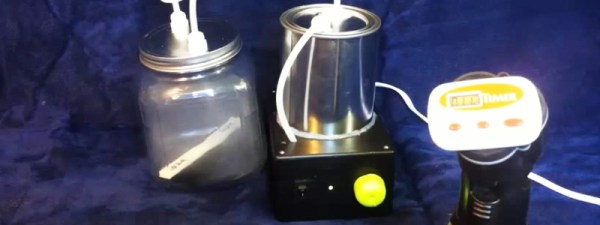
[Mike] from engineerdog.com thinks he may have found a more elegant solution using an inexpensive ultrasonic humidifier you can buy online for about $40 USD. This room humidifier uses a piezoelectric transducer that can vibrate liquids at a high frequency to produce a mist. [Mike] removed the transducer and electronics from the humidifier and mounted it into a paint can.  This is where the acetone is stored, and turned into a vapor by the transducer. An aquarium pump is used to transfer the highly concentrated vapors into the polishing chamber (an extra large pickle jar.) He added a spring loaded, electrical timer (the kind you might find in the bathroom at an office building) to make his vapor polisher as easy to use as a microwave oven.

[Mike] concludes his post with some strength testing of parts before and after acetone treatment, and was surprised to find that the parts were weaker after the treatment.  You can read more about that on his blog and see a video of the vapor polisher after the break.

Continue reading “Ultrasonic Misting Vapor Polisher For 3D Printed Parts”

Smoothing PLA Printed Parts

We’ve seen a few advances in the finishing processes of 3D prints over the last few months that result in some very attractive parts that look like they were injection molded. Smoothing ABS prints is now a necessary skill for anyone looking to produce professional parts, but those of us using PLA for our RepRaps have been left in the cold. After some experimentation, the guys over at protoparadigm have come up with a way to smooth out those PLA prints, using the same technique and a chemical that’s just as safe as acetone.

Instead of acetone, the guys at protoparadigm are using tetrahydrofuran, or THF, as a solvent for PLA. Other PLA solvents aren’t friendly to living organisms or are somewhat hard to obtain. THF has neither of these qualities; you still need to use it in a well ventilated area with nitrile gloves, but the same precautions when using acetone or MEK still apply. It’s also easy to obtain, as well: you can grab some on Amazon, even.

The process for smoothing PLA prints with THF is the same as smoothing ABS prints with acetone. Just suspend the print in a glass container, pour in a tiny amount of the solvent, and (gently) heat it. The evaporated solvent will smooth all the ridges out of the print, leaving a shiny and smooth surface. You can, of course, hand polish it by dedicating a lint-free cloth and a pair of gloves to the task.