Drill Thrice, Solder Once

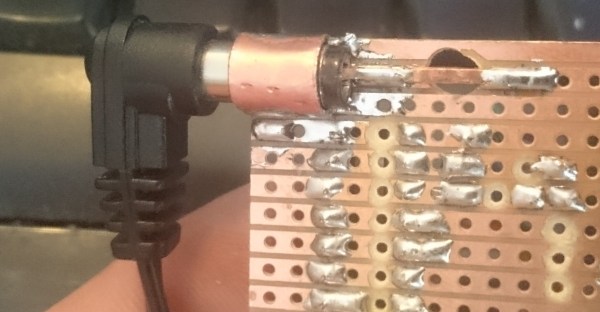
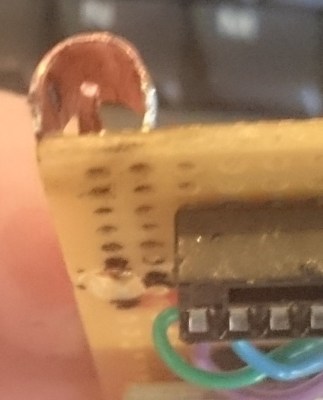
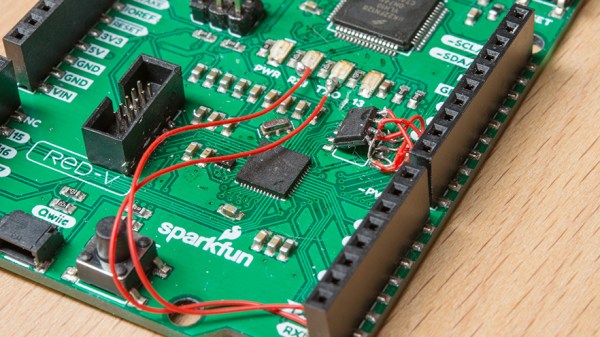
If you design printed circuit boards, then you will have also redesigned printed circuit boards. Nobody gets it right the first time, every time. Sometimes you can solder a scrap of 30gauge wire, flip a component 180°, or make a TO-92 transistor do that little pirouette thing where the legs go every-which-way. If you angered the PCB deities, you may have to access a component pad far from an edge. [Nathan Seidle], the founder of Sparkfun, finds himself in this situation, but all hope is not lost.

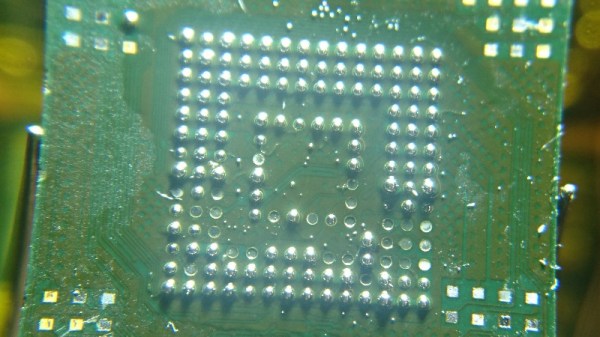
Our first thought is to desolder everything, then take a hot iron and tiny wires to each pad. Of course, this opens up a lot of potential for damage to the chip, cold joints, and radio interference. Accessing the pin in vivo has risks, but they are calculated. The idea is to locate the pin, then systematically drill from the backside and expose the copper. [Nate] also discovers that alcohol will make the PCB transparent so you can peer at the underside to confirm you have found your mark.

In a real, “fight fire with fire” idea, you can rework with flex PCBs or push your PCB Fu to the next level and use PCBs as your enclosure.

Nixie Clock Failure Analysis, [Dalibor Farný] Style

We’ve become sadly accustomed to consumer devices that seem to give up the ghost right after the warranty period expires. And even when we get “lucky” and the device fails while it’s still covered, chances are that there will be no attempt to repair it; the unit will be replaced with a new one, and the failed one will get pitched in the e-waste bin.

Not every manufacturer takes this approach, however. When premium quality is the keystone of your brand, you need to take field failures seriously. [Dalibor Farný], maker of high-end Nixie tubes and the sleek, sophisticated clocks they plug into, realizes this, and a new video goes into depth about the process he uses to diagnose issues and prevent them in the future.

One clock with a digit stuck off was traced to via failure by barrel fatigue, or the board material cracking inside the via hole and breaking the plated-through copper. This prompted a board redesign to increase the diameter of all the vias, eliminating that failure mode. Another clock had a digit stuck on, which ended up being a short to ground caused by pin misalignment; when the tube was plugged in, the pins slipped and scraped some solder off the socket and onto the ground plane of the board. That resulted in another redesign that not only fixed the problem by eliminating the ground plane on the upper side of the board, but also improved the aesthetics of the board dramatically.

As with all things [Dalibor], the video is a feast for the eyes with the warm orange glow in the polished glass and chrome tubes contrasting with the bead-blasted aluminum chassis. If you haven’t watched the “making of” video yet, you’ve got to check that out too.

Continue reading “Nixie Clock Failure Analysis, [Dalibor Farný] Style”

The Battery Is Part Of The Art

A work of art is appreciated for its own sake and we will never tire of seeing stunning circuits from microscopic dead-bugs to ornate brass sculptures. We also adore projects that share the tricks to use in our own work. Such is the case with [Jiří Praus] who made some jewelry and shared his templates so we try this out ourselves.

The materials include brass wire, solder, and surface-mount LEDs. Template design expects a 1206 light, so if you step outside that footprint, plan accordingly. The printable templates are intuitive and leverage basic wire jewelry making skills. Some good news is that flashing LEDs are available in that size so you can have an array of blinkenlights that appears random due to drifting circuits. Please be wary with RGB lights or mixing colors because red LEDs generally run at a lower voltage and they will siphon a significant chunk of a coin-cell’s power from a competing green or blue. How else can these be personalized?

[Jiří]’s charms are just the latest of circuits that capture our eyes and tickle our ears.

Dead Bug Arduino Is Lively And Shield-Compatible

Microcontroller demo boards such as the Arduino UNO are ubiquitous on Hackaday as the brains of many a project which inevitably does something impressive or unusual. Sometime someone builds a particularly tiny demo board, or an impressively large one. In the case of the board featured here, the Arduino is a gorgeous labor of love which can’t really be called a board since there is no PCB. Instead of the traditional fiberglass, [Jiří Praus] formed brass bars into the circuitry and held it together with solder.

This kind of dedication to a project leaves an impression. His notes show he saw the barest way to operate an ATMega328, built it, tested, and moved on to the power supply to make it self-sustaining, then onto the communication circuit, and finally the lights. The video below shows a fully-functional Arduino happily running the blink program. He plans to encase the brass portion in resin to toughen it up and presumably keep every bump from causing a short circuit. The components are in the same position due to a custom jig which means a standard shield will fit right into place.

The Arduino started far less flashy yet nearly as fragile, and it has grown. And shrunk.

Continue reading “Dead Bug Arduino Is Lively And Shield-Compatible”

Ask Hackaday: Get The Lead Out Or Not?

For most of the history of industrial electronics, solder has been pretty boring. Mix some lead with a little tin, figure out how to wrap it around a thread of rosin, and that’s pretty much it. Sure, flux formulations changed a bit, the ratio of lead to tin was tweaked for certain applications, and sometimes manufacturers would add something exotic like a little silver. But solder was pretty mundane stuff.

Source: RoHS Guide

Then in 2003, the dull gray world of solder got turned on its head when the European Union adopted a directive called Restriction of Hazardous Substances, or RoHS. We’ve all seen the little RoHS logos on electronics gear, and while the directive covers ten substances including mercury, cadmium, and hexavalent chromium, it has been most commonly associated with lead solder. RoHS, intended in part to reduce the toxicity of an electronic waste stream that amounts to something like 50 million tons a year worldwide, marked the end of the 60:40 alloy’s reign as the king of electrical connections, at least for any products intended for the European market, when it went into effect in 2006.

Continue reading “Ask Hackaday: Get The Lead Out Or Not?”

Recover Data From Damaged Chips

Not every computer is a performance gaming rig. Some of us need cheap laptops and tablets for simple Internet browsing or word processing, and we don’t need to shell out thousands of dollars just for that. With a cheaper price tag comes cheaper hardware, though, such as the eMMC standard which allows flash memory to be used in a more cost-advantageous way than SSDs. For a look at some the finer points of eMMC chips, we’ll turn to [Jason]’s latest project.

[Jason] had a few damaged eMMC storage chips and wanted to try to repair them. The most common failure mode for his chips is “cratering” which is a type of damage to the solder that holds them to their PCBs. With so many pins in such a small area, and with small pins themselves, often traditional soldering methods won’t work. The method that [Jason] found which works the best is using 0.15 mm thick glass strips to aid in the reflow process and get the solder to stick back to the chip again.

Doing work like this can get frustrating due to the small sizes involved and the amount of heat needed to get the solder to behave properly. For example, upgrading the memory chip in an iPhone took an expert solderer numerous tries with practice hardware to finally get enough courage to attempt this soldering on his own phone. With enough practice, the right tools, and a steady hand, though, these types of projects are definitely within reach.

Bottom Of The Barrel Connector: Tell Us Your Socket Hacks

Sometimes you get an epiphany for a project that will change the world. A simple device, on a custom circuit board with inexpensive parts that will disrupt the status quo and make you a billion dollars in no time. Then there are the times where you need to throw scraps of copper at a prototyping board and strangle nine-volts out by any means necessary.

This is about the latter. In one of our Hack Chats, [Morning.Star] shared a couple of images wherein a barrel connector was needed, but there was no time to wait for one in the mail. Necessity birthed the most straightforward solution which did not involve shredding a power adapter’s plug. There is no link, [Stuart Longland] aka [Redhatter] screen-capped the image exchange and reminded us on the tip line.

Chances are you’ve faced this problem yourself. Everyone has a box of old wall warts somewhere, exhibiting a wide range of barrel connector sizes. If you can’t take the easy route of cutting off the connectors, what’s your go-to trick? Alligator clips are a horrid approach, and there aren’t really any clear winners that come to mind. [Morning.Star’s] hack is actually quite respectable! It appears to be a roll of copper (perhaps from tubing?) bent for a bit of spring tension on the outside of the barrel. The inside is contacted by thick copper wire with a kink to again provide spring action.

So, spill the beans. What’s your barrel connector trick and does it work reliably?