Mold-Making Masterclass In Minutes

Making silicone molds seems easy, but there are a lot of missteps to be made along the way that can mean the difference between a great, reusable mold, and one that’s a sad waste of silicone. If you’re helpless to know the difference, then check out [Eric Strebel]’s 9-minute masterclass teaser video on making a two-part mold for resin casting, which is also embedded below.

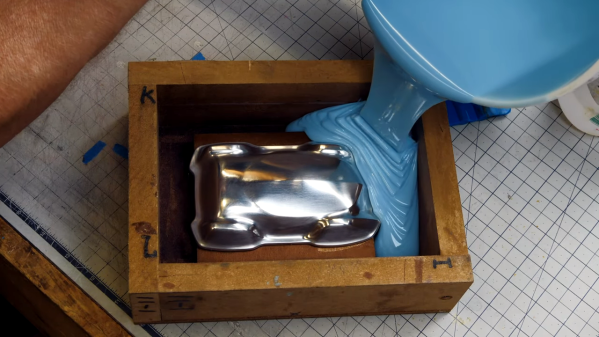
Even if you already know how to do this, there’s probably a good tip in here somewhere. One of them being that you should always pour your silicone from one place and let it coat the piece being copied. Otherwise, there might be lines on the mold. Another tip is for DIY mold release made from petroleum jelly thinned with naphtha.

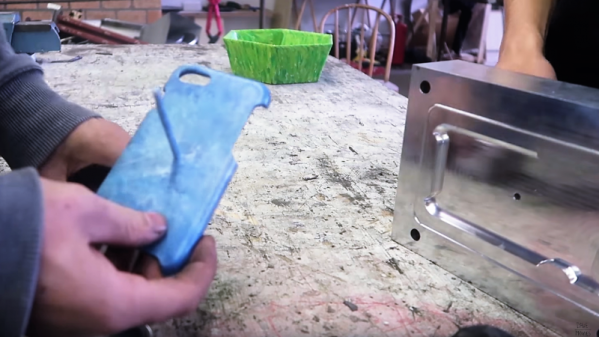
Our favorite tip has to do with the way [Eric] makes this a reusable two-part mold, which is more akin to injection molding. To pour silicone for the second part and get it to separately nicely, [Eric] uses sprues made out of resin rods that were cast inside of drinking straw molds. These he chamfers against a belt sander to minimize the contact with the cast part, which makes them a snap to break off. [Eric] says this is just the beginning, and there are more videos to come that will break down the steps.

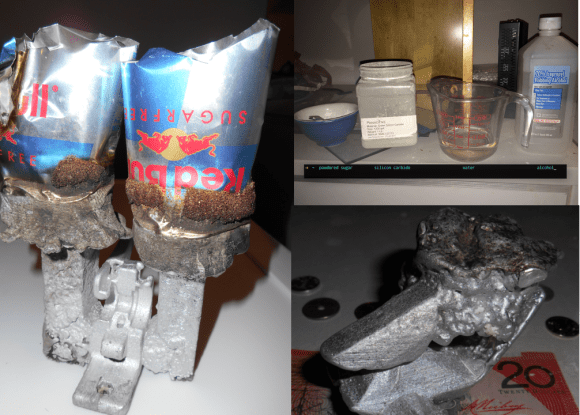
There’s more than one way to make a mold, especially for casting in metal. We’ve seen everything from 3D-printed molds to kinetic sand.

Continue reading “Mold-Making Masterclass In Minutes”

DIY Injection Mold Design For The Home Shop

3D printing is great for prototyping, and not bad for limited runs of parts. Unfortunately though it really doesn’t scale well beyond a few pieces, so when you’re ready for the mass market you will need to think about injection molding your parts. But something like that has to be farmed out, right? Maybe not, if you know a thing or two about designing your own injection molds.

The video below comes from [Dave Hakkens] by way of his Precious Plastic project, whose mission it is to put the means of plastic recycling into the hands of individuals, rather than relying on municipal programs.  We’ve covered their work before, and it looks like they’ve come quite a way to realizing that dream. This tutorial by [Dave]’s colleague [Jerry] covers the basic elements of injection mold design, starting with 3D modeling in Solidworks. [Jerry] points out the limitations of a DIY injection molding effort, including how the thickness of parts relates to injection pressure. Also important are features like gentle curves to reduce machining effort, leaving proper draft angles on sprues, and designing the part to ease release from the mold. [Jerry] and [Dave] farmed out the machining of this mold, but there’s no reason a fairly complex mold couldn’t be produced by the home gamer.

When you’re done learning about mold design, you’ll be itching to build your own injection mold machine. Precious Plastic’s tutorial looks dead simple, but this machine looks a little more capable. And why CNC your molds when you can just 3D print them?

Continue reading “DIY Injection Mold Design For The Home Shop”

Lost PLA Casting With A Little Help From Your Microwave

lost-pla

[Julia and Mason] have been perfecting their microwave-based lost PLA casting technique over at Hackaday.io. As the name implies, lost PLA is similar to lost wax casting techniques. We’ve covered lost PLA before, but it always involved forges. [Julia and Mason] have moved the entire process over to a pair of microwaves.

Building on the work of the FOSScar project, the pair needed a way to burn the PLA out of a mold with a microwave. The trick is to use a susceptor. Susceptors convert the microwave’s RF energy into thermal energy exactly where it is needed. If you’ve ever nuked a hot pocket, the crisping sleeve is lined with susceptor material. After trying several materials, [Julia and Mason] settled on a mixture of silicon carbide, sugar, water, and alcohol for their susceptor.

The actual technique is pretty simple. A part printed in PLA is coated with susceptor. The part is then placed in a mold made of plaster of paris and perlite. The entire mold is cooked in an unmodified household microwave to burn out the PLA.

A second microwave with a top emitter is used to melt down aluminum, which is then poured into the prepared mold. When the metal cools, the mold is broken away to reveal a part ready to be machined.

We think this is a heck of a lot of work for a single part. Sometimes you really need a metal piece, though. Until metal 3D printing becomes cheap enough for everyone to do at home, this will work pretty well.