3D Printed Stamp Rollers

If you have an artistic bent, you might have seen self-inking stamp rollers. These are like rotary rubber stamps that leave a pattern as you roll across a page. [Becky] wanted a larger custom roller and turned to 3D printing to make it happen. The first prototype used a modified Sharpie. However, she soon moved to an unmodified acrylic marker that had a rectangular tip.

A Tinkercad design produces a cap that fits the marker and a wheel that contains the desired pattern. Text works well, although you can easily do a custom pattern, too, of course.

Continue reading “3D Printed Stamp Rollers”

the RP2040 stamp

Putting The RP2040 On A Stamp

In the electronics world, a little one-inch square board with castellated edges allows a lot of circuitry to be easily added in a small surface area. You can grab a prepopulated module, throw it onto your PCB of choice, and save yourself a lot of time routing and soldering. This tiny Raspberry Pi 2040 module from [SolderParty] ticks all those boxes.

With all 30 GPIO broken out, 8MB of onboard flash, and a NeoPixel onboard, you have plenty to play with on top of the already impressive specs of the RPi2040. Gone are the days of in-circuit programmers, and it uses a UF2 bootloader to make it easy B to transfer new images over USB. Rust, MicroPython, Arduino, and the PicoSDK are all development options for code. All the KiCad files, BOM, schematics, and firmware are up on GitHub under a CERN license for your perusal pleasure. They’ve helpfully included footprints as well as a reference carrier board design.

It is a handy little project that might be good to keep in mind or just use as a reference design for your efforts. We have a good overview of the RPi2040 from an STM perspective. If you’re curious about what you could even use this little stamp for, why not driving an HDMI signal?

Easily Deboss Notebooks With A 3D Printed Stamp

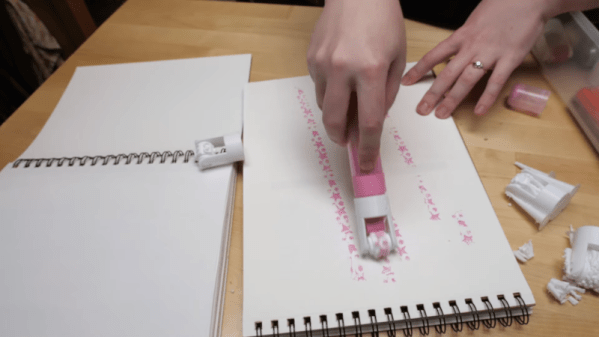
While it’s arguably a bit closer to the “Arts & Crafts” region of the making spectrum upon which we don’t usually tread on account our l33t sense of superiority, we’ve got to admit that the quick and easy notebook customization demonstrated by [Sean Hodgins] is very compelling. We don’t put ink to dead trees with nearly the frequency we used to, but when we do it might as well be Hemingway-style with a little black Hackaday emblazoned notebook.

As demonstrated in the video after the break, the process starts by designing the stamp in your CAD package of choice. For optimal results [Sean] suggests fairly large capital letters, but with practice you should be able to get into some more creative fonts. Potentially you could even use the logo of your favorite hacking blog, but who are we to dictate what you do?

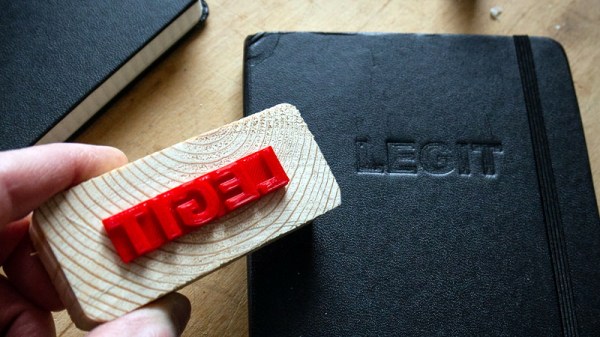
Whatever you chose, it needs to be mirrored and placed on a relatively thick backing. He recommends a 2 mm thick “plate” with the letters raised on top. You’ll want to print it at a high infill percentage, but even still it shouldn’t take more than 30 minutes or so to run off. Remember there tends to be diminishing returns on infill past 50%, so taking it all the way to 100% is not going to do much but expend more time and plastic.

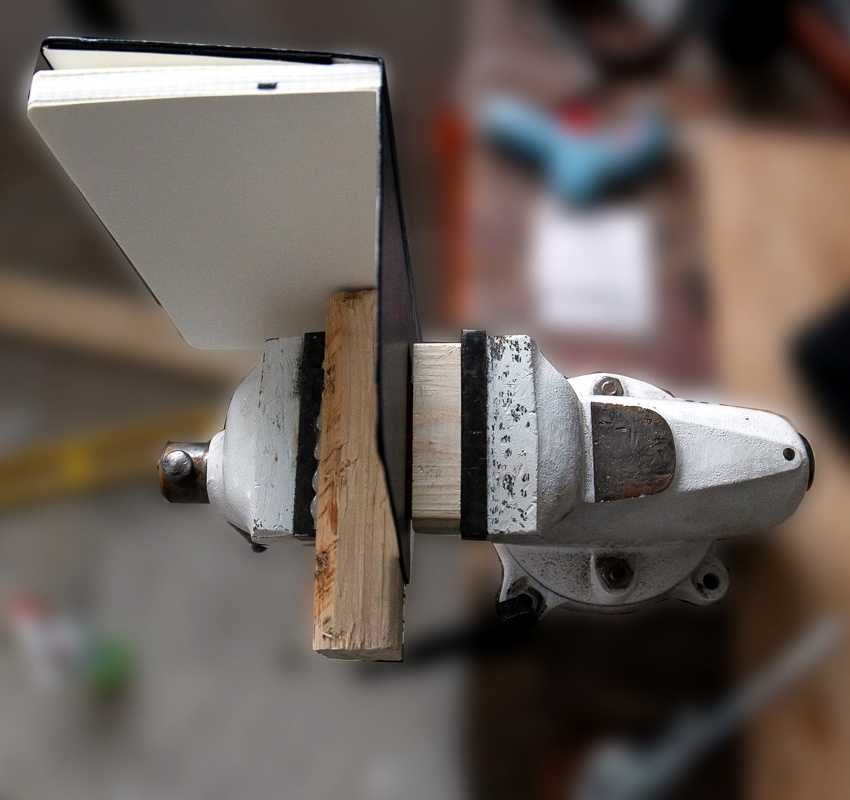
Once printed, [Sean] hot glues the stamp to a block of wood since putting pressure on the printed piece directly would likely crack it. Then it’s just a matter of getting your notebook, printed stamp, and blocks of wood lined up in to a suitably beefy bench vise. Getting everything aligned is one of those things that easier said than done, so expect to mess up the first couple until you get the hang of it.

When the alignment looks good, crank it down and let it sit for a few minutes. If you’re embossing the design into actual leather, wetting it a bit before putting the pressure on should help. The final effect is understated but undeniably very slick; and with the Holidays rapidly approaching this might be an excellent way to knock out some legitimately thoughtful gifts.

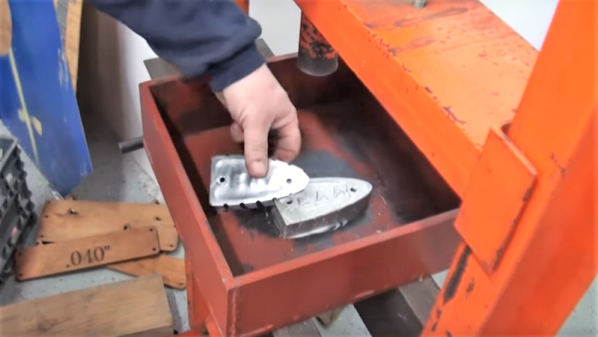
Ultimately the idea here is something of a lightweight version of the 3D printed press break dies used to bend aluminum or the punch and die set used for steel plates. At this point it seems there’s enough evidence to say that 3D printed objects are certainly strong enough (in compression, at least) to put some legitimate work in.

Continue reading “Easily Deboss Notebooks With A 3D Printed Stamp”

Low-Budget Hydroformer Puts The Squeeze On Sheet Metal Parts

Between manufacturing technologies like 3D-printing, CNC routers, lost-whatever metal casting, and laser and plasma cutters, professional quality parts are making their way into even the most modest of DIY projects. But stamping has largely eluded the home-gamer, what with the need for an enormous hydraulic press and massive machined dies. There’s more than one way to stamp parts, though, and the budget-conscious shop might want to check out this low-end hydroforming method for turning sheet metal into quality parts.

If hydroforming sounds familiar, it might be because we covered [Colin Furze]’s attempt, which used a cheap pressure washer to inflate sheet metal bubbles with high-pressure water. The video below shows a hydroformer that [Rainbow Aviation] uses (with considerably less screaming) to make stamped aluminum parts for home-brew aircraft. The kicker with this build is that there is no fluid — at least not until the 40,000-pound hydraulic press semi-liquifies the thick neoprene rubber pad placed over the sheet metal blank and die. The pressure squeezes the metal into and around the die, forming some pretty complex shapes in a single operation. We especially like the pro-tip of using Corian solid-surface countertop material offcuts to make the dies, since they’re available for a pittance from cabinet fabricators.

It’s always a treat to see hacks from the home-brew aviation world. They always seem to have plenty of tricks and tips to share, like this pressure-formed light cowling we saw a while back.

Continue reading “Low-Budget Hydroformer Puts The Squeeze On Sheet Metal Parts”

Making a Hackerspace Passport Stamp

How To Make A Hackerspace Passport Stamp

A few years ago, [Mitch Altman] from Noisebridge came up with the idea of a Hackerspace Passport. The idea behind it was not to hinder or monitor travels but to encourage visiting other hackerspaces. These passports can be purchased for just a few dollars or, in true open source fashion, be made with nothing more than a computer printer… the Hackerspace Passport design files are totally free and available here.

So next time you’re visiting a new hackerspace, bring your passport and get it stamped to document the trip…. and that brings us to the point of this post: The Stamp. At around $25, having a custom ink stamp made at an office supply store isn’t that much money, but buying a stamp is not as fun as making one! That is what we are going to do today; make a stamp… or more specifically, several stamps using different techniques. Then we’ll compare the performance of each method.

DESIGN

Since this is Hackaday, we will be making a Hackaday Logo stamp. Back a couple years ago we ran a contest asking folks to make unique things with the Hackaday logo. To make it easy for the entrants, the Hackaday logo was made available in SVG format. We’ll start with that, since it is available, and make a minor change by adding some lettering, as most soon-to-be stamp makers will probably want letters on their stamps too. This is easily done in the FOSS vector graphic editor software: Inkscape.

The stamp size is important. A Hackerspace Passport page has room for 4 stamps up to 41 x 47mm and we’ll try to keep our stamp within those limits.

Continue reading “How To Make A Hackerspace Passport Stamp”