Water Level Sensor Does Not Use Water Level Sensor

When interfacing with the real world, there are all kinds of sensors available which will readily communicate with your microcontroller of choice. Moisture, pH, humidity, temperature, location, light, and essentially every other physical phenomenon are readily measured with a matching sensor. But if you don’t have the exact sensor you need, it’s sometimes possible to use one sensor as a proxy for another.

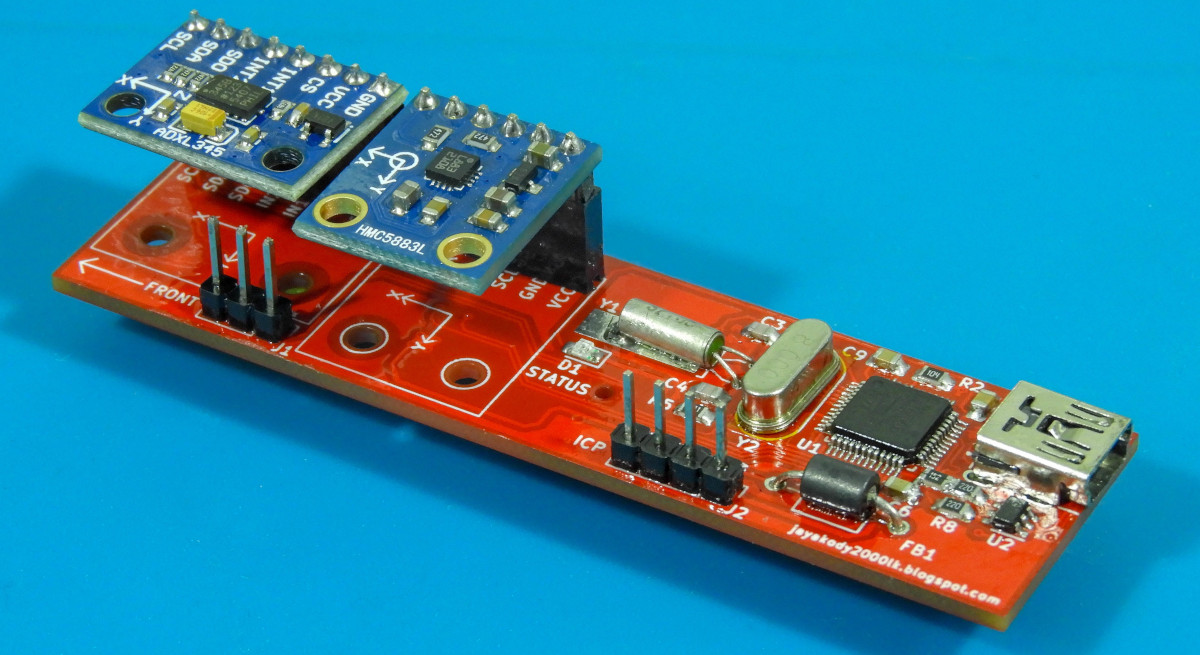
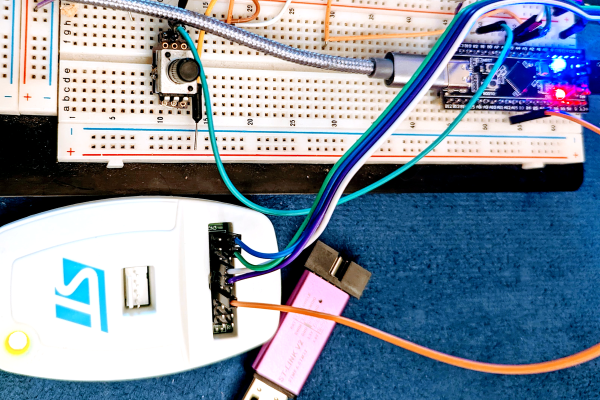
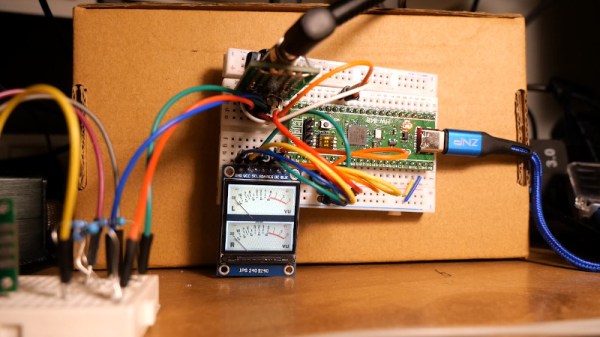
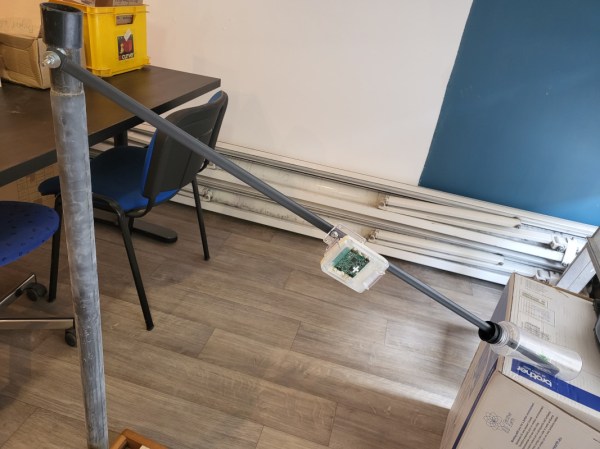
[Brian Wyld] needed a way to monitor the level of a remote body of water but couldn’t use a pressure or surface-level sensor, so he used a sensor typically intended for geolocation instead. This particular unit, an STM-type device with a built-in accelerometer, is attached to a rotating arm with a float at one end. As the arm pivots, the microcontroller reports its position and some software converts the change in position to a water level. It’s also paired with a LoRa radio, allowing it to operate off-grid.

Whether there is a design requirement to use an esoteric sensor to measure something more common, or a personal hardware limitation brought about by a shallow parts drawer, there’s often a workaround like this one that can accomplish the job. Whatever the situation, we do appreciate hacking sensors into other types of sensors just as much as anything else.

Everything You Didn’t Know You Need To Know About Glitching Attacks

If you’ve always been intrigued by the idea of performing hardware attacks but never knew where to start, then we’ve got the article for you: an in-depth look at the hows and whys of hardware glitching.

Attentive readers will recall that we’ve featured [Matthew Alt]’s reverse engineering exploits before, like the time he got root on a Linux-based arcade cabinet. For something a bit more challenging, he chose a Trezor One crypto wallet this time. We briefly covered a high-stakes hack (third item) on one of these wallets by [Joe Grand] a while back, but [Matthew] offers much, much more detail.

After introducing the theory of glitching attacks, which seek to force a processor into an undefined state using various methods, [Matthew] discusses the specifics of the Trezor wallet and how the attack was planned.

His target — the internal voltage regulator of the wallet’s STM32 microcontroller — required desoldering a few caps before the attack could begin, which was performed with a ChipWhisperer. After resolving a few initial timing issues, he was able to glitch the chip into dropping to the lowest level of readout protection, which gave access to the dongle’s SRAM through an ST-Link debugger.

While this summary may make the whole thing sound trivial, it’s obvious that the attack was anything but, nor was the effort that went into writing it all up. The whole thing reads a little like a techno-thriller, and there’s plenty of detail there if you’re looking for a tutorial on chip glitching. We’re looking forward to part 2, which will concentrate on electromagnetic fault-injection using a PicoEMP and what looks like a modified 3D printer.

Bare-Metal STM32: Adding An Analog Touch With ADCs

An Analogue to Digital Converter (ADC) is at its core a straight-forward device: by measuring an analog voltage within a set range and converting the measured level to a digital value we can use this measurement value in our code. Through the use of embedded ADCs in microcontrollers we can address many essential use cases, ranging from measuring the setting on a potentiometer, to reading an analog output line on sensors, including the MCU’s internal temperature and voltage sensors.

The ADCs found in STM32 MCUs have a resolution between 12 to 16 bits, with the former being the most common type. An ADC can be configured to reduce this resolution, set a specific sampling speed, and set up a multi-mode configuration depending on the exact ADC peripheral. STM32 MCUs feature at least a single ADC peripheral, while some have multiple. In this article we will take a look at how to configure and use the basic features of the ADCs in STM32 MCUs, specifically the ADCs found in F0 and the ADC5_V1_1 type as found in most F3-family MCUs.

Continue reading “Bare-Metal STM32: Adding An Analog Touch With ADCs”

Odd Inputs And Peculiar Peripherals: RoenDi Smart Knob Thinks Outside The Box

When it comes to design decisions, we’re often advised to “think outside the box.” It’s generally good advice, if a bit abstract — it could really mean anything. But it appears that someone took it quite literally with this nifty little smart knob display and input device.

[Dimitar]’s inspiration for RoenDi — for “rotary encoder and display” — came from an unusual source: a car dashboard, and specifically, the multipurpose knobs that often crop up in a car’s climate control cluster. Designed for ease of use while driving while causing as little distraction as possible, such knobs often combine a rotary encoder with one or more indicators or buttons. RoenDi builds on that theme by putting a 1.7″ round LCD display in the middle of a ring attached to an Alps rotary encoder, allowing the knob to be customized for whatever you want it to represent. The backplane sports a powerful STM32 microcontroller with a lot of the GPIO pins broken out, so customization and interfacing are limited only by your imagination. The design is open source, so you can either build your own or support the project via Crowd Supply.

Unlike the haptic smart knob we’ve been seeing a bit about lately, which also features a round LCD at its center, RoenDi’s feedback is via the physical detents on the encoder. We think both devices are great, and they fill different niches in the novel input ecosystem.

Continue reading “Odd Inputs And Peculiar Peripherals: RoenDi Smart Knob Thinks Outside The Box”

StarPointer Keeps Scope On Target With Stellarium

On astronomical telescopes of even middling power, a small “finderscope” is often mounted in parallel to the main optics to assist in getting the larger instrument on target. The low magnification of the finderscope offers a far wider field of view than the primary telescope, which makes it much easier to find small objects in the sky. Even if your target is too small or faint to see in the finderscope, just being able to get your primary telescope pointed at the right celestial neighborhood is a huge help.

But [Dilshan Jayakody] still thought he could improve on things a bit. Instead of a small optical scope, his StarPointer is an electronic device that can determine the orientation of the telescope it’s mounted to. As the ADXL345 accelerometer and HMC5883L magnetometer inside the STM32F103C8 powered gadget detect motion, the angle data is sent to Stellarium — an open source planetarium program. Combined with a known latitude and longitude, this allows the software to show where the telescope is currently pointed in the night sky.

As demonstrated in the video after the break, this provides real-time feedback which is easy to understand even for the absolute beginner: all you need to do is slew the scope around until the object you want to look at it under the crosshairs. While we wouldn’t recommend looking at a bright computer screen right before trying to pick out dim objects in your telescope’s eyepiece, we can certainly see the appeal of this “virtual” finderscope.

Then again…who said this technique had to be limited to optical observations? As the StarPointer is an open hardware project, you could always integrate the tech into that DIY radio telescope you’ve always dreamed of building in the backyard.

Continue reading “StarPointer Keeps Scope On Target With Stellarium

SWO: An ARM Printf By Any Other Name

I’ll confess. Although printf-style debugging has a bad rep, I find myself turning to it on occasion. Sure, printf is expensive and brings in a lot of code, but if you have the space and time to use it while debugging you can always remove it before you are finished. However, what if you don’t have an output device or you are using it for something else? If you are using most modern ARM chips, you have another option — a dedicated output channel that is used for several things, including debugging output. I decided I wanted to try that on the Blackpill running mbed, and found out it isn’t as easy as you might think. But it is possible, and when you are done reading, you’ll be able to do it, too.

I’m writing this using the STM32-specific ST-LINK hardware. If you use other JTAG devices like the BlackMagic probe, you probably already have this set up for you.

What You Get

I’ll start backward with the end result, then talk about the software, so you’ll be good and motivated by the time you get to the hardware requirements. Spoiler alert: your existing hardware might need a quick hack to make it work, although you can buy something off the shelf if you prefer.

Here is a very simple test program:


SWO_Channel debugport;  // requires #include "SWO.h"
int main() 
  {
  unsigned count=0;
  debugport.printf("\r\nHello World from SWO\r\n");
  debugport.printf("CPU SystemCoreClock is %d Hz\r\n", SystemCoreClock);

  while (1) 
    {
    led = !led; // flip LED if output is true
    ThisThread::sleep_for(rate); // sleepy time
    if (count % 10) debugport.putc('*'); else debugport.printf("%d\r\n",count); 
    count++;
    }
}

Continue reading “SWO: An ARM Printf By Any Other Name”

The STM32 Makes For A Cheap DIY USB Soundcard

Soundcards used to be giant long 8-bit ISA things that would take up a huge amount of real estate inside a desktop computer. These days, for most of us, they’re baked into the motherboard and we barely give them a second thought. [Samsonov Dima] decided to whip up a cheap little sound card of their own, however, built around the STM32.

The soundcard is based specifically on the STM32F401. readily available on the “Green Pill” devboards. A digital-to-analog converter is implemented on the board based on two PWM timers providing high-quality output. There’s also a simulated software sigma delta ADC implemented between the audio streaming in via USB and the actual PWM output, with some fancy tricks used to improve the sound output. [Samsonov] even found time to add a display with twin VU meters that shows the audio pumping through the left and right channels.

Without test gear on hand, we can’t readily quantify the performance of the sound card. However, as per the Youtube videos posted, it appears more than capable of recreating music with good fidelity and plenty of fine detail.

If you need a cheap, simple USB sound card that you can hack away on, this might be the one for you. If you need something more suitable for a vintage PC, however, consider this instead. Video after the break.

Continue reading “The STM32 Makes For A Cheap DIY USB Soundcard”