Adding A Sound Synthesizer To A ‘don’t-touch-the-sides’ Maze Game

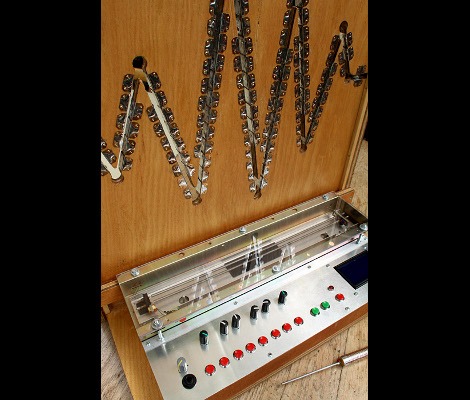
Part of the fun of the classic game of Operation is the jump you get from the loud buzzer which sounds if you touch the sides. This exhibit piece uses the same principle of lining the edges of a track with metal, but instead of an annoying buzz, each touch will issue a bit of music. That’s because the maze has been paired with a synthesizer. Instead of one sound wherever the stylus touches the sides, different parts of the maze act as one of 94 keys for the synthesizer.

There’s a lot more built into the base of the device than just a maze game. The knobs are used to alter the audio effects and the buttons work in conjunction with they stylus to sequence audio samples. There’s even a graphic LCD screen which shows the currently playing wave form. You can get a better look at the project in the video after the break.

Continue reading “Adding A Sound Synthesizer To A ‘don’t-touch-the-sides’ Maze Game”

3D Whiteboard Without The Whiteboard

This one is so simple, and works so well, we’d call it a hoax if April 1st hadn’t already passed us by. But we’re confident that what [William Myers] and [Guo Jie Chin] came up with exists, and we want one of our own. The project is a method of drawing in 3 dimensions using ultrasonic sensors.

They call it 3D Paint, and that’s fitting since the software interface is much like the original MS Paint. It can show you the movements of the stylus in three axes, but it can also assemble an anaglyph — the kind of 3D that uses those red and blue filter glasses — so that the artists can see the 3D rendering as it is being drawn.

The hardware depends on a trio of sensors and a stylus that are all controlled by an ATmega644. That’s it for hardware (to be fair, there are a few trivial amplifier circuits too), making this an incredibly affordable setup. The real work, and the reason the input is so smooth and accurate, comes in the MATLAB code which does the trilateration. If you like to get elbow deep in the math the article linked above has plenty to interest you. If you’re more of a visual learner just skip down after the break for the demo video.

Continue reading “3D Whiteboard Without The Whiteboard”

Extending The Usability Of Touchscreens

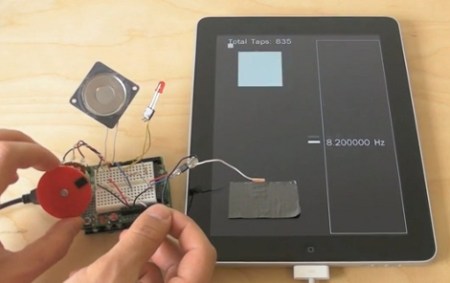
Fanboys may be in shock from seeing duct tape applied to the screen of an iPad, but we can assure you it’s in the name of science. [Michael Knuepfel] is working on his thesis for the ITP graduate program at the Tisch School for the Arts. He managed to augment the usability of touchscreen devices by adding hardware to them.

What he’s come up with are devices for both input and output. The output devices generally rely on light and color of light displayed on the screen itself which is picked up by a light sensor. The input devices use conductive material to complete a path between your hand and your screen. This lets the capacitive sensing screen detect the presence of your hand, through the conductor. Some of his example devices include gaming controller overlays, encoder rings, and multiple stylus designs.

After the break we’ve embedded [Michael’s] teaser trailer which jumps through several demonstrations. It’s plenty to get your mind rolling, but if you want to know more you must watch his thesis presentation. It’s available as an MP4 download on this page. Just search for his name, [Michael Knuepfel] for the proper link.

Continue reading “Extending The Usability Of Touchscreens”

1 Watt Laser Engraver

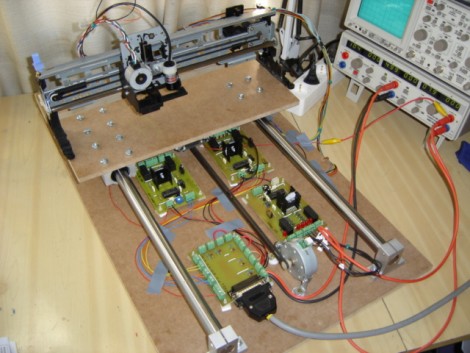
This laser engraver was built using printer parts, a CD-ROM carriage, and some homebrew electronic boards. The laser diode is a 1-Watt model similar to what we saw used as a weak laser cutter back in August. When the width of the material changes the focus of the laser is affected so the diode was mounted on a CD-ROM carriage (in the Z axis) for easy adjustment. The X and Y axes are made using parts from Epson Stylus 800 and Epson Stylus Color II printers. After the break we’ve embedded a video of the machine engraving some wood using EMC2 software on an Ubuntu box. It also boasts the ability to cut paper and some plastic but it can’t compare in power to a CO2-based unit.

Continue reading “1 Watt Laser Engraver”

Drawbot Produces Portraits… Very Slowly

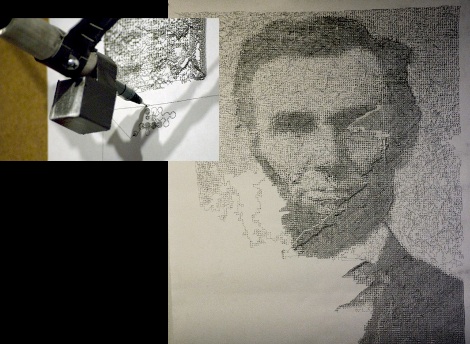
This robot artist, the Drawbot, produces images using an Arduino and Processing. A piece of paper is attached to a wall as a stylus connected to a couple of stepper motors scribbles out patterns that gradually become the image seen above. Each drawing is different and can take several weeks of constant operation to finish. That must have made debugging a real problem for [Harvey] during development. We wonder if this would work with homemade pencils?