A Comprehensive Look At FDM Supports

When we first started 3D printing, we used ABS and early slicers. Using supports was undesirable because the support structures were not good, and ABS sticks to itself like crazy. Thankfully today’s slicers are much better, and often we can use supports that easily detach. [Teaching Tech] shows how modern slicers create supports and how to make it even better than using the default settings.

The video covers many popular slicers and their derivatives. If you’ve done a lot with supports, you might not find too much of this information surprising, but if you haven’t printed with supports lately or tried things like tree supports, you might find a few things that will up your 3D printing game.

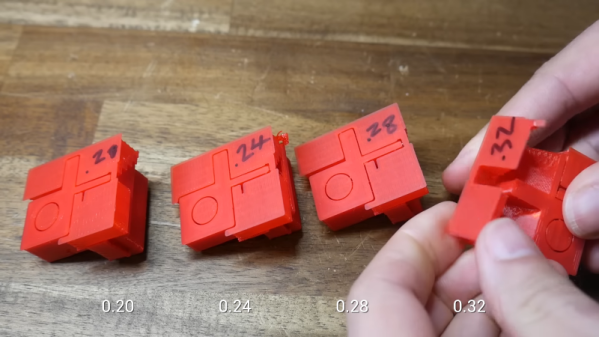
One thing we really like is that the video does show different slicers, so regardless of what slicer you like to use, you’ll probably find exactly what different settings are called. Of course, because slicers let you examine what they produce layer-by-layer, you can do like the video and examine the results without printing. [Michael] does do some prints with various parameters, though, and you can see how hard or easy the support removal is depending on some settings. The other option is to add support to your designs, as needed manually, or — even better — don’t design things that need support.

This video reminded us of a recent technique we covered that added a custom support tack to help the slicer’s automatic support work better. If you want a longer read on supports that also covers dissolvable support, we’ve seen that, too.

Continue reading “A Comprehensive Look At FDM Supports”

Arc Overhangs Make “Impossible” 3D Prints

An accidental discovery by [3DQue] allows overhangs on FDM printers that seem impossible at first glance. The key is to build the overhang area with concentric arcs. It also helps to print at a cool temperature with plenty of fan and a slow print speed. In addition to the video from [3DQue], there’s also a video from [CNC Kitchen] below that covers the technique.

If you want a quick overview, you might want to start with the [CNC Kitchen] video first. The basic idea is that you build surfaces “in the air” by making small arcs that overlap and get further and further away from the main body of the part. Because the arcs overlap, they support the next arc. The results are spectacular. There’s a third video below that shows some recent updates to the tool.

We’ve seen a similar technique handcrafted with fullcontrol.xyz, but this is a Python script that semi-automatically generates the necessary arcs that overlap. We admit the surface looks a little odd but depending on why you need to print overhangs, this might be just the ticket. There can also be a bit of warping if features are on top of the overhang.

You don’t need any special hardware other than good cooling. Like [CNC Kitchen], we hope this gets picked up by mainstream slicers. It probably will never be a default setting, but it would be a nice option for parts that can benefit from the technique. Since the code is on GitHub, maybe people familiar with the mainstream slicers will jump in and help make the algorithm more widely available and automatic.

What will you build with this tool? If you don’t like arcs, check out conical slicing or non-planar slicing instead.

Continue reading “Arc Overhangs Make “Impossible” 3D Prints”

It’s Noodles All The Way Down: Ramen Comes To 3D Printer Support

While ramen support might sound like a help desk for soup, it is actually a technique [GeoDroidJohn] uses to get easy-to-remove support structures on 3D prints. We saw the video below and we have to admit that it did remind us of a brick of uncooked ramen noodles.

We had to dig a little further to find out how he did it. We finally found a Reddit post that gives the recipe for Simplify 3D:

  • Nozzle diameter/2= layer height
  • Support material every other layer, 15% crossing at -45, and 45
  • 5 dense layers at 90% 0 gap layers top or bottom.

We have to admit, we try to avoid support where we can, and where we can’t we just pick one of the stock Cura settings. It wasn’t entirely clear how — or even if — you could replicate this in slicers other than Simplify 3D. The layer height, of course, is a given. We think 15% support density with [-45, 45] in the “line directions” box might get partially there. Maybe someone who is an expert in Simplify and some other slicers can help translate.

In any event, it did make us think about experimenting with different support structures. We’ve played with Cura’s tree supports before this and liked them. So maybe the defaults aren’t always the best.

We’d like to have time to try more of what we read about supports. You can also fit your printer with a marker if you want to try that.

Continue reading “It’s Noodles All The Way Down: Ramen Comes To 3D Printer Support”

Improving 3D Printed Supports With A Marker

Anyone who’s spent some quality time with a desktop 3D printer is familiar with the concept of supports. If you’re working with a complex model that has overhanging features, printing a “scaffolding” of support material around it is often required. Unfortunately, supports can be a pain to remove and often leave marks on the finished print that need to be addressed.

Looking to improve the situation, [Tumblebeer] has come up with a very unique modification to the traditional approach that we think is certainly worthy of closer examination. It doesn’t remove the need for support material, but it does make it much easier to remove. The method is cheap, relatively simple to implement, and doesn’t require multiple extruders or filament switching as is the case with something like water-soluble supports.

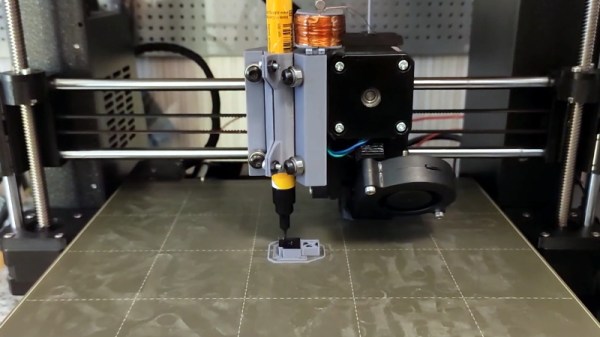
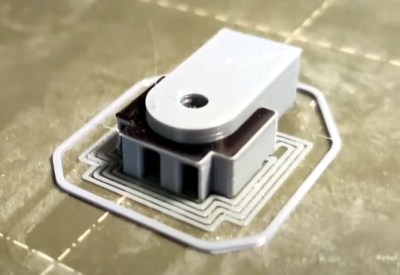
The trick is to use a permanent marker as a release agent between the top of the support and the area of the print it’s actually touching. The coating of marker prevents the two surfaces from fusing, while still providing the physical support necessary to keep the model from sagging or collapsing.

To test this concept, [Tumblebeer] has outfitted a Prusa i3 MK3S with a solenoid actuated marker holder that hangs off the side of the extruder assembly. The coil is driven from the GPIO pins of a Raspberry Pi running OctoPrint, and is engaged by a custom command in the G-code file. It keeps the marker out of the way during normal printing, and lowers it when its time to lay down the interface coating.

[Tumblebeer] says there’s still a bit of hand-coding involved in this method, and that some automated G-code scripts or a custom slicer plugin could streamline the process considerably. We’re very interested in seeing further community development of this concept, as it seems to hold considerable promise. Having a marker strapped to the side of the extruder might seem complex, but it’s nothing compared to switching out filaments on the fly.

Continue reading “Improving 3D Printed Supports With A Marker”

Hackaday Links: November 13, 2016

The Travelling Hackerbox is going International. I wrote a post on this earlier in the week, and I’m still looking for recipients for the box that are not in the United States. The sign-up form is right here, [the sign up form is now closed] and so far we have good coverage in Canada, Australia, NZ, Northern Europe, and a few in Africa. If you ever want to be part of the Travelling Hackerbox, this is your chance. I’m going to close the sign-up sheet next week. Sign up now.

Like the idea of a travelling hackerbox, but are too impatient? Adafruit now has a box subscription service. Every quarter, an AdaBox will arrive on your doorstep packed to the gills with electronic goodies.

The very recently released NES Classic edition is the 2016 version of the C64 DTV — it’s a Linux system, not as elegant, and there’s little hacking potential. If you want to increase the amount of storage, desolder the Flash chip (part no. S34ML04G200TFI000), and replace it with a larger chip. The NES Classic edition isn’t the coolest retro system coming out — Genesis is back, baby. Brazil has had a love affair with the Genesis/Mega Drive because of their bizarre import restrictions. Now, the manufacturer of the Brazilian Sega clones is releasing a Linux-ified clone. Does anyone know how to export electronics from Brazil?

The CFP deadline for the SoCal Linux Expo is fast approaching. You have until the 15th to get your talks in for SCALE.

Let’s talk about dissolvable 3D printer support material. One of the first materials able to be printed and removed by dissolving in water was PVA. Makerbot sold it for use in their dual extruder machines. PVA does dissolve, but it degrades at higher temperatures and kills nozzles. HIPS can be dissolved with limonene, but it’s really only for use in conjunction with ABS. This week, E3D released their Scaffold support material. It’s a PVA/Polyvinyl alcohol filament — ‘the stuff gel caps are made out of’ was the line we got when E3D previewed Scaffold at MRRF last March. It’s a support material that’s water dissolvable, compatible with most filaments, and is able to produce some amazing prints. It’s available now, but it is a bit pricey at £45 for half a kilo. Brexit is a good thing if you’re paid in dollars.

If you’re into chiptunes, you’ve heard about Little Sound DJ. LSDJ is a cart/ROM capable of toggling all the registers on the Game Boy sound chip, sequencing bleeps and bloops, and generally being awesome. The recently released Nanoloop Mono is not Game Boy software. It’s a few op-amps and a PIC micro pasted on a board that turns the Game Boy into a synth. You get a significantly more 80s sound with the Nanoloop Mono over LSDJ, audio input, and a step sequencer.

3D Printing On Shims?

Forget to generate support material for your 3D printed part? Already a few hours in? Don’t cancel the print — you might be able to save it!

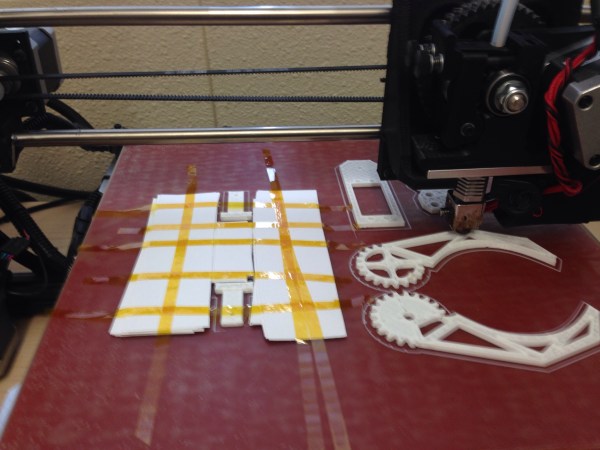
[Dr Dawes] was printing a bunch of different parts for students in his electronics class. He slipped up and forgot to add support material to the one part that needed it. Figuring this out a few hours in, he didn’t have time to cancel the job and lose all the prints, so he made the best of the situation and paused the print to build his own support material. He ended up taping down index cards to the bed around his object until they reached layer 13 — the layer that would have started to bridge across the support material had he included it in his Octoprint settings.

Continue reading “3D Printing On Shims?”

Printing In Three Dimensions, For Real This Time

topo

3D printers don’t continuously print in three dimensions – they print one layer, then another, then another. This is true for every single 3D printing technology, but now Topolabs has a very interesting technique that changes that. They’re printing in three dimensions by moving in the Z axis while also printing in the X and Y axes.

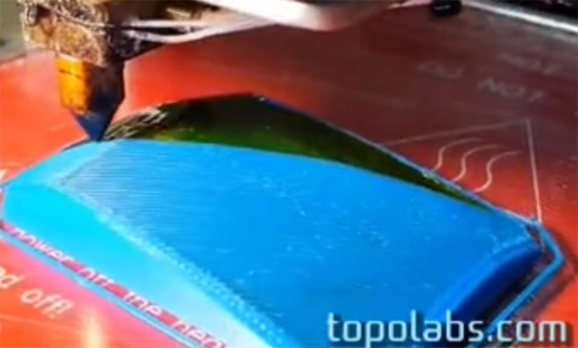
The basic idea behind Topolabs’ software is to print a support block, then print an object right on top of the support. The support block can be curved and convex, and the finished product follows the contours of the solid support block. Unlike ‘printing with supports’, the printer extrudes along the X, Y, and Z axes, which should make the finished product much, much stronger.

There are a few drawbacks to the technique – a release agent must be applied to the top of the support block. In the video below, Topolabs is using Kapton, but hair spray or glue sticks will also work. There’s also a limit to how steep an incline a printer can print, determined by the size of the extruder nozzle. Lastly, this technique would be much better suited for a delta-style bot, but the team is getting very good results with a normal Cartesian bot.

You can see a few videos of the Topolabs printing technique below.

Continue reading “Printing In Three Dimensions, For Real This Time”