Safety Belt Holds Up Pants And Passwords

[Dan Williams] built a belt that holds up your pants while remembering your passwords. This was his project while camped out at the Hackaday Hardware Villiage at the 2015 TC Disrupt Hackathon last weekend.
safety-belt-pcb-sandwichThe idea started with the concept of a dedicated device to carry a complicated password; something that you couldn’t remember yourself and would be difficult to type. [Dan] also decided it would be much better if the device didn’t need its own power source, and if the user interface was dead simple. The answer was a wrist-band made up of a USB cable and a microcontroller with just one button.

To the right you can see the guts of the prototype. He is using a Teensy 2.0 board, which is capable of enumerating as an HID keyboard. The only user input is the button seen at the top. Press it once and it fires off the stored password. Yes, very simple to implement, but programming is just one part of a competition. The rest of his time was spent refining it into what could reasonably be considered a product. He did such a good job of it that he received an Honorable Mention from Hackaday to recognize his execution on the build.

Fabrication
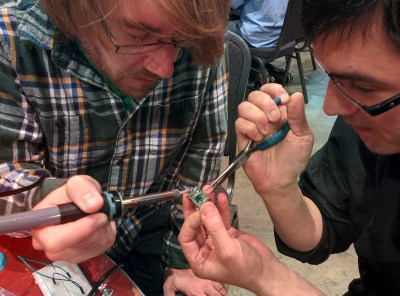
IMG_20150502_183207[Dan] came up with the idea to have a pair of mating boards for the Teensy 2.0. One on top hosts the button, the other on the bottom has a USB port which is used as the “clasp” of the belt buckle. One side of the USB cable plugs into the Teensy, the other into this dummy-port. Early testing showed that this was too bulky to work as a bracelet. But [Dan] simply pivoted and turned it into a belt.

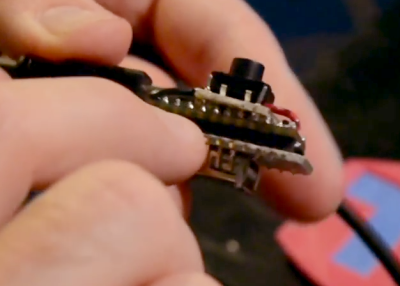
safety-belt-built-at-hackathon-thumb[Kenji Larsen] helped [Dan] with the PCB-sandwich. Instead of mounting pin sockets on the extra boards, they heated up the solder joints on a few of the Teensy pins and pushed them through with some pliers. This left a few pins sticking up above the board to which the button add-on board could be soldered.

To finish out the build, [Dan] worked with [Chris Gammell] to model a 2-part case for the electronics. He also came up with a pandering belt buckle which is also a button-cap. It’s 3D printed with the TechCrunch logo slightly recessed. He then filled this recess with blue painter’s tape for a nice contrast.

[Dan] on-stage presentation shows off the high-level of refinement. There’s not a single wire (excluding the USB belt cable) or unfinished part showing! Since he didn’t get much into the guts of the build during the live presentation we made sure to seek him out afterward and record a hardware walk through which is embedded below.


The 2015 Hackaday Prize is sponsored by:

Play Music With Your Painting Using Teensy

[sab-art], a collaboration between [Sophia Brueckner] and [Eric Rosenbaum], has created a touch-sensitive musical painting. Initially, basic acrylic paint is used for the majority of the canvas. Once that is dry, conductive paint is used to make the shapes that will be used for the capacitive touch sensing. As an added step to increase the robustness, nails are hammered through each painted shape and connected with wiring in the back of the painting. These wires are then connected to the inputs of a Teensy++ 2.0, using Arduino code based on MaKey MaKey to output MIDI. The MIDI is then sent to a Mac Mini which then synthesizes the sound using Ableton Live.  Any MIDI-processing software would work, though. For this particular painting, external speakers are used, but incorporating speakers into your own composition is certainly possible.

A nice aspect of this project is that it can be as simple or as complex as you choose. Multiple conductive shapes can be connected through the back to the same Teensy input so that they play the same sound. While [sab-art] went with a more abstract look, this can be used with any style. Imagine taking a painting of Dogs Playing Poker and having each dog bark in its respective breed’s manner when you touch it, or having spaceships make “pew pew” noises. For a truly meta moment, an interactive MIDI painting of a MIDI keyboard would be sublime. [sab-art] is refining the process with each new painting, so even more imaginative musical works of art are on the horizon. We can’t wait to see and hear them!

Continue reading “Play Music With Your Painting Using Teensy”

Pac Man Clock

Pac-Man Clock Eats Time, Not Pellets

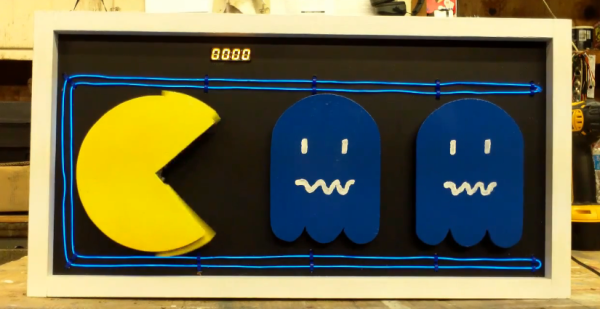
[Bob’s] Pac-Man clock is sure to appeal to the retro geek inside of us all. With a tiny display for the time, it’s clear that this project is more about the art piece than it is about keeping the time. Pac-Man periodically opens and closes his mouth at random intervals. The EL wire adds a nice glowing touch as well.

The project runs off of a Teensy 2.0. It’s a small and inexpensive microcontroller that’s compatible with Arduino. The Teensy uses an external real-time clock module to keep accurate time. It also connects to a seven segment display board via Serial. This kept the wiring simple and made the display easy to mount. The last major component is the servo. It’s just a standard servo, mounted to a customized 3D printed mounting bracket. When the servo rotates in one direction the mouth opens, and visa versa. The frame is also outlined with blue EL wire, giving that classic Pac-Man look a little something extra.

The physical clock itself is made almost entirely from wood. [Bob] is clearly a skilled wood worker as evidenced in the build video below. The Pac-Man and ghosts are all cut on a scroll saw, although [Bob] mentions that he would have 3D printed them if his printer was large enough. Many of the components are hot glued together. The electronics are also hot glued in place. This is often a convenient mounting solution because it’s relatively strong but only semi-permanent.

[Bob] mentions that he can’t have the EL wire and the servo running at the same time. If he tries this, the Teensy ends up “running haywire” after a few minutes. He’s looking for suggestions, so if you have one be sure to leave a comment. Continue reading “Pac-Man Clock Eats Time, Not Pellets”

Kyub MIDI Keyboard Puts A Piano In Your Pocket

[Keith Baxter] loves making electronic instruments. His latest vision has come to life as Kyub, an open-source MIDI keyboard. [Keith] has previously graced our site and cracked Popular Science with his servoelectric guitar.
[Keith] wanted to make a completely open source instrument that’s elegant, useful, and a bit more accessible than the servoelectric guitar, so he teamed up with a hacker/electronic music expert and an industrial designer. He built the early prototypes around an Arduino Uno. The current iteration uses a Teensy 2.0 and is available in various forms through Kickstarter. [Keith] opened the Kyub up to crowd funding in an effort to obtain volume pricing on some of the parts as well as an Eagle license to make the PCB files available commercially.

The Kyub has eleven pressure-sensitive capacitive keypads on five sides of the cube. The accelerometer can be used to vary note volume, bend the pitch, or whatever else you program it to do. Of course, you’ll need a computer with a synthesizer program, but [Keith] says it is compatible with most software synth programs, some of which are free.

There’s a demo video of an early prototype after the break. Videos of the Kyub in its current form are available on the Kickstarter page.

Continue reading “Kyub MIDI Keyboard Puts A Piano In Your Pocket”

Expanded Memory For The Teensy++ 2.0

RAM

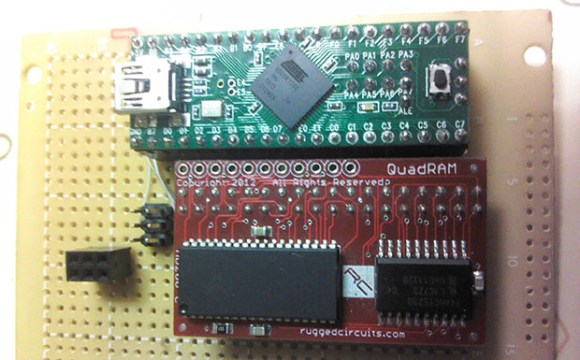
Sometimes with a microcontroller project you need to do some very RAM-hungry operations, like image and audio processing. The largish AVR chips are certainly fast enough to do these tasks, but the RAM on these chips is limited. [xxxajk] has come up with a library that allows the use of huge RAM expansions with the Teensy++ 2.0 microcontroller, making these RAM-dependant tasks easy on one of our favorite microcontroller board.

[xxajk]’s work is actually a port of XMEM2, an earlier project of his that added RAM expansion and multitasking to the Arduino Mega. Up to 255 banks of memory are available and with the supported hardware, the Teensy can address up to 512kB of RAM.

XMEM2 also features a preemptive multitasking with up to 16 tasks, the ability to pipe messages between tasks, and all the fun of malloc().

The build is fairly hardware independent, able to work with Rugged Circuits QuadRAM and MegaRAM expansions for the Arduino Mega as well as [Andy Brown]’s 512 SRAM expansion. With the right SRAM chip, etching a board at home for XMEM2 is also a possibility.

Stop Traffic In This 7-Mode LED Running Jacket

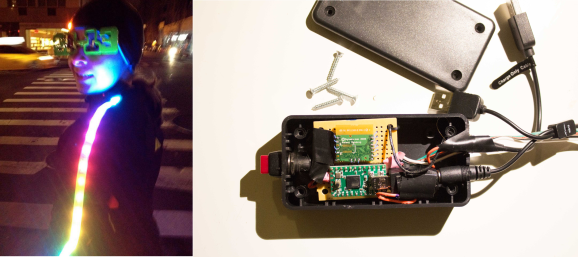
[Miria] was tired of tangling with bicyclists on her nighttime runs. It was obvious to her to illuminate herself, but she thought it would be really cool if the lights responded to her heart rate. The short summary that tipped us off is over at NYC Resistor, and [Miria] gives the gory details on her blog. The LEDs operate in seven different light modes that increase in speed proportionate to her heart rate.
She started the build around an Arduino but found that the compatible heart rate sensors were mostly optical and gave inaccurate readings. Since she was already using a Garmin GPS watch and heart rate monitor band, she decided to hack into the conversation between the two. Garmin uses the ANT protocol for this. While [Miria] found the documentation to be an effective sleeping pill, she also found that SparkFun has an ANT transceiver breakout board. Unfortunately, it’s been discontinued.

[Miria] continued undeterred, using the SparkFun board for prototyping. Her final version uses a Teensy 2.0 and this ANT transceiver in place of the ill-fated SparkFun board. She found an Energizer power pack that plugs directly into the Teensy and can power both Adafruit weatherproof LED strips for about an hour. Look both ways, and check out her demo after the break.

Continue reading “Stop Traffic In This 7-Mode LED Running Jacket”

Benchmarking USB Transfer Speeds

boards

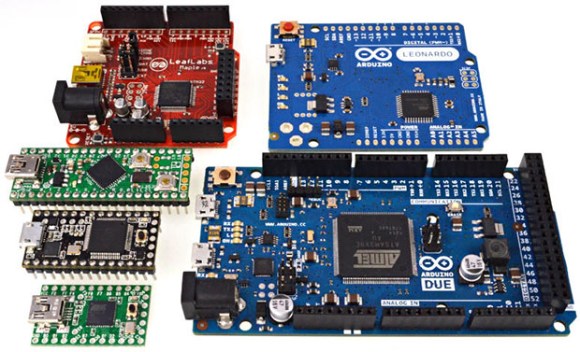
[Paul Stoffregen], creator of the Teensy series of microcontroller dev boards, noticed a lot of project driving huge LED arrays recently and decided to look into how fast microcontroller dev boards can receive data from a computer. More bits per second means more glowey LEDs, of course, so his benchmarking efforts are sure to be a hit with anyone planning some large-scale microcontroller projects.

The microcontrollers [Paul] tested included the Teensy 2.0, Teensy 3.0, the Leonardo and Due Arduinos, and the Fubarino Mini and Leaflabs Maple. These were tested in Linux ( Ubuntu 12.04 live CD ), OSX Lion, and Windows 7, all running on a 2012 MacBook Pro. When not considering the Teensy 2.0 and 3.0, the results of the tests were what you would expect: faster devices were able to receive more bytes per second.  When the Teensys were thrown into the mix, though, the results changed drastically. The Teensy 2.0, with the same microcontroller as the Arduino Leonardo, was able to outperform every board except for the Teensy 3.0.

[Paul] also took the effort to benchmark the different operating systems he used. Bottom line, if you’re transferring a lot of bytes at once, it really doesn’t matter which OS you’re using. For transferring small amounts of data, you may want to go with OS X. Windows is terrible for transferring single bytes; at one byte per transfer, Windows only manages 4kBps. With the same task, Linux and OS X manage about 53 and 860 (!) kBps, respectively.

So there you go. If you’re building a huge LED array, use a Teensy 3.0 with a MacBook. Of course [Paul] made all the code for his benchmarks open source, so feel free to replicate this experiment.