JITX Spits Out Handy USB Cable Tester

When USB first came on the scene, one of the benefits was that essentially any four conductors could get you to the point where you could send information at 12 Mbps. Of course everything is faster these days, and reaching today’s speeds requires a little bit more fidelity in the cables. This simple tester makes sure that your modern cables are actually up to the task.

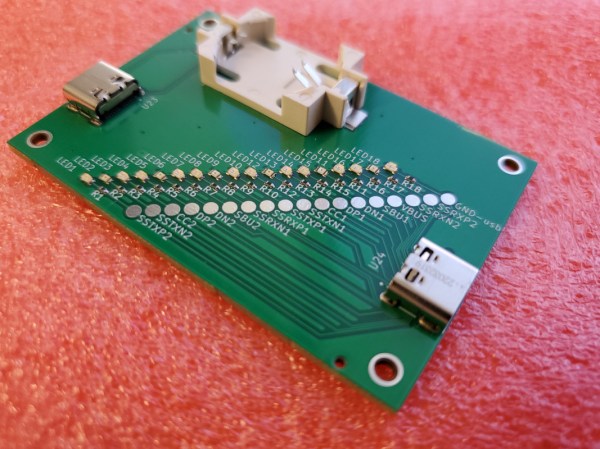
One of the design goals of this project is to automate away the task of testing cables or finding one that works, especially before thinking a problem with a device is somewhere in software, spending hours or days debugging, before realizing that it’s actually being caused by a hardware malfunction. The small PCB has two USB-C fittings to plug in both of the ends of a cable to, and between those connectors there is a number of LEDs. Each LED is paired to one the many conductors within the USB cable, and not only does it show continuity of these conductors but it can also show a high resistance connection via a dimly-lit or off-color display from an LED.

One of the other interesting facets of this build is the use of JITX, which is a software-defined electronics CAD tool which allows PCB design to be automated by writing out the requirements of the PCB into code, rather than drawing it manually. It’s worth a look, and a lot of the schematics of this particular project as well as some discussion on this software can be found on the project’s GitHub page. Incidentally, if this tester looks familiar, it’s probably because your’re thinking of the open source hardware USB tester created by [Álvaro Prieto].

Your Multimeter Might Be Lying To You

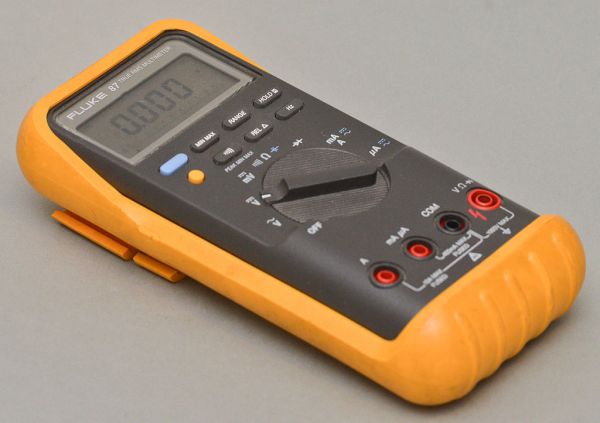
Multimeters are indispensable tools when working on electronics. It’s almost impossible to build any but the most basic of circuits without one to test and troubleshoot potential issues, and they make possible a large array of measurement capabilities that are not easily performed otherwise. But when things start getting a little more complex it’s important to know their limitations, specifically around what they will tell you about circuits designed for high frequency. [watersstanton] explains in this video while troubleshooting an antenna circuit for ham radio.

The issue that often confuses people new to radio or other high-frequency projects revolves around the continuity testing function found on most multimeters. While useful for testing wiring and making sure connections are solid, they typically only test using DC. When applying AC to the same circuits, inductors start to offer higher impedance and capacitors lower impedance, up to the point that they become open and short circuits respectively. The same happens to transformers, but can also most antennas which often look like short circuits to ground at DC but can offer just enough impedance at their designed frequency to efficiently resonate and send out radio waves.

This can give some confusing readings, such as when testing to make sure that a RF connector isn’t shorted out after soldering it to a coaxial cable for example. If an antenna is connected to the other side, it’s possible a meter will show a short at DC which might indicate a flaw in the soldering of the connector if the user isn’t mindful of this high-frequency impedance. We actually featured a unique antenna design recently that’s built entirely on a PCB that would show this DC short but behaves surprisingly well when sending out WiFi signals.

Continue reading “Your Multimeter Might Be Lying To You”

3D Printed Light Pipe Turns Overly-Bright LED Into Design Harmony

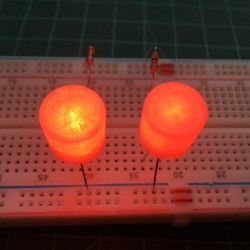
There are a number of ways to efficiently and elegantly limit an LED’s brightness, but [Tommy] found that using a light pipe or diffuser can integrate better with a device, especially when the device itself is mostly 3D printed in the first place.

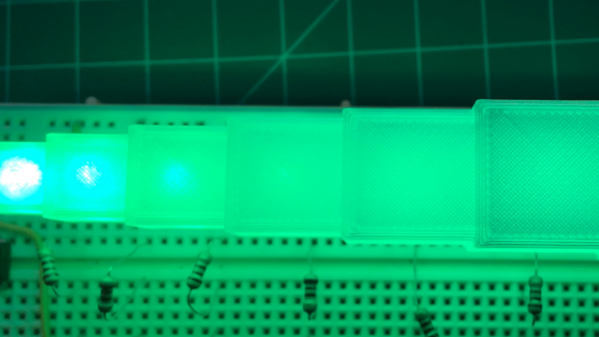
Infill has an effect on appearance. 20% infill on the left, 100% infill on the right.

For some problems the Goldilocks approach is the way to go. [Tommy] designed a small array of different LED cover options, and tested each to see what yielded the best results for his printed kit. Some of the biggest takeaways include:

  • 100% infill is best for even results (although interesting shadows happen at less than 100% infill.)
  • Interesting things happen with 7 to 11 mm of top layers of clear PLA, when illuminated from below with a 5 mm high-brightness LED. An even diffusion of light starts to give way to a circular gradient as the upper layer gets thicker.
  • LEDs emit their light mainly upward in a round pattern. Corners will always be darker, even more so if the guide is not round. This effect becomes noticeably more pronounced as the light guide grows in size, putting a practical upper limit on its effective dimensions.

[Tommy] explores these kinds of issues because he designs and builds electronic synth instruments, and they are mostly 3D printed. He explores efficiency and is always happy to share his findings about what works and doesn’t work.

Of course, the usual ways to deal with an overly-bright LED are to limit its current or control its brightness by driving it with a PWM signal. The right approach depends on the application and the scale of the design, and there are actually quite a few ways to crack this nut. Luckily, our own [Inderpreet Singh] is here to tell you all about how best to control LED brightness.

Peer-Reviewed Continuity Tester

One of the core features of the scientific community is the concept of “peer review” where any claims made by a scientist are open to be analyzed and reproduced by others in the community for independent verification. This leads to either rejection of ideas which can’t be reproduced, or strengthening of those ideas when they are. In this community we typically only feature the first step of this process, the original projects from various builders, but we don’t often see someone taking those instructions and “peer reviewing” someone’s build. This is one of those rare cases.

[oxullo] came across [Leo]’s original build for the ultimate continuity tester. This design is much more sensitive than the function which is built in to most multi-meters, and when building this tool specifically some other refinements can be built in as well. [oxullo] began by starting with the original designs, but made several small modifications. Most of these were changing to surface-mount parts, and switching some components for ones already available. Even then, there was still a mistake in the PCB which was eventually corrected. The case for this build is also 3D printed instead of being made out of metal, and with the original video to work from the rest fell into place easily.

[oxullo] is getting comparable results with this continuity tester, so we can officially say that this design is peer reviewed and tested to the highest of standards. If you’re in need of a more sensitive continuity sensor, or just don’t want to shell out for a Fluke meter when you don’t need the rest of its capabilities, this is the way to go. And don’t forget to check out our original write-up for this tester if you missed it the first time around.

When 3D Printing Gears, It Pays To Use The Right Resin

There are plenty of resins advertised as being suitable for functional applications and parts, but which is best and for what purpose?

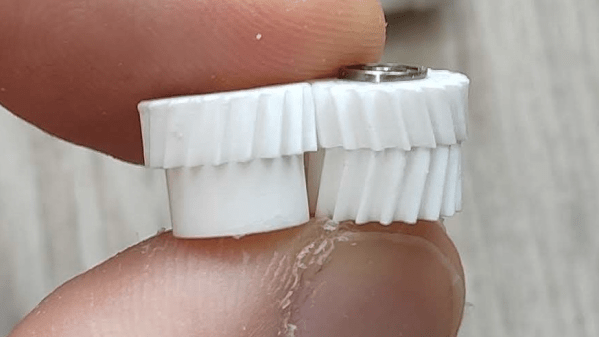
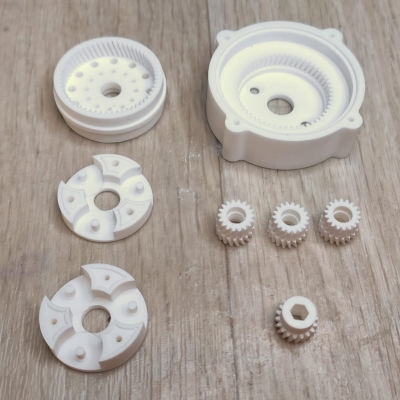
According to [Jan Mrázek], if one is printing gears, then they are definitely not all the same. He recently got fantastic results with Siraya Tech Fast Mecha, a composite resin that contains a filler to improve its properties, and he has plenty of pictures and data to share.

[Jan] has identified some key features that are important for functional parts like gears. Dimensional accuracy is important, there should be low surface friction on mating surfaces, and the printed objects should be durable. Of course, nothing beats a good real-world test. [Jan] puts the resin to work with his favorite method: printing out a 1:85 compound planetary gearbox, and testing it to failure.

The results? The composite resin performed admirably, and somewhat to his surprise, the teeth on the little gears showed no signs of wear. We recommend checking out the results on his page. [Jan] has used the same process to test many different materials, and it’s always updated with all tests he has done to date.

Whether it’s working out all that can go wrong, or making flexible build plates before they were cool, We really admire [Jan Mrázek]’s commitment to getting the most out of 3D printing with resin.

Testing An Inexpensive CNC Spindle

The old saying “you get what you pay for” is a cautionary cliché, but is directly contrary to several other common sayings. In the case of [Spikee]’s planned CNC machine build, he took the more adventurous idiom of “no risk, no reward” to heart when he purchased these spindles for the machine from AliExpress. While the delivered product seemed fine, there were some problems that needed investigations.

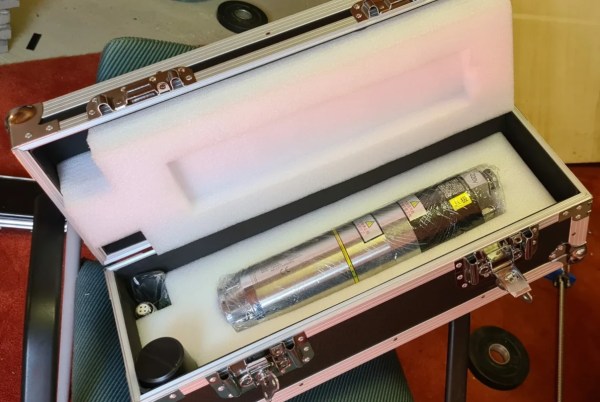
Upon delivery of the spindle, everything seemed to work correctly out-of-the-box. Even the variable frequency drive, which was programmed at the factory, was working properly. But at around 8000 rpm the machine would begin shaking. The suspected part causing the vibration was the tool holder, so after checking the machine’s runout and also using a specialized vibration sensor this was confirmed to be the case.

Luckily [Spikee] was able to get a refund on the tool holders since they were out of spec, but still has a quite capable spindle on his hands for an excellent price. Without some skills in troubleshooting he might have returned the entire machine unnecessarily. If you are looking for some other ideas in setting up an inexpensive CNC machine, you might also like to look at BLDC motors from a remote control vehicle.

The Big List Of Naughty Strings Helps Find Those User Input Problems

Any software that accepts user input must take some effort to sanitize incoming data, lest unexpected and unwelcome things happen. Here to make that easier is the Big List of Naughty Strings, an evolving list of edge cases, unusual characters, script-injection fragments, and all-around nonstandard stuff aimed at QA testers, developers, and the curious. It’s a big list that has grown over the years, and every piece of it is still (technically) just a string.

These strings have a high probability of surfacing any problems with handling user input. They won’t necessarily break anything, but they may cause unexpected things to happen and help point out any issues that need fixing. After all, many attacks hinge on being able to send unexpected inputs that don’t get properly sanitized.

Finding bad inputs is not always entirely straightforward, but at least the Big List of Naughty Strings is available in a variety of formats to make it easy to use. [Max Woolf] has been maintaining the list for years, but if you haven’t heard of it yet and think it might come in useful, now’s the time to give it a look. Now you can help ensure your system can handle things like someone registering a company named ; DROP TABLE “COMPANIES”;– LTD.