Coolest Way To Watch 3D Printing: Lights, Camera, Octolapse!

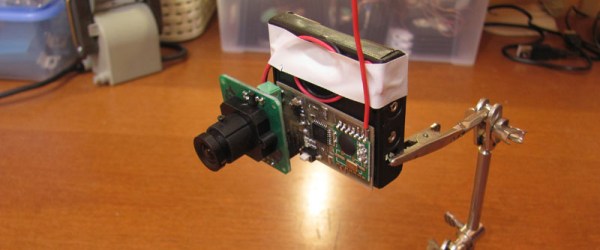
Octoprint is a household name for anyone into 3D printing and anyone regularly reading Hackaday. Described by creator Gina Häußge as “the snappy web interface for your 3D printer”, Octoprint allows you to control effectively any desktop 3D printer over the local network or Internet. It even has webcam support so you can watch your printer while it works, meaning you can finally put that video baby monitor back into the crib with Junior.

While the core functionality of Octoprint is fantastic alone, its true power is unlocked through the plugin system and the community that’s sprung up around it. With plugins, Octoprint can do everything from control RGB light strips in your printer’s enclosure to sending status messages via Discord. One particularly popular plugin that has been making the rounds lately is Octolapse by [FormerLurker]. This plugin provides a comprehensive intelligent system for creating time-lapse videos of prints.

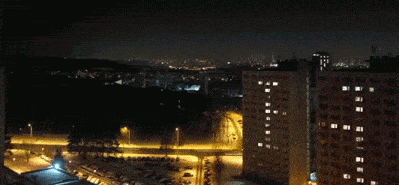
What does that mean? Well, instead of simply taking a picture every few seconds like you’d do traditionally, Octolapse actually keeps track of the printer’s motions while its running. It can then take a picture at the opportune moment to create a number of user-selected effects. More importantly, it can even take control of the printer directly; moving the hotend away from the print before taking a picture. The effect is that the print simply “grows” out of the bed.

I thought it would be interesting to take a closer look at Octolapse and see just what it takes to create one of those awesome time-lapse videos. It turned out to be somewhat trickier than I anticipated, but the end results are so fantastic I’d say it’s a technique worth mastering.

Continue reading “Coolest Way To Watch 3D Printing: Lights, Camera, Octolapse!”

PipeCam: Shallow-Water Exploration With Raspberry Pi

In what began as a personal challenge he issued to himself, [Fred] is in the process of building an underwater camera that’s capable of long-term photography in shallow waters. He’d like it to last about five hours on a charge while taking a photo every five minutes. Ideally, it will be as cheap as possible and constructed from readily available parts. Solving the cheap/available equation would theoretically make the camera easily to replicate, which is the third major requirement.

[Fred] has recently made great strides, both in the circuitry and the capsule design. The latest version uses a Raspberry Pi 3 with a V2 camera module and runs on a 12 V, 2.4 Ah rechargeable lead-acid battery. Everything is mounted on a piece of hardboard that slides into a 110mm piece of PVC. At one end, the camera looks out through a 10mm  acrylic lens fixed into a heavy-duty PVC fitting, and a DS1307 RTC provides a handy clock for shooting time lapses. With a friend’s help, he pressure-tested the housing and found that it can withstand 4 bar without leaking. He is still doing dry tests and trying hard to resist the urge to throw it in the water.

PipeCam is a work in progress, and [Fred] has many ideas for improvements. He’d like to add an Arduino to govern the battery use and provide its vital signs back to the Pi, and add an LDR to decide whether there’s enough light to warrant turning the Pi on to take pictures.

PVC is great for custom capsule building. But if you want to get started with underwater photography a little faster and want to build something instead of just buying a GoPro, try sealing your camera in something that’s already watertight.

Scrolling A Message On A Building In A Time Lapse Video

[Saulius Lukse] has a really interesting way of turning a couple of buildings into his own addressable display. The effect is not seen in real life, but is a clever video rendering with stock he pulled from time-lapse cameras. Now if you want to play Tetris using the windows of a building you add wireless lightbulbs to every window. But that’s a lot of work. You can fake playing Tetris (or scrolling messages in this case) if you just show a video of the buildings and swap in your own image manipulation.

4

[Saulius] starts with a time lapse sequence of a city scape. It needs to be one with a large building or two to provide a good scrolling surface. The building is extracted from the scene with the background transparent. The really time consuming part is creating a distinct image with one window lit for each window that is going to be used. This set of windows are the ‘pixels’ used to create the scrolling images. This is accomplished by masking out one image of the building with every office light turned off, then masking out each window individually with the office illuminated. This masking means everything going on around the building (traffic, weather, people) will be preserved, while the windows can be individually manipulated.

Next the program jinx is used to create the building animation. This program is designed to create scrolling messages on LED panels. [Saulius] provides a Python script that takes the images, the output of jinx, and combines them to create the final set of moving images.

The result is a city wishing you a “Happy New Year!”

Continue reading “Scrolling A Message On A Building In A Time Lapse Video”

Camera Slider

Camera Slider Utilizes Skateboard Trucks

[Peter] wanted a camera slider and found some inspiration on the good ole ‘net. He then gathered some parts and came up with his own design. We’ve seen camera sliders made from roller blade wheels before but never one that uses skateboard trucks as the carriage! On each truck axle are 2 bearings spaced apart without the skate wheels. Each pair of bearings rides on one of two 48 inch long closet rods supported between two push-up stands. The top portion from an old camera tripod makes a handy mount that allows adjustment of the camera’s aim.

Some camera sliders are manual operated. This one, however, is lead screw driven with a goal of keeping the camera moving at a constant rate. A disassembled hand drill provides the motor, gearbox and speed control necessary to turn the lead screw. Although it works well at slow speeds, [Peter] admits that it becomes less usable as the speed increases. This is mainly due to the 5/16 inch threaded rod lead screw oscillating and whipping around after reaching a certain RPM. If you stick with a straight run, a belt-driven system might make those faster movements more smoothly.

A Year Long Time Lapse Camera

All [val3tra] wanted was an RF-accessible camera. A camera that would take pictures, save them to an SD card, and occasionally send them over an RF link to a computer. This project has grown out of control, and now it has become an open-source camera that’s able to take year-long time-lapse movies.

The build started as a low power camera using an eBay JPEG camera modified for 3.3V. That’s only 640×480, but each frame averages only 48kb – small enough to store a few thousand pictures on a FAT16 formatted SD card. A $4 RF module, an ATMega, and an RTC make up the rest of the build that has a power draw of about 100 Joules per hour. A D-cell has about 60,000 Joules, and a pessimistic estimate of a battery of four in series, two in parallel gives a run time of 200 days.

This build was then improved, bringing the total battery consumption down to about 3.5-4 Joules per frame, or at one frame every 10 minutes, about 24 Joules an hour. That’s impressive, and getting this camera to run longer than a dozen or so months raises some interesting challenges. The self-discharge of the battery must be taken into account, and environmental concerns – especially when leaving this camera to run in a Moscow winter, seen in the video below – are significant.

If you don’t want to go equipment-lite you could seal your DSLR, Pi, and some serious batteries in a weatherproof enclosure.

Continue reading “A Year Long Time Lapse Camera”