Toorcamp: The Lock Picking Village

The Open Organization Of Lockpickers (TOOOL) ran the lock picking village at Toorcamp. They gave great workshops on how lock picking works, provided a lot of examples of security flaws in popular locks, and let everyone practice with their locks and tools. Lock picking is a bit addictive, and I spent quite a bit of time at the village.

TOOOL is an international organization that aims to advance the general public knowledge about locks and lockpicking. If you’ve ever wanted to know more about locks, you can check out their list of chapters to see if there’s one in your area, or send them an email to see if there’s other lock picking enthusiasts near you. Their detailed slides that were used for the village are also available.

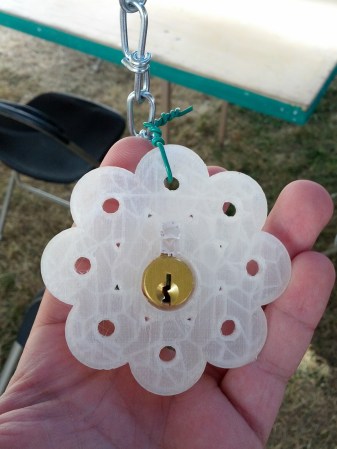
[Eric] from TOOOL worked on building a lock picking installation called the Labyrinth of Locks. The first prototype of this consists of locks enclosed in 3D printed enclosures, and lit by LEDs. The goal was to string them up in the woods and challenge people to find and pick the locks. MakerBot Industries printed the orange and flower shaped enclosures that the LEDs and locks were mounted into.

This is a first prototype, and [Eric] plans to expand on the idea and use it at other lock picking events he attends. It’s a neat way to mix lock picking and an art installation into an interactive activity.

Toorcamp: Milling PCBs With KiCad

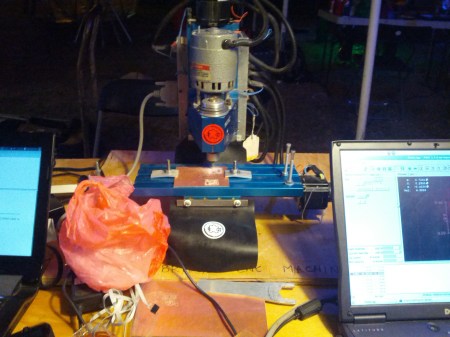
[Hao] from Noisebridge showed me their CNC mill being used to etch PCBs. Using copper clad board, this MAXNC 10 mill routes the PCB with decent accuracy. This makes for very rapid prototyping of single sided PCBs.

[Hao] designed the PCB using the open source KiCad EDA tool. This was used to draw the schematic, layout the PCB, and generate the Gerber files. Next, pcb2gcode was used to convert the Gerbers to G-code, which is a standard set of instructions for controlling CNC devices. Finally, LinuxCNC was used to send the G-code instructions to the mill. It’s a powerful application of a completely open source workflow.

The PCB being milled is for a pressure based touch sensor. It uses the Freescale MPL115A barometric pressure sensor encased in a rubber housing. This sensor is being incorporated into the Dora Opensource Robot Assistant project, which [Hao] and the Noisebridge folks are working on. We’re looking forward to hearing more about the Dora project in the future.

Toorcamp: Type A Machines

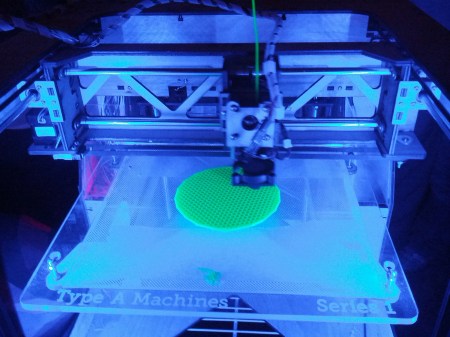
Type A Machines designs and builds 3D printers in San Francisco. [Miloh], one of the founders, brought two of their flagship Series 1 printers to Toorcamp. He printed out a variety of models including water tight cups and quadcopter arms.

The RepRap Arduino MEGA Pololu Shield (RAMPS) is used to drive the stepper motors for each axis, as well as the extruder. This is attached to an Arduino MEGA running the Marlin RepRap firmware. Type A Machines ships the printer with Polylactic Acid (PLA) filament, which is biodegradable.

On software side, you start with a 3D model in STL format. This can be exported from 3D software such as Google SketchUp or Autodesk 123D. You then need a slicer to generate G-code and machine control software to command the printer. [Miloh] used Slic3r and Repetier for his workflow, but he also pointed out a good summary of 3D printer workflows.

The Series 1 was launched at the Bay Area Maker Faire this past May. It has a print volume of 1200 mL, which is the largest print volume of any desktop printer around. The Series 1 brings another option into the low-cost 3D printer market.

Toorcamp: Hackerbot Labs’ Giant FAA Approved Laser

This is a big laser.

[3ric] from Hackerbot Labs gave me a run down of their BattleYurt laser installation at Toorcamp. It’s built with twenty-four 1 Watt lasers taken from a Casio DLP projector. The laser is housed on top of a yurt, which contains the controls and cooling system. It was built with the goal of measuring diffuse reflections of the atmosphere, but it also does the job of looking awesome when fired into the sky. Continue reading “Toorcamp: Hackerbot Labs’ Giant FAA Approved Laser”

Toorcamp: Bliplace 2.0

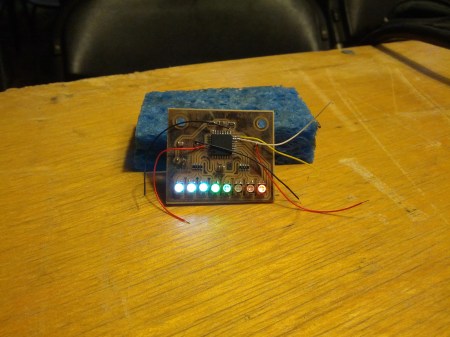
We’ve shown [Tanjent]’s Bliplace 1.0 in the past. He handed out a few hundred of the open source audio toys at Burning Man. At Toorcamp, he’s been showing off an improved 2.0 version of the project. This one has a more powerful microcontroller and many more RGB LEDs.

The device uses the ATMega328 and an electret microphone to sample ambient noise. It the processes the sound into a light pattern which is displayed on the line of RGB LEDs. The demo that I saw showed the LEDs synchronized to bass frequencies, which it could pick up at a range from the large sub-woofers at Toorcamp. It’s powered by a CR2032 coin cell battery, which means it can be worn as a neat audio toy.

This prototype version was etched in his kitchen but [Tanjent] is working on making a production version of the PCB. He plans to release it as a surface mount soldering kit.

Toorcamp: Quadcopter Controlled By A TI-84+

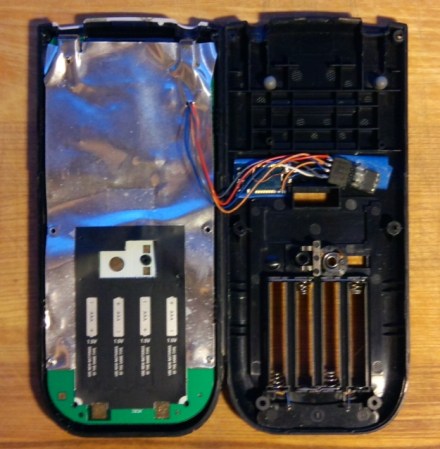
What happens when you combine a TI-84+ graphing calculator with an added bluetooth module, a 1 Watt Alfa wifi dongle, and a Parrot Wifi Quadcopter? You get a long range quadcopter that’s controlled from the TI-84+ directional pad.

This TI-84+ looks like a standard issue school calculator, but [Owen] added an ATTiny13 microcontroller and a bluetooth module which sniffs the I/O port of the calculator. This allows for bi-directional communication with a laptop. He wrote a few Python scripts on the laptop to receive data from the calculator and send commands to the Parrot Quadcopter. The high-powered wifi module allowed for pretty good range with the Quadcopter, which was flown across the Toorcamp grounds.

Of course, having an innocent looking calculator with wireless communications has some other uses. Data could be displayed on the calculator from a phone over bluetooth. How about accessing Wikipedia or WolframAlpha from your calculator? Despite the possibilities, [Owen] did say that he’s never used it to cheat on tests.

Toorcamp: Banana Piano

Banana Piano

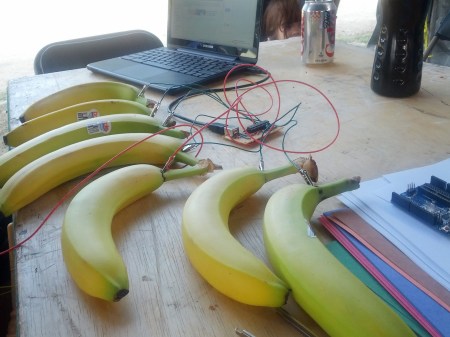
[Michael] built his own clone of the popular MaKey MaKey Kickstarter project. His implementation uses an ATMega328 and the V-USB stack to connect as a USB Human Interface Device. He was showing it off at Toorcamp wired up to a banana piano, which captured the interest of kids and adults alike.

The digital inputs are pulled to ground with a large (10 Mohm) resistance. The user holds a supply voltage in one hand and completes the circuit by touching a conductive object like a banana, which is connected to a digital input of the ATMega328. Since the internal resistance across your body is typically around 1 Mohm, this pulls the input high and corresponds to a key being pressed on a normal keyboard.

We featured banana pianos before, and it’s a great demo of the interfaces that can be built with this project. This implementation is very simple, and works well if your internal resistance is low enough. [Michael] taught a workshop at Toorcamp to show people how to build their own. He has found that the ‘magic’ of playing music with bananas is a great way to get children interested in electronics.