Hackaday Prize Entry: A BSTRD Preamp

For this year’s Hackaday Prize, [skrodahl] is building a beautiful tube preamp. It’s a masterpiece of glass and free electrons, it already works, and it sounds great.

This circuit is a modified version of the Bastard, an amp published in the Danish magazine Ny Elektronik nearly 20 years ago. The original amp was a true bastard, with a transistor phono stage, a valve line stage, and an input selector that used relays. [skrodahl]’s version only uses the line stage, but part of the name remains as a nod to the original design.

The design of this amp uses octal 6J5 tubes, a 80 VDC, 0.1 A and 6 VDC, 1.5 A power supply. This is actually two projects in one, with the power supply comprising an another entire project.

[skrodahl]’s BSTRD is built, and it works, but the question remains: how does it sound? Unlike so, so many tube amp projects on the Interwebs, [skrodahl] actually has test and measurement gear to figure out what the frequency response and THD measurements actually are. For the frequency response, this amp is dead flat from 10 Hz to 30 kHz. THD is somewhere between 0.35-0.4%, or more than acceptable.

This is a great little project, and an awesome extension to an already popular Open Source project. It’s also a great entry for the Hackaday Prize, and we’re pleased to see it entered in this year’s contest.

Now Is The Golden Age Of Artisanal, Non-Traditional Tube Amps

Earlier in the month, [Elliot Williams] quipped that it had been far too long since we saw a VFD-based amplifier build. Well, that dry spell is over. This week, [kodera2t] started showing off his design for a VFD headphone amp.

Here’s the thing, this isn’t using old surplus vacuum fluorescent displays. This is actually a new part. We first covered it about 18 months ago when Korg and Noritake announced the NuTube. It’s the VFD form factor you would find in old stereo and lab equipment, but housed in the familiar glass case is a triode specifically designed for that purpose.

Check out [kodera2t’s] video below where he walks through the schematic for his amplifier. Since making that video he has populated the boards and taken it for a spin — no video of that yet but we’re going to keep a watchful eye for a follow-up. Since these parts can be reliably sourced he’s even planning to sell it in his Tindie store. If you want to play around with this new tube that’s a pretty easy way to get the tube and support hardware all in one shot. This is not a hack, it’s being used for exactly what Korg and Noritake designed it to do, but we hope to see a few of these kits hacked for specific tastes in amp design. If you do that (or any other VFD hacking) we want to hear about it!

And now for the litany of non-traditional VFD amps we’ve grown to love. There is the Nixie amp where [Elliot] made the quip I mentioned above, here’s an old radio VFD amp project, in this one a VCR was the donor, and this from wayback that gives a great background on how this all works.

Continue reading “Now Is The Golden Age Of Artisanal, Non-Traditional Tube Amps”

Building Better Tube Amps With Heathkit Parts

[Justin] had been trying to find a good tube amp for years, but all the best examples were either expensive or a complete basket case. Instead of buying a vintage stereo tube amp, he decided to build his own using the guts of a Heathkit AA-100, a popular tube amp from the 60s and 70s that doesn’t have a great reputation for sound quality.

This project was based on an earlier project from a decade ago that replicated the very popular Dynaco ST-70 tube amp from parts taken from the Heathkit AA-100. The schematic for this conversion was readily available on the usual tube head message boards, and a few PCBs were available for the input stage.

With the schematic in hand, the next thing for [Justin] to do was get a nice enclosure. High quality tube amps are valued as much for their appearance as they are for their sound quality, and after giving his father-in-law a few sketches, a cherry hardwood chassis stained in a beautiful golden brown appeared on [Justin]’s workbench.

The big iron for this new tube amp was taken directly from the old Heathkit, and a few hours in front of a mill netted [Justin] a chassis panel drilled out for the transformers and tube sockets. The rest of the project was a bit of assembly, point-to-point wiring, and wire management giving [Justin] a fantastic amplifier that will last for another fifty years until someone decides to reuse the transformers.

A Cake Tin Makes A Great Tube Amp Chassis

If you have ever had a go at building a tube-based project you will probably be familiar with the amount of metalwork required to provide support structures for the tubes themselves and the various heavy transformers and large electrolytic capacitors. Electronic construction sixty years ago was as much about building the chassis of a project as it was about building the project itself, and it was thus not uncommon to see creative re-use of a chassis salvaged from another piece of equipment.

This morning we stumbled upon a rather nice solution to some of the metalwork woes facing the tube constructor courtesy of [Bruce], who built his tube audio amplifier on a chassis made from a cake tin and with its transformers housed in decorative display tins.

The circuit itself is a straightforward single-ended design using an ECL82 triode-pentode on each stereo channel, and comes courtesy of [Nitin William]. The power supply is on-board, and uses a pair of silicon diodes rather than another tube as the rectifier.

It’s true that [Bruce] has not entirely escaped metalwork, he’s still had to create the holes for his tubes and various mountings for other components. But a lot of the hard work in making a tube chassis is taken care of with the cake tin design, and the result looks rather professional.

We have something of a personal interest in single-ended tube amplifiers here at Hackaday, as more than one of us have one in our constructional past, present, or immediate futures. They are a great way to dip your toe in the water of tube amplifier design, being fairly simple and easy to make without breaking the bank. We’ve certainly featured our share of tube projects here over the years, for example our “Groove tube” round-up, or our look at some alternative audio amplifiers.

Hacklet 85: Alternative Audio Amplifiers

When you think of amplifiers, you’re probably thinking of audio or some big ‘ol power amps for radios. While interesting, there are some very interesting ‘alternative’ amplifiers floating around hackaday.io that are more than just power amps, and exceedingly useful, to boot.

1601181393316190625[Ronald] bought an XMS amplifier a few years ago, and although it worked well, every time he changed the input, the loudness had to be toggled. One thing led to another, and he realized this amplifier had a four-channel audio processor that could be controlled by I2C. This was the beginning of his Network Amplifier.

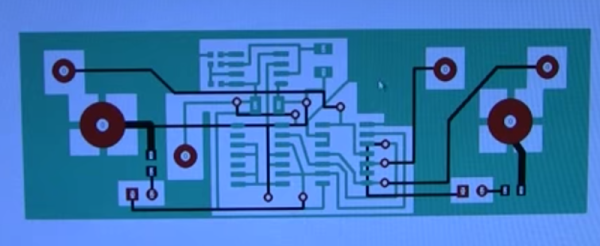
Inside the box is a Raspberry Pi that controls a PT2314-based amplifier. Also included is a 2×16 character LCD, a few LEDs, switches, and a rotary encoder.  There was an Android app that controlled the amplifier, but this was discarded for a better looking web-based solution. Now [Ronald] has every audio source available over WiFi.

973501443636885535
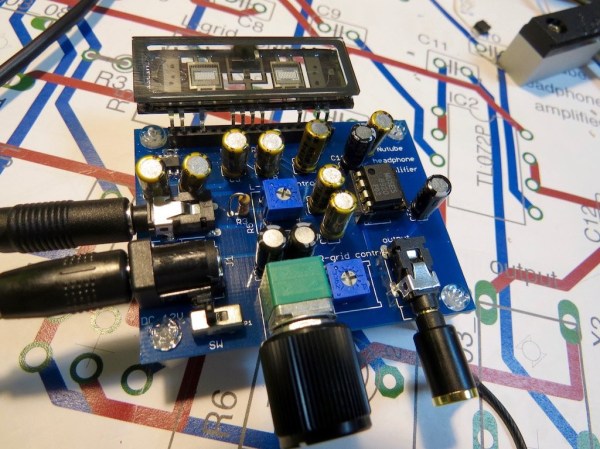
What if you want an audio amplifier without a speaker? Wait, what? That’s what [DeepSOIC] is doing with his experiments in ion wind loudspeakers.

‘Ion wind lifters’ have been around for decades now, mostly in the labs of slightly off-kilter people who believe this is the technology aliens are using to visit earth. Nevertheless, ion wind lifters produce an airflow, and if you make that wind variable, you get sound. Pretty cool, huh?

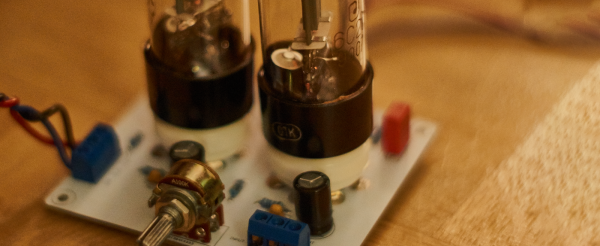
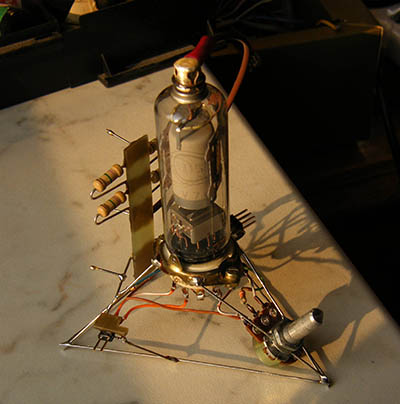
The amplifier for this project uses a tube to modulate kilovolt supply through the ion ‘blower’. Does it work? Sure does. [DeepSOIC] got a piece of 0.2 mm nichrome wire to discharge ions into the air, after which the ions drift into the second electrode. The result is sound, and the entire project is built deadbug style. It really doesn’t get cooler than this.


2981611414932529525
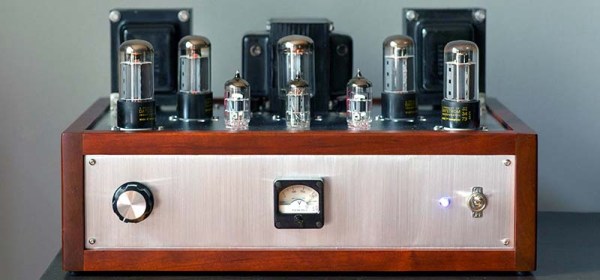
Continuing with the tube amp trend, [Marcel] built the cheapest little tube amp around.

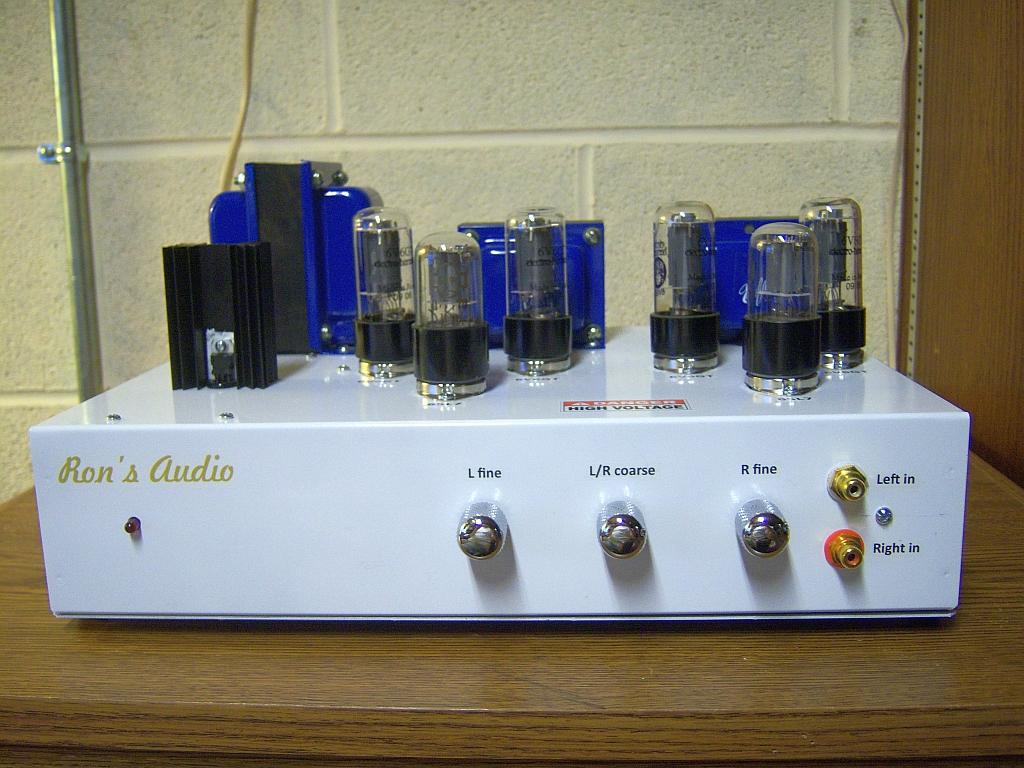
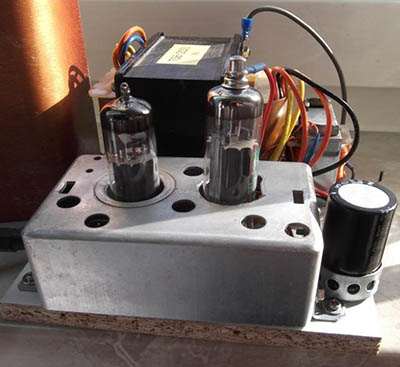
The design of an audio tube amp is fairly simple business. First, you start with a big ‘ol transformer, and rectify the AC into DC. This gets fed into a preamp tube, and this is fed into a bigger power tube.

In about 50 years of development, tube designers had the technology down pat by the mid 1950s, and triode/pentode tubes were created. This allowed tube designers to condense two amplifier stages into a single tube. While this setup was usually used for cheap, toy-like electronics, you can still buy the ECL82 tube today.

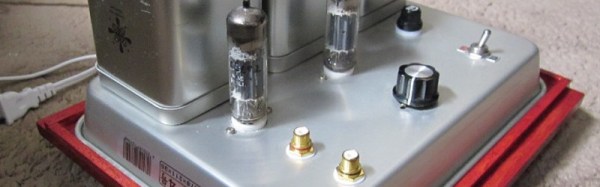
[Marcel] took one of these tubes, added a rectifier tube, transformer, and big cap to create the simplest possible tube amp. Use it for guitars, use it for hi-fis, it’s all the same. It’s not going to sound great, but it is a very easy amp to build.

All of these interesting audio amplifier projects are curated on this new list! If you have a build that amplifies sound in an interesting way, don’t be shy, just drop [Adam] a message on Hackaday.io and he’ll add it. That’s it for this week’s Hacklet. As always, see you next week. Same hack time, same hack channel, bringing you the best of Hackaday.io!

How To Tell If You’re Installing Foil Capacitors Backwards

It only takes one mistake to realize electrolytic capacitors have a polarity, but if you’re working with old tube gear, tube amps, or any old equipment with those old orange dip, brown dip, or green dip foil capacitors you also have to watch your polarity. These old caps were constructed with a foil shielding, and there’s always one side of these caps that should always be connected to the chassis ground. If you don’t, you’re going to get interference – not something you want in an amplifier circuit.

Old caps that have long since given up the ghost usually have a black band designating whatever side of the cap the ‘foil ground’ is. This is the side that should be connected to ground. If you look at modern foil caps, you might also see a black band on one side of the cap, which should – if we lived in a just world – also designate the foil ground. This is not always the case.

To properly test foil caps and determine which side should be closer to ground, you can construct a small tester box that’s more or less an h-bridge with a single switch and a pair of alligator clips in the middle. Connect the cap to the clips, put the output of the circuit in your scope, and flick the switch: the direction that has the least amount of interference is the denotes the foil ground of the cap. Replace those old caps in your vintage equipment with a new, correctly oriented cap, and you’re well on your way to having a great sounding amplifier.

Video below.

Continue reading “How To Tell If You’re Installing Foil Capacitors Backwards”

A Nicely Designed Stereo Tube Amp

tube amp

Most of the work that [Ron] has done in the past with vacuum tubes and solid state electronics has been repair. At 59 years old, he finally put together his own stereo tube amplifier and we have to admit it definitely has an awesome look.

The platform is built around the well-known 6V6 beam-power tetrodes which are mostly used by major audio brands for their guitar amplifiers nowadays. The Dynaco 6V6 circuit based PCB was bought from China and minor changes were made to it. The amplifier uses one transformer to convert the US 120VAC into 240VAC and 9VAC, the first being rectified by a glassware PS-14 power supply while the later is converted regulated at 6.3V for the tube heaters. The output stage consists of two Edcor audio transformers (one for each channel) that converts the high voltage for its 8 ohms speakers. The home-made chassis provides proper grounding and as a result you can’t hear any background noise.

We are very curious to know if some our readers have been experimenting with glass tubes for audio applications. Please let us know your experience in the comments section below.