If you’ve got a desktop 3D printer, there’s an excellent chance you’ve heard of OctoPrint. This web front-end, usually running on a Raspberry Pi, allows you to monitor and control the printer over the network from any device that has a browser. But what if you’ve got two printers? Or 20? The logistics of each printer getting its own Pi can get uncomfortable in a hurry, which is why [Jay Doscher] has been working on a way to simplify things.
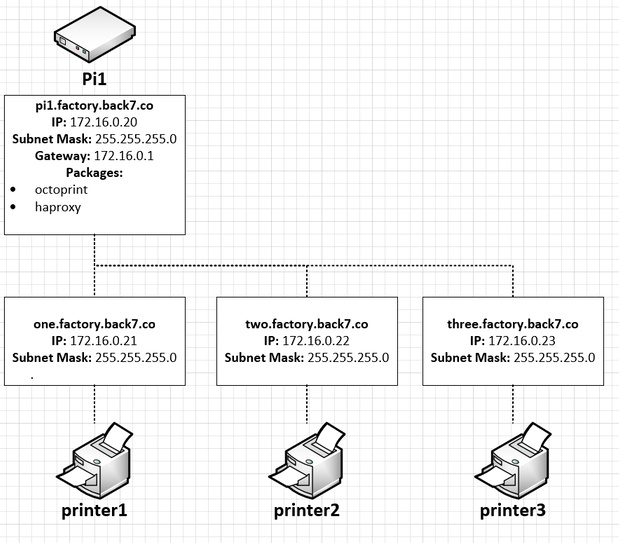 Leveraging the boosted processing power of the Raspberry Pi 4 and some good old fashioned Linux trickery, [Jay] is now controlling multiple printers from a single device. The trick is to run multiple instances of the OctoPrint backend and assign them to virtual network interfaces so they don’t interfere with each other. This takes some custom
 systemd unit files to get up and running on Raspbian, which he’s been kind enough to include them in the write-up.
But getting multiple copies of OctoPrint running on the Pi is only half the battle. There still needs to be a way to sort out which printer is which. Under normal circumstances, the printers would be assigned random virtual serial ports when the Pi booted. To prevent any confusion, [Jay] explains how you can use custom udev rules to make sure that each printer gets its own unique device node. Even if you aren’t trying to wrangle multiple 3D printers, this is a useful trick should you find yourself struggling to keep track of your USB gadgets.
If you’re wondering why [Jay] needs to have so many 3D printers going at the same time, we hear they’ve been keeping rather busy running off parts for commissioned copies of his popular projects. Something to consider the next time you’re wondering if there’s a way to make a happy buck out of this little hobby of ours, folks.