THP Entry: Cut Energy Consumption By 30 Percent With This WiFi XBee Setup

5277901405891974757

Let’s be honest. Paying electricity bills sucks. The amount paid is always too much, and the temperatures in the building are rarely set at a comfortable level. But now, with the help of this DIY Climate Control system, power-users can finally rejoice knowing that the heating and cooling process of their home (or commercial space) can be easily controlled through the utilization of an XBee Remote Kit and a process called zoning.

The team behind the project is [Doug], [Benjamin] and [Lucas]. They hope to solve the inconsistent temperature problems, which are caused by a moving sun, by open-sourcing their work into the community.

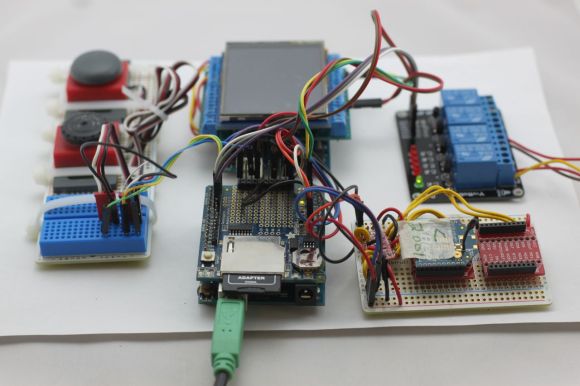
Their XBee system runs on a mesh network making it a perfect tool for sensing and communicating which areas in the house are too hot or too cold. Once the data is collected, XBee modules route the information wirelessly to each other until it reaches a central Arduino gatekeeper; which then decides if it wants to heat, ventilate, or air condition the room.

Not to mention all the added benefits posted below:

Continue reading “THP Entry: Cut Energy Consumption By 30 Percent With This WiFi XBee Setup”

Stubby, The Adorable And Easy To Build Hexapod

stubby

A while back, we had a sci-fi contest on Hackaday.io. Inspired by the replicators in Stargate SG-1, [The Big One] and a few other folk decided a remote-controlled hexapod would be a great build. The contest is long over, but that doesn’t mean development stopped. Now Stubby, the replicator-inspired hexapod is complete and he looks awesome.

The first two versions suffered from underpowered servos and complex mechanics. Third time’s the charm, and version three is a lightweight robot with pretty simple mechanics able to translate and rotate along the XYZ axes. Stubby only weights about 600 grams, batteries included, so he’s surprisingly nimble as well.

The frame of the hexapod is designed to be cut with a scroll saw, much to the chagrin of anyone without a CNC machine. There are three 9g servos per leg, all controlled with a custom board featuring an ATMega1284p and an XBee interface to an old Playstation controller.

Video of Stubby below, and of course all the sources and files are available on the project site.

Continue reading “Stubby, The Adorable And Easy To Build Hexapod”

Upgrading Home Automation To Home Anticipation

geofencingHomeAnticipation

[Bithead’s] already built some home automation to control the lighting and temperature in his house while he’s away, but he wanted to take things a step further and have the house automatically anticipate his arrival and adjust the environment accordingly. The project takes advantage of geofencing to create a perimeter around the home that listens for a transceiver in [Bithead’s] car. We featured a similar project with a Raspi a few months ago, which locked the doors upon driving away.

[Bithead’s] implementation uses a pair of Digi Xbee Pro XSC radios with U.FL antennas to provide an impressive 2+ mile range of communication. The home-based Xbee hooks up to a Parallax Xbee USB adapter and subsequently into his computer—its antenna sits in a nearby window on the top floor of his house to maximize range. For his car, [Bithead] originally opted for an Xbee shield and an Arduino Uno, but he’s recently overhauled the build in favor of an Arduino Fio, which reduced the footprint and increased the range. Check out his page for the build log specifics and more pictures.

Using Ultrasonic Sensors To Measure And Log Oil Tank Levels

[Mike] lives in a temperate rainforest in Alaska (we figured from his website’s name) and uses a 570 gallon oil tank to supply his furnace. Until now, he had no way of knowing how much oil was left in the tank and what his daily usage was. As he didn’t find any commercial product that could do what he wanted, he designed his own solution. In his write-up, [Mike] started by listing all the different sensors he had considered to measure the oil level and finally opted for an ultrasonic sensor. In his opinion, this kind of sensor is the best compromise between cost, ease of use, range and precision for his application. The precise chosen model was the ping))) bought from our favorite auction website for around $2.5.

[Mike] built the custom enclosure that you can see in the picture above using PVC parts. Enclosed are the ultrasonic sensor, a temperature sensor and an LED indicating the power status. On the other side of the CAT5 cable can be found an Arduino compatible board with an XBee shield and a 9V battery. Using another XBee shield and its USB adapter board, [Mike] can now wirelessly access the tank oil level log from his computer.

A Low-Cost Modular High Altitude Balloon Tracker With Mesh Networked Sensors

[Ethan] just tipped us about a project he and a few colleagues worked on last year for their senior design project. It’s a low-cost open hardware/software high altitude balloon tracker with sensors that form a mesh network with a master node. The latter (shown above) includes an ATmega644, an onboard GPS module (NEO-6M), a micro SD card slot, a 300mW APRS (144.39MHz) transmitter and finally headers to plug an XBee radio. This platform is therefore in charge of getting wireless data from the slave platforms, storing it in the uSD card while transmitting the balloon position via APRS along with other data. It’s interesting to note that to keep the design low-cost, they chose a relatively cheap analog radio module ($~40) and hacked together AFSK modulation of their output signal with hardware PWM outputs and a sine-wave lookup table.

The slave nodes are composed of ‘slave motherboards’ on which can be plugged several daughter-boards: geiger counters, atmospheric sensors, camera control/accelerometer boards. If you want to build your own system, be sure to check out this page which includes all the necessary instructions and resources.

Hackaday Links: October 6, 2013

hackaday-links-chain

The iBeacon has been all over the interwebs lately. Here’s a riff on the Arduino Pro MIni that adds a BLE module. It can be used to make an iBeacon clone. You can also hack a VTag keyfinder to operate in much the same way.

Remember that post about pulling a QR Code generator into Google Docs? One could argue that the best use of this functionality is to add labels to your parts storage that lead back to the product page for the component. [Thanks Nicholas]

[Michael] wrote in to share his crowd funding campaign. He is a school teacher and wants to publish a detective story that gets kids excited about STEM.

Our own [James Hobson] made the first cut to be [Adam Savage’s] new assistant. He’s the [TheHacksmith] (read our staff page if you don’t believe us) and is the third entry featured in this vignette. Apparently they’ve got something against Canadians because they say he’s ineligible due to his nationality!?

If you’ve ever been confused about the features of different Xbee modules this comparison chart may be of assistance.

A couple of weeks ago we learned about a contest put on by TheControllerProject. [TouchStone936] gets credit for quick, easy, and functional. His solution to making shoulder buttons more accessible includes hot-glue, a golf tee, and a binder clip. Pretty clever!

Wanting a better color of backlight for his eReader, [Vivek Gani] cracked it open and applied Kapton Tape as a gel to soften the hue.

And finally something very silly. If you put a strong enough prop on the front, you can get just about anything to fly. This instance involves a flying pizza box which to us looks particularly un-flight-worthy. [via Gizmodo]

Obstacle Avoiding LEGO Rover Uses CDs For Wheels

lego-rover

This rover built by [Sath02] is a great example that you don’t have to be a mechanical engineering wizard to get into robotics. He used LEGO pieces to help ease the difficulty of getting a rover up and running.

In this case the use of LEGO is strictly structural. The electronics are not the NXT parts you would expect to see when working with these popular toy blocks. Instead he’s put the Arduino Palm Plus into service. It’s an Arduino board that has rows of holes at either end to make it LEGO compatible. It also carries an LM293D motor controller and [Sath02] added an XBee module for wireless control.

At the top of the assembly is an IR distance sensor which is used for obstacle avoidance. You may not be interested in building and exact replica, but the techniques he uses for attaching the distance sensor, CD wheels,  and fabricating the rest of the rover are good examples if you take on a LEGO build in the future.

Continue reading “Obstacle Avoiding LEGO Rover Uses CDs For Wheels”