Custom HTPC And Home Media Server

[Benoit Frigon]’s builds are a tribute to tidiness: both his HTPC and media server are elegant creations packed full of features. He has quite the knack for clean builds in this form factor; his PBX server was met with high praise earlier this summer.

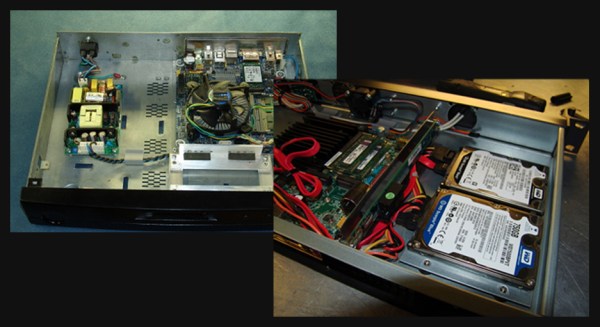
For the HTPC, [Benoit] gutted and cleaned an old DVR case and modified it to house a Mini-ITX board. He added standoff mounts to support the motherboard, then sketched up a template for the IO shield as a guide for cutting the back panel. The front of the DVR case originally had a 4-digit 7-segment display and a few simple buttons. Though he kept the original button layout, [Benoit] chose to replace the segment displays with a 20×2 character LCD. The new display is controlled via a python script on the HTPC, which runs an OpenElec Linux distro with XBMC 12.0.

The HTPC’s hard drive bay is a bit lighter these days, because [Benoit] decided to migrate his media storage to a separate server. Inside the new home media server is yet another Mini-ITX motherboard with an embedded Atom N2800 that runs Ubuntu Server. Live television streams via a WinTV HVR-2550 TV tuner and TVHeadend software. The case originally suspended the tuner from the IO bracket on the back (and nowhere else), which left the rest of the card dangerously unsupported inside. [Benoit] solved the problem by building an additional aluminum bracket that firmly holds both the PCIe riser and the tuner. Check out both builds’ pages for downloadable templates, software details and bill of materials.

Using A Raspberry Pi To Give Your Car More Features

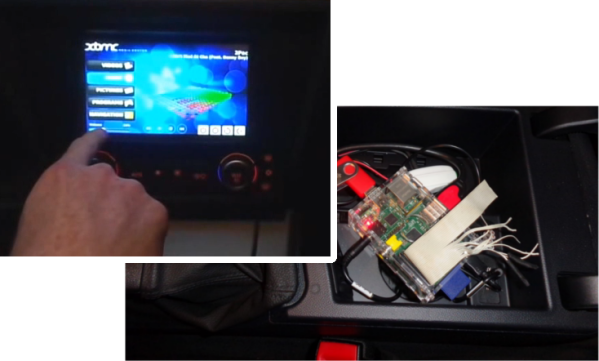
[Andrei] is cruising in style thanks to his Raspi-powered CarPC project, which is a steal at $200 considering all the functionality it provides. This is an update to the work we saw from him back in March. Rather than completely replace his car’s head unit, [Andrei] simply relocated it to the trunk, permanently set it to the “aux input” source, and connected the Raspberry Pi’s audio output. The Pi runs a Raspbian Wheezy distro with XBMC and is mounted in the storage area beneath the middle armrest. [Andrei] filled the hole left by the old stereo with a 7-inch touchscreen display, which connects to the Pi through both HDMI and USB. If you throw the car into reverse, the Pi automatically selects the touchscreen’s AV input to display the car’s backup camera, then flips back when put in drive.

The unit also provides navigation via the open-source Navit software using OpenStreetMap data. An ST22 SkyTraq GPS receiver grabs coordinates and feeds them into the Raspi, which updates the on-screen map once per second. You’ll want to watch the video after the break (Audio Warning: Tupac) to see for yourself just how well the CarPC came together,

Continue reading “Using A Raspberry Pi To Give Your Car More Features”

An XBMC Controller Built For Grandma

10-finished-controller

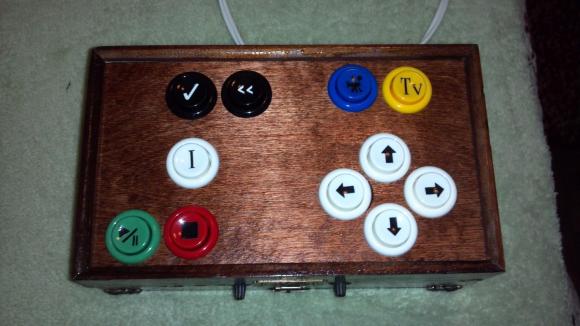
Is your grandmother cool enough to use XBMC? Maybe it’s a testament to the functionality of the wildly popular home entertainment suite rather than the hipness of your elders. But indeed, [Brian’s] grandmother is an XBMC user who needed a controller with larger buttons to accommodate her. This is what he built. He sent us a set of photos and a description of the build, both of which you can see below. He was inspired to get in touch after reading about the custom controller which [Caleb] has been working on for [Thomas].

[Brian] didn’t get bogged down with electronics. He went with the simple, cheap, and popular solution of gutting a wireless keyboard. After tracing out the keys he needed he got rid of everything except the PCB. A wiring harness was crafted by soldering jumper wires to the PCB traces and terminating them with crimping slide connectors. The arcade buttons he used have terminals for the connectors which will make it simple to mate the electronics with the mechanics.

The enclosure is a little wooden hobby box. It originally had a lid with a mirror. [Brian] broke open the lid’s frame to replace it with a thin piece of plywood which hosts the buttons. Inside you’ll find a battery power source. These keyboards last a long time on one set of batteries so he just needs to remember to preemptively replace them from time to time. The finishing touch was to add decals so that granny can figure out what each button does.

Continue reading “An XBMC Controller Built For Grandma”

Hackaday Links: Sunday, April 7th, 2013

hackaday-links-chain

Let’s wind down the weekend with some projects that didn’t quite warrant their own feature, but we think they’re still worth a look.

First up is a quick tip on cracking the lids on those hard to open jars of food. [Jason] says just grab about a foot of duct tape and the lid will come flying off. And while you’re searching for that roll of tape why not grab some foil tape to build a cooking oven. [Gabriel] built this solar oven by covering curved wedges of cardboard with foil tape and combining them to form a parabolic reflector.

Next we’ve got a trio of hacks that will come in useful in your home shop or at the local Hackerspace. Organization is key, and here’s a resistor storage system that uses #6 envelopes [via Reddit]. Also useful is the tip from [Felix] about using a tile saw to get clean cuts on your circuit boards. And if you’ve ever been plagued by a laser cutter job that doesn’t fully sever the material [Dan] wrote a guide on using a fence so that you can reposition the piece for another run.

Finally, we’re hoping we weren’t the only ones that didn’t realize the Raspberry Pi has an unpopulated footprint for a reset button. Now we’ve got to figure out if it’s okay to leave the PSU plugged in (based on it’s current consumption while the RPi is in power down) and hack together some sort of TV-based reset circuit for our RPi XBMC setup.

Building A Touchscreen XBMC Setup With The Raspberry Pi

rapsberry-pi-based-touchscreen-xbmc-tablet

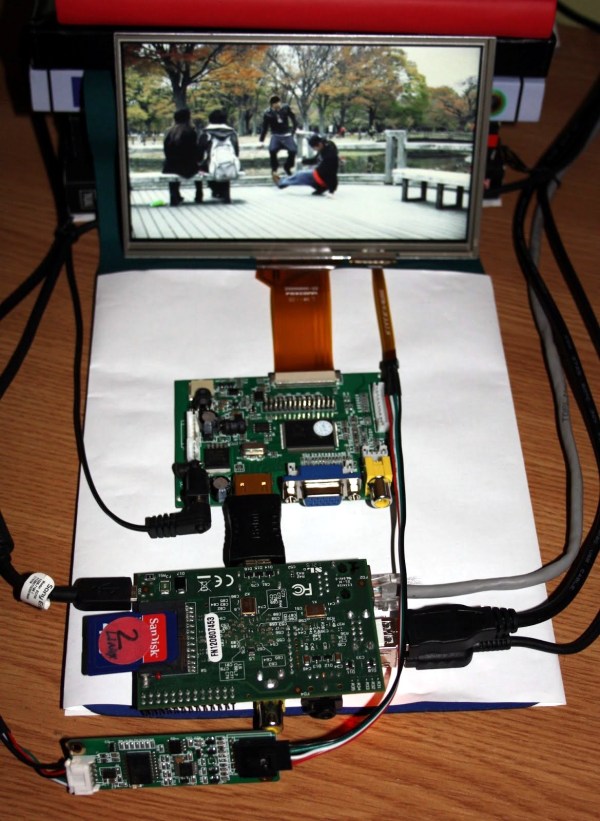
[Andrei Istodorescu] has been hard at work building a 7″ touch-screen rig which runs XBMC. It may be upside-down, but the Raspberry Pi board which is front and center is still easily recognizable. There’s a lot of stuff connected to it in order to pull this off, and even more software configuration. But as you can see in the clip after the break he did get it working!

The screen is an eGalaxy 7″ touch sensitive module he picked up on eBay. It sounds like it was meant for a backup camera in the dashboard of a car. He compiled his own Linux kernel to add support for the screen. It uses HDMI for the video interface with the driver board, and the touchscreen connects to one of the USB ports. The rest of the setup involves compiling XBMC with touchscreen support and calibrating the screen to accurately sense input.

Continue reading “Building A Touchscreen XBMC Setup With The Raspberry Pi”

XBMC Workaround For Android Hardware Video Acceleration

An unofficial, but fully functional release of XBMC should make the uber-popular media center software work with almost all Android devices. About six months ago the developers of XBMC announced that it had been ported for Android. That was true, but there was one caveat. The port was made functional on one specific Android device. The hardware company Pivos paid for the devs to add support for their Xios DS device. Although that build could be run on other Android devices, the hardware video acceleration could only be use if it was the same as the Xios. When not using the hardware acceleration many common video formats would only play at a few frames per second, if at all.

This build is a workaround and is not officially supported. What it brings to the table is the ability to use an external media player with XBMC. This way any video format which your Android device is capable of playing (with hardware acceleration) can be launched from XBMC but will be played by the native video application. We haven’t tried it for ourselves. If you have we’d love to hear about your experience in the comments.

[via Ars Technica]

ODROID-U2 Is Latest Barebones Board Begging To Be Used

odroid-u2

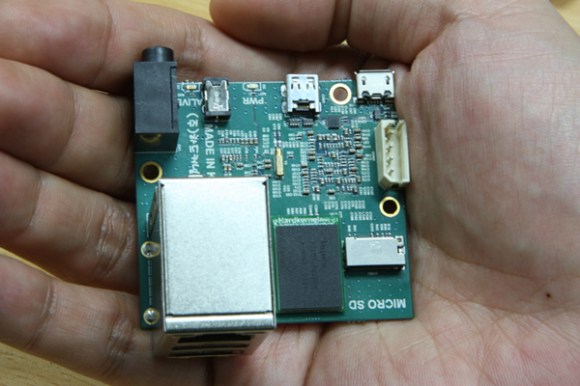
Oh hey, another barebones dev board. Well, that’s what we said to ourselves when we first saw this picture, but the way this is presented is like crack for geeks. It starts with this tiny board, which has a footprint smaller than a credit card. But once you start looking at the add-ons you’ll want to watch out or you’ll cover yourself in drool.

The name of the game here is speed. It’s running a quad-core Cortex-A9 chip with a Mali-400 graphics accelerator. There is no on-board storage, but the microSD slot is meant to be used for OS and storage. A faster option is to use a NAND add-on board offered in 8, 16, and 64 gig capacities ($25-$79). There is a micro type-D HDMI connector and the device is powered by a cellphone charger. It ships with a big heat sink that acts as a case for the board.

After the break you can see it booting Android and immediately loading into XBMC. The menu looks mighty snappy, making us think this is a great alternative to using Raspberry Pi as a media center. But you’ll pay for the faster speed and ability to run Android. The rig they’re showing off, plus the add-ons, comes out to about $132. There are also questions to be answered as to which video formats are supported through hardware decoding.

Continue reading “ODROID-U2 Is Latest Barebones Board Begging To Be Used”