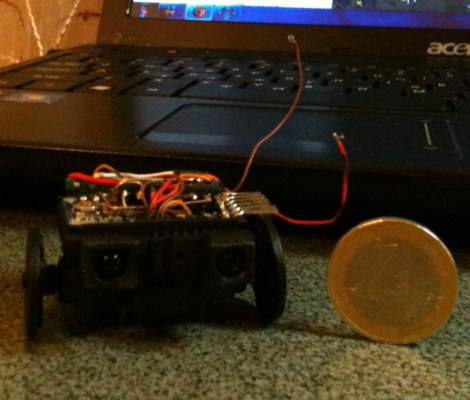
Here’s a quick and easy little robot with a not-so-pint-sized brain. [Dikos] over at grobot, slapped together some gutted micro servos, an Arduino pro mini, H bridge chip, and a solar key-chain charger to make this little three wheeled cutie. The robot boasts some very simple object avoidance thanks to the Sharp GP2Y0A21YK analog IR distance sensor, and that’s about it. This leaves tons of Arduino Pro left for a whole slew of sensors and robot stuff. We can’t spot it but somewhere under the pro mini is the solar key-chain’s 3.7V Lipo battery. The PCB for the emergency charger also makes a convenient little back panel housing a few LEDs, charging electronics, and a handy spot to hang a bead roller.
The micro bot has a pretty mean starboard list due to the lack of wheel position feedback, after all the micro servos were gutted to just function as simple gear boxes. We might have kept the servo mostly untouched, ditched the H bridge and performed a continuous rotation mod. We even have a guide for it! This is a really cool little bot though, and not terribly expensive if you need a little maze roller… or if you have a ton of money and like swarms of things.
Check out a (silent) video of the robot after the jump, the bot doesn’t hit the table until 1:16.
[youtube=http://www.youtube.com/watch?v=GH7gBkAqKek&w=470]


Cool project but I recomend never using your PCB as a supporting feature, it’s always a bad idea.
The weight of this project is miniscule. I have used PCB as a platform numerous times with small projects like this and have never had a problem with it. Work with whatever works best for you. Wood, plastic, PCB, etc.
Great project!
The coin in photo reminded me of several postings to the oldtools forum. Some members had made small replicas of hand planes and such, but then (as a joke) photographed them with a novelty large penny or nickel to make them look even smaller.
Modifying those micro servos for continuous rotation is pretty tough – there isnt a whole lot of room inside the housings for any extra parts, and its a pain to cram everything in there. After doing it once, I never tried again.
At the very least I’d think you could punch a hole in the side of the case to run the potentiometers to some of the spare analog inputs, the hardware should already be in place!
a couple 402 size 2.2K resistors and your set. Plenty of room.