Do jumper wires pulling out of your Uno have you pulling your hair out? Is troubleshooting loose jumpers making you lose your mind? Are your projects backing up because of all the time you’ve lost keeping jumper wires secure in your Arduino Uno? Then you need the all new Ardunio Strain Relief Enclosure!
[Jeremy Cook] has had it with loose jumpers pulling out of his Uno, so he designed a case that not only secures the Arduino; it also keeps those dastardly jumper wires from pulling out at the most inconvenient times.
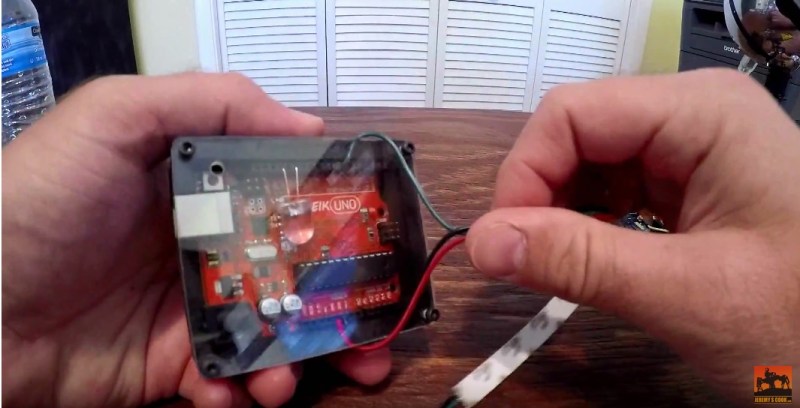
Composed of 3/4 inch thick MDF and 1/8 inch thick polycarbonate, the Arduino Strain Relief enclosure is sure to be a hit for every hacker’s work bench. [Jeremy] used a CNC router to cut the enclosure and top. The plastic top is secured to the MDF base via four 4-40 screws. Interestingly – he applied super glue to the screw holes in the MDF before tapping them. We’ll have to try this trick on our next project!


LED is too small.
Yeah, all out of 20mm LEDs unfortunately :-(
That’s quiet nice for a semi permanent project.
I suppose if you don’t have a router to cut out the mdf a similar enclosure could be made on a 3D printer ( everyone has one of those. Don’t they? ) or even a couple of pieces of Perspex with stand-offs to hold the pieces just far enough apart to allow the wires to fit.
Or less than $10 worth of tools from the fleamarket tool stall, being a drill and a coping saw or fret saw, and a clamp if you don’t have a vice.
Oops, should have watched vid more closely, I assumed it had a separate piece for the bottom. So you can make something similar with those tools, but either you’ll have to drill right through and have your bolts hold the back piece or glue it on.
That certainly would have made machining faster, though this process worked well with the materials I had lying around.
Thanks! Yeah, certainly could 3D print something similar.
I think a lasercutter should also work wonders here, though you’d need to use acrylic instead of polycarbonate, and maybe split the MDF part into multiple pieces.
Definitely could work. I may be biased as it’s what I have most easily available, but I think CNC router is the best tool for this job. Nice only having to deal with only 1 piece of MDF.
Thanks for the writeup Will!
Great project that I am sure a lot of people will appreciate but …
Technically it’s captive connections rather that strain relief.
Captive connections prevent things from disconnecting and that is what this project does very well.
Strain relief is more related to the malleability of different materials. When you solder a wire to a connector the solder wicks along the copper wire for a distance making that section of the conductor very rigid and prone to failure with flexing. A strain relief prevents flexing at the prone point by holding the wire more rigidly close to the connector and then progressively providing moreflexibility the further away from the wire you get.
This is hackaday, mate..
love u jen, but RÖB’s post was awesome. I hadn’t heard such explained so well before. Thank you for the wisdom, RÖB. Will take such things into consideration from now on.
I’m with Ms. Tonin. :)
And knowing that the plan is to go from stiff to very flexible in a controlled, smooth manner can help you whether you’re engineering or just laying down a bead of hot glue to serve as strain relief.
Thanks! Interesting point, I didn’t know the difference TBH.
What happens when you connect wires with different thickness insulators? The thinner ones will suddenly stop being retained as effectively? Neat idea, possible to make it less expensive in terms of time and cost by not milling it but instead using more of an ice cream sandwich style of build approach? Maybe with off the shelf threaded spacers?
Stick the thicker wires in daughter boards with their own sandwiches ????
A layer of craft foam would solve this and still likely do a decent job asst holding the wires.
Actually if you just wanna be lazy, front plate, back plate, and use draft seal strip for the sides either the extruded rubber or the high density foam.. bolt thru.
using inches, so retarded
Feel free to add “…divided by 25.4” wherever you hear inches…
… now drill a second hole roughly 25.4mm from the first …
I’m so glad that here in the US they teach multiplication and division in school! These technical hobbies must be really hard when arithmetic is so troubling that people using different units 1000s of miles of ocean away from you is offensive.
Personally I like to use metric when I am measuring on the left side of something and USC when measuring on the right. Why? Because the biggest functional difference is which side of the tape measure they are printed on! Other than that they are just units. Just don’t forget which one you used for what and everything comes out fine!
Fasteners however are so much less expensive over here when they are USC sizes. “Going Metric” would be a good way to kill a hobby as it would quickly become too expensive.
I love those little jumper wires when I am still actively working on a design, making changes and all that. Leaving them in a finished or even semi-finished project though… I don’t get why so many do this. It’s like the electronic version of a hobbyist woodworker filling his/her living-room with furniture “permanently” held together with woodworking clamps! Why not just get a cheap proto-shield clone. Or.. use a Mini, a couple rows of header sockets and a piece of strip board. For one little robot where I really did intend to keep on making more connections indefinitely I went the stripboard route but soldered screw terminals to the stripboard.