[Eric Strebel] doesn’t need an introduction anymore. If there is a picture of an elegantly designed part with a professional finish on our pages, there is a good chance he has a hand in it. This time he is sharing his method of making a part which looks like it is blow-molded but it is not. Blow-molded parts have a distinctive look, especially made with a transparent material and [Eric’s] method certainly passes for it. This could upgrade your prototyping game if you need a few custom parts that look like solidified soap bubbles.
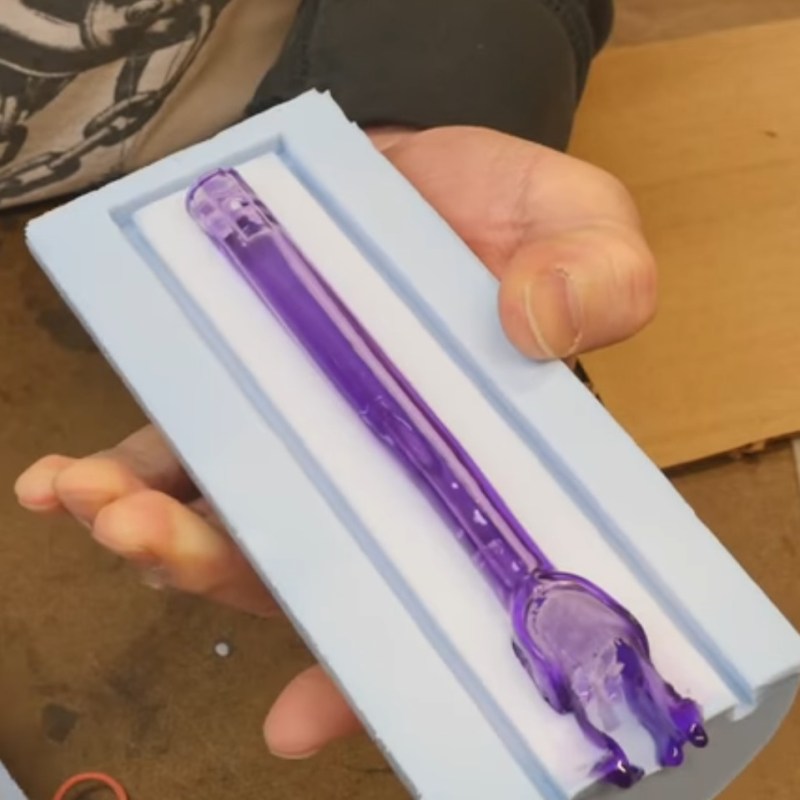
Mold making is not covered in this video, which can also be seen below the break, but we can help you out with a tip or two. For demonstration’s sake, we see the creation of a medical part which has some irregular surfaces. Resin is mixed and degassed then rolled around inside the mold. Then, the big reveal, resin is allowed to drain from the mold. Repeat to achieve the desired thickness.
This is a technique adapted from ceramics called slipcasting. For the curious, an elegant ceramic slipcasting video demonstration can be seen below as well. For an added finishing touch, watch how a laquer logo is applied to the finished part; a touch that will move the look of your build beyond that of a slapdash prototype.
More education from this prolific maker can be seen in his video on painting with a professional-looking finish and his tips for working with foam-core.
Here’s a video showing how ceramic slip casting works. After watching [Eric]’s video, this should make perfect sense.


Ceramic slip casting works by the plaster mold absorbing water from the clay slip. The longer you let it set, the thicker the casting’s walls will be.
The plaster needs to be special made for slip casting molds. Other plasters may just become mush when wet slip is poured in.
If you take care of your molds, they will last a very long time and make 100+ castings without showing erosion. Allow them to fully dry between pourings! If you cast them too often, the inside surface will break down and erode from absorbing too much moisture.
Don’t use elevated heat to force them to dry faster. A cabinet with 75F flowing air might speed things up some but just letting them sit at a comfy ambient temperature in a not too humid environment is best for mold longevity.
If you must rapidly make a large number of the same casting, buy or make several of the same mold so you can do them in parallel.
If you’ve ever looked inside a slip cast item and saw bumps on the bottom, that’s because whomever did the casting simply tipped the mold upside down to let it drain. The trick is to tip it upside down to dump the majority of the liquid slip out, then lay it on one side for about 30 seconds so the liquid clinging to the bottom will run down. Then tip it pour hole down so the slip can run down the side.
For making slip casting molds, the techniques are much the same as making RTV silicone molds, except you don’t need vacuum or pressure tanks. Unlike silicone molds you absolutely cannot get away with negative draft angles and parting lines *must be* at the widest part of the mold cavity. Pretty much the same rules as for fiberglass molds.
So an item that can have a 2 part silicone mold may need a 3 or more part plaster or fiberglass mold. The one in the video here is a great example. In silicone that could easily be done in two parts, but for slip casting it had to be five.
I grew up in the ceramics business. My family had a ceramics business that started before I was born (1971) and continued into the late 80’s. We had over 1,000 molds and sold greenware and bisque (fired greenware) to shops all over the Pacific Northwest. We also did some finished pieces and taught classes back when ceramics was one of the top hobbies.
A favorite was versions of this Christmas tree http://www.debmark.com/molds/AL/images/AL0774SET.jpg That one is done as intended, with plastic pegs in the holes to pipe light from one bulb. The molds for that tree were quite large and heavy. Full mold set for that tree is $240.00 Continuously popular for 40+ years.
How we did them was cutting larger holes near the branch tips then modifying strings of electric Christmas lights with the flared plastic ‘flowers’ to fit in them. That way the tree could have blinking lights. LED’s would be pretty neat on one now.
Thank you for this Gregg, sounds like information from someone who knows.
Thank you — THIS is the kind of comment I love to see on HAD. Thank you for taking the time to write all of this out and share your experience with us.
Nice details. I did some work with a ceramics department* and recalled slip casting as a process quite different from what is described in the article. IIRC they used Calgon bath oil beads to “defloculate” (?) the clay.
*I used the electric kilns to melt glass in a spinning mold to make telescope mirrors. Then got interested in all the firing techniques. I had a really high end optical pyrometer, and the ceramics grad students were crazy for the thing!
I believe this is more usually known as “slush casting” when done with polymers or metals.
HB has a bundle on cosplay, with moldmaking being one of them.
MIs-named process – Slip casting uses slip, the thin ceramic material that has high water levels. This is slush casting bordering on rotational molding, with what looks like minimal rotation. The key is that in slip casting the mold is filled to the top with slip; since that is not being done here it’s just adding to mis-information.
What is the pressure tank used for? Would it work without it too?
A pressure tank is used in resin casting and silicone (or urethane or polysulfide rubber) mold casting to force air bubbles into solution in the material. Larger bubbles will get forced together and up/out if the cavity is properly vented.
Many hard urethane resins can be demolded minutes to hours after casting, but you have to be aware of the possibility they may still sag under their own weight until they cure more. What I do is keep the mold with casting under pressure no less than 24 hours, no matter what resin I’m using.
Two reasons for that.
1 is ‘suckback’. Some resins (in particular Smooth-On Crystal Clear) will for some reason shrink away from the mold as the resin cures, if left in contact with the mold without being under pressure. If the casting is self supporting it can be removed from the mold and will shrink so little you’d need digital calipers to tell. So I leave everything under pressure long enough to get past that point in curing. Then I pop the castings loose from the mold and use part of the mold as s support during post-curing.
2 is a consequence of forcing the air into solution. If the resin isn’t sufficiently cured when put in to post cure, some of that air either comes out of solution, or microscopic bubbles that weren’t quite squeezed to nothing will inflate. The result is visible bubbles needing repair or a completely ruined casting. Same thing can happen to the silicone. I once tried casting a mold in an unheated shop in winter. When I let the pressure out of the tank, the mold foamed, like a deep diver’s blood from surfacing too fast. So for molds I have to use the extra large tank on, I shine a halogen worklight on the tank, or make them in warm weather.
For post curing I quickly learned that a radiant heat oven won’t do. Convection heat is best. I use an old food dehydrator that goes up to 145F and a countertop convection oven that only goes down to 200F (and annoyingly has a 90 minute max timer). For most things I use the dehydrator for 4 to 8 hours, depending on the casting size and how many items. If it’d go hotter I could use less time. For what I cure in the oven a single 90 minute 200F cycle has been sufficient. No reports of those items warping in a closed car in direct sunlight.
That brings up another useful property of some urethane resins. Despite not being a thermoplastic, they can still be heated and deformed, at least for a while after being cast and post cured at 145F. I put on heavy duty nitrile gloves and heat some water to 200F*. Dip the casting in until it becomes pliable then hold it to shape until it cools enough (doesn’t take much) to hold shape. Mostly I do that to make straightened copies of old warped plastic parts. Make a ‘throwaway’ mold of the warped item, cast it then bend it straight and make the production mold from that. The parts I convection cure at 200F probably wouldn’t be bothered by a 200F water bath.
That should be quite useful for hacking projects. For example you’ve some bracket you wish was a different shape, but cutting a gluing it would be A. ugly and B. possibly not strong enough. And if you need several of them, cutting and gluing the lot would be time consuming plus the possibility of variances.
So make a mold and one casting. Water bath bend it to the desired shape them make a second mold to make your dozen identical new shape brackets.
*My circa 1965 Nash Kelvinator stove has one burner with Pan-O-Matic temperature control.
I know this isn’t really relevant, but does anyone know what the part was that was made? It has been bothering me that I can’t identify it.
And my respectful comments critisicing OSHW business models get deleted.