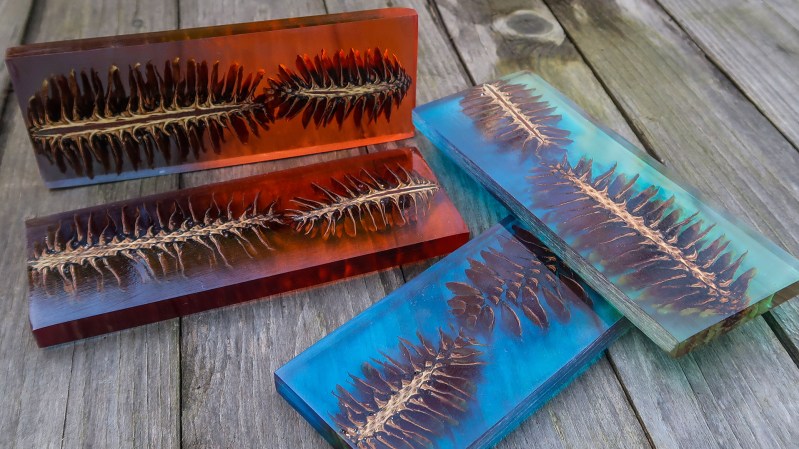
[Black Beard Projects] sealed some pine cones in colored resin, then cut them in half and polished them up. The results look great, but what’s really good about this project is that it clearly demonstrates the necessary steps and techniques from beginning to end. He even employs some homemade equipment, to boot.
 Briefly, the process is to first bake the pine cones to remove any moisture. Then they get coated in a heat-activated resin for stabilizing, which is a process that infuses and pre-seals the pine cones for better casting results. The prepped pine cones go into molds, clear resin is mixed with coloring and poured in. The resin cures inside a pressure chamber, which helps ensure that it gets into every nook and cranny while also causing any small air bubbles introduced during mixing and pouring to shrink so small that they can’t really be seen. After that is cutting, then sanding and polishing. It’s an excellent overview of the entire process.
The video (which is embedded below) also has an outstanding depth of information in the details section. Not only is there an overview of the process and links to related information, but there’s a complete time-coded index to every action taken in the entire video. Now that’s some attention to detail.
There’s a lot that can be done with molds and resin, such as slip casting which is a technique of simulating blow-molded parts with no special tools, just some patience and attention to detail.


Be sure to wear gloves and a organics rated respirator when working with uncured resins. Its pretty common for people to suddenly develop a hypersensitivity to the stuff. A lot of people don’t know about this. A friend of mine became sensitive to it literally overnight and she developed rashes any time she was even near uncured resin. Once it is cured it is fine.
Also change oil often in the vacuum pump, the resin vapors deposit internally and make a huge mess, I had to rebuild one and it was not pretty.
Yes, do take care. Nikki de Saint Phalle is one prominent testament that resin fumes may reduce your life quality:
https://en.wikipedia.org/wiki/Nikki_de_Saint_Phalle#Later_years_(1990%E2%80%932002)
From the description above it sounds like he used high pressure instead of a vacuum, so there were almost no vapors going inside the pump.
There are occasionally vacuum pumps on eBay that are designed for this sort of thing. Alas, I wasn’t paying enough attention and lost in the bidding for the last one I saw.
Or use your pump’s gas ballast valve, if it has one. It introduces air into the intake to flush out volatile contaminants.
Where can I buy these?
So what is best?
Should we pull a vacuum on the resin to degas the resin and risk ruining our vacuum pump, or pressurize the resin to make the bubbles small?
Both methods in theory do the same thing, but in practice each has their place.
Pull a vacuum on mixed two-part resin (or silicone, or whatever) to pull out the dissolved gasses. This causes the mixture to bubble and froth, then settle down. After this, pour the liquid into the mold.
Any bubbling up *after* pouring into the mold can be messy, and could also disturb the mold, or the positioning of the mold, or elements embedded in the mixture (if any).
It’s more practical to pull gasses out with vacuum after mixing but before pouring, then use sustained pressure for the full time needed to cure in order to shrink any bubbles added during the pour (and help make sure the mixture gets into every nook and cranny of the mold.) This is why you see both tools used, but if a few bubbles aren’t a concern then only one (or even none) of the degassing methods can be used.